
5 Series E60 525d (M57TU) SAL
Important!
Risk of damage!
Adhere without fail to the following removal sequence for
unclipping the door trim panel.
Note:
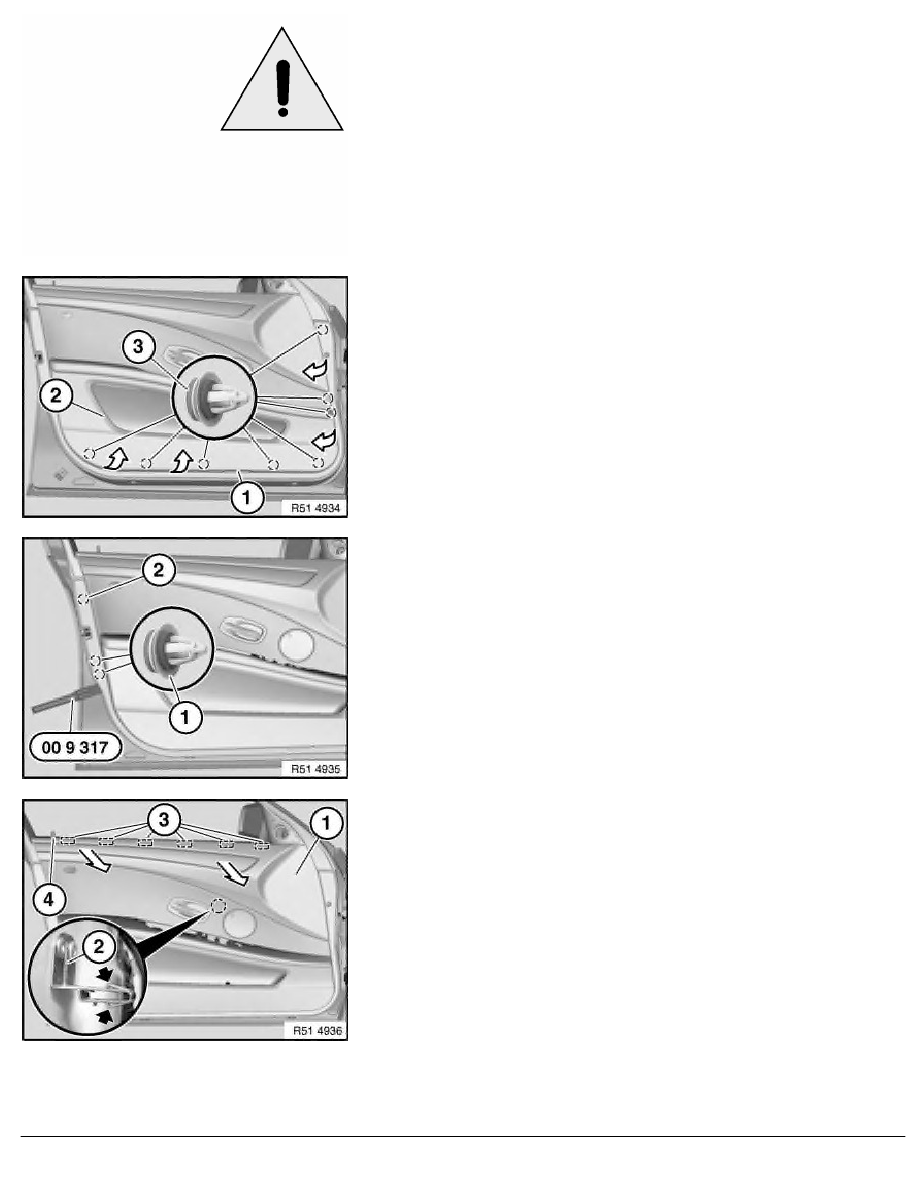
If necessary, wear gloves due to sharp edges on cutout (1).
Firmly pull on cutout (1) of footwell light and thus detach door trim
panel (2) from clips (3) at bottom.
Detach door trim panel (2) in area of A-pillar from clips (3).
Important!
Risk of damage!
Insert special tool 00 9 317 in such a way that sound
insulation is not touched.
Insert special tool 00 9 317 under clips (1) between door and
door trim panel.
Press special tool 00 9 317 outwards (do not pull inwards) and
thereby detach door trim panel from clips (1).
Detach door trim panel from clip (2).
Carefully unclip door trim panel (1) at top from retainers (3).
Feed door trim panel (1) upwards out of central clip mounting (2)
and release button (4).
Installation:
Release central clip from mounting (2) and attach to door trim
panel.
Prior to installation, bend open retainer on inner door plate for
central clip mounting (2).
RA Removing and installing front left or right door trim panel (long version or fro
BMW AG - TIS
11.02.2013 21:21
Issue status (12/2007) Valid only until next DVD is issued
Copyright
Page - 2 -