
5 Series E60 525xd (M57T2) SAL
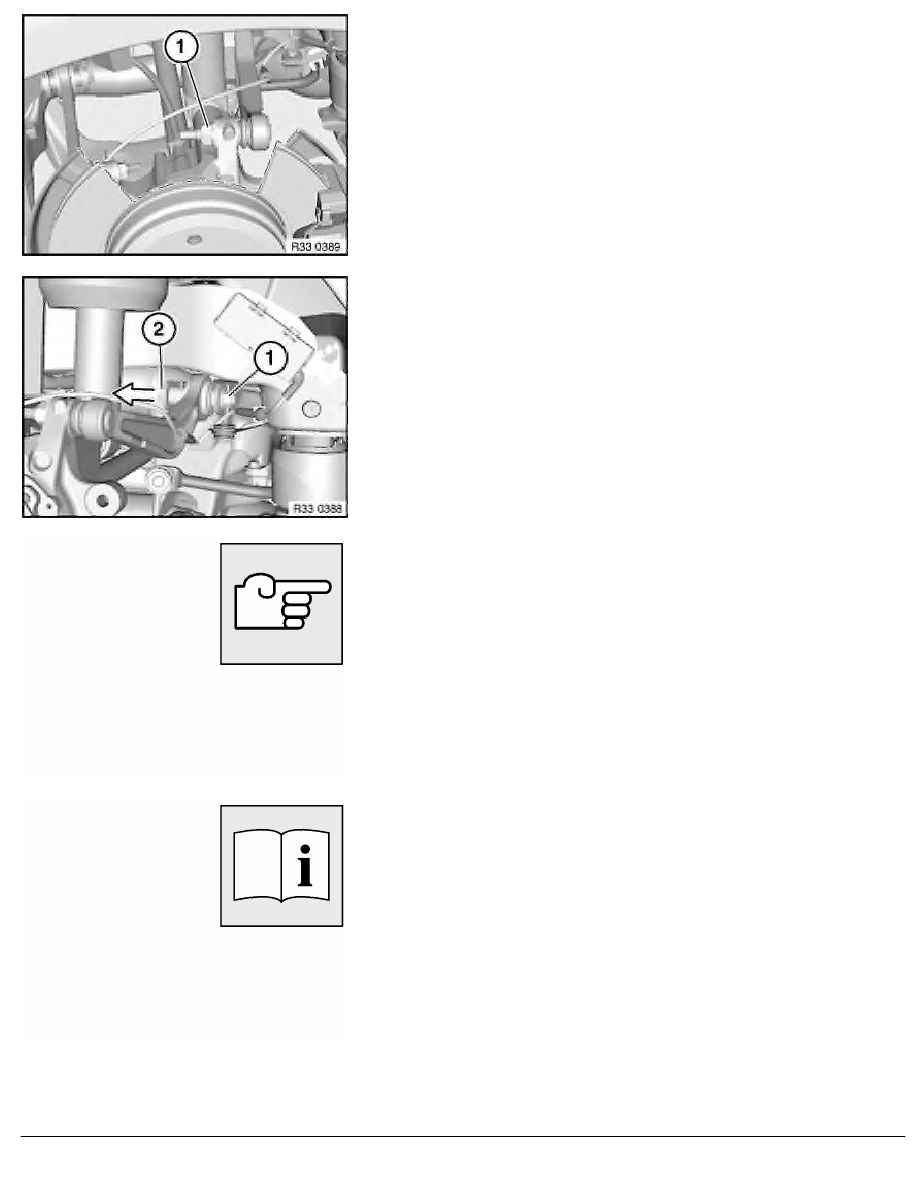
Unscrew nut (1).
Remove control arm at top from wheel carrier.
Installation:
Keep control arm to wheel carrier connection clean and free from
oil and grease.
Replace self-locking nut.
Tightening torque 33 32 8AZ
.
Unscrew nut (1).
Pull out bolt (2) and remove control arm.
Installation:
Note insertion direction of screw.
Replace self-locking nut.
Tighten bolt connection in normal position.
Tightening torque 33 32 14AZ
.
Replacement:
Unclip holder on control arm.
After installation:
•
E61: Activate and fill air suspension system
•
Perform chassis alignment check
RA Replacing one upper control arm
BMW AG - TIS
20.02.2013 11:15
Issue status (12/2007) Valid only until next DVD is issued
Copyright
Page - 2 -