
5 Series E60 528xi (N52K) SAL
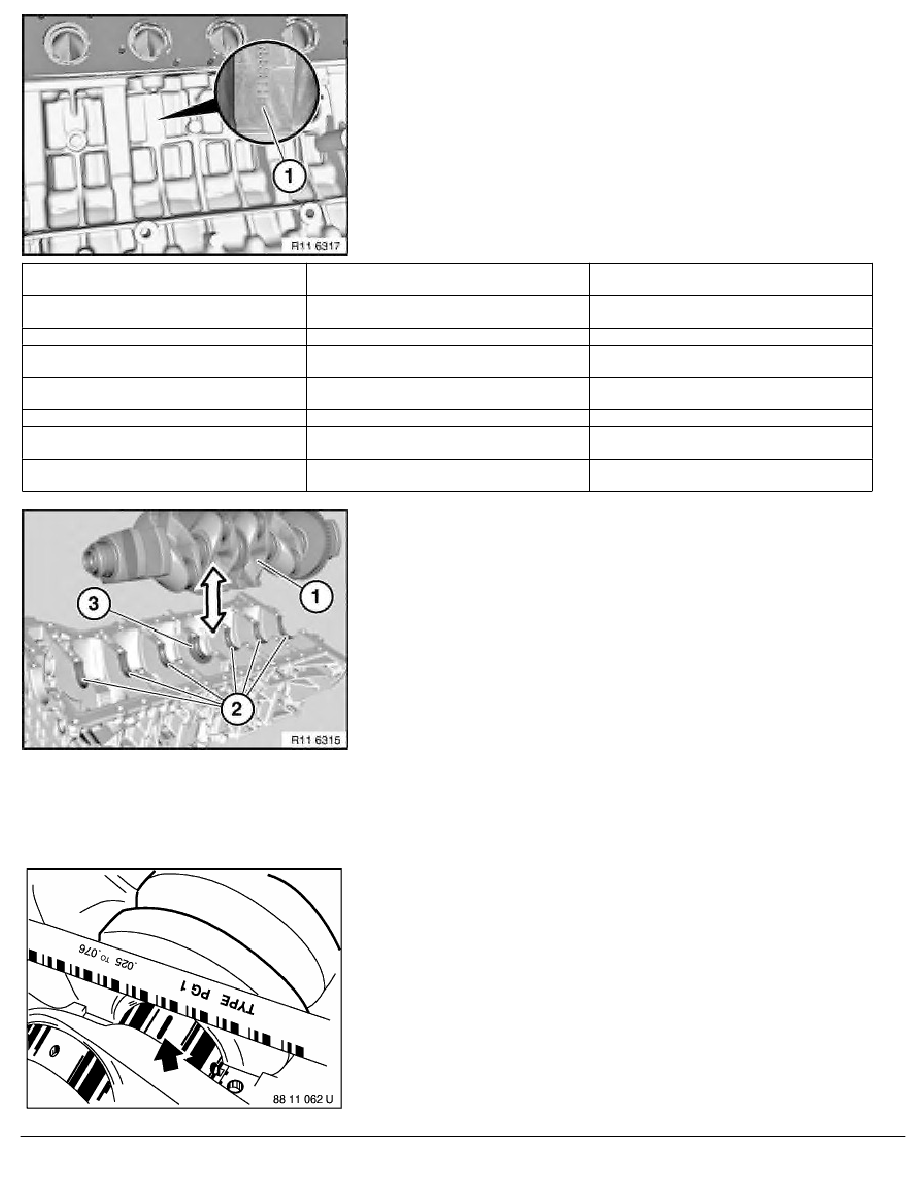
Bearing classification (1) on crankcase (see table: values of
A/B/C).
Installation:
When all the letters and number code have been determined, the
colour of the bearing shells must be allocated (see table).
Important!
Excessively small bearing play will result in engine damage.
The colour combination Yellow and Red must not be fitted.
Possible colour combinations (see table).
(A1) Bedplate / Yellow
(B1) Bedplate / Yellow
(C1) Bedplate / Green
(A1) Crankcase / Yellow
(B1) Crankcase / Green
(C1) Crankcase / Green
(A2) Bedplate / Green
(B2) Bedplate / Green
(C2) Bedplate / Green
(A2) Crankcase / Yellow
(B2) Crankcase / Green
(C2) Crankcase / Red
(A3) Bedplate / Green
(B3) Bedplate / Red
(C3) Bedplate / Red
(A3) Crankcase / Green
(B3) Crankcase / Green
(C3) Crankcase / Red
Install bearing shells (2) and guide bearing shell (3).
Installation:
Clean all sealing surfaces.
Important!
Do not use any metal-cutting tools.
Clean sealing faces with special tool 11 4 470 only.
Determine bearing play with special tool 00 2 590 .
Installation:
All measuring points must be clean and free from oil and grease. If
necessary, clean all measuring points.
Use the existing screws to determine the bearing play.
Set up bedplate with bearing shells.
Remove bedplate.
Read off bearing play at width of flattened plastic thread and
measurement scale.
Installation:
Remove plastic thread.
Apply a light coat of oil to bearing shells and crankshaft.
RA Replacing all main crankshaft bearing shells (N52K)
BMW AG - TIS
21.02.2013 10:40
Issue status (12/2007) Valid only until next DVD is issued
Copyright
Page - 3 -