
5 Series E60 535d (M57TU) SAL
11 65 045
Removing and installing / replacing low-
pressure turbocharger (large turbocharger)
Warning!
Scalding hazard!
Only perform these tasks on an engine that has cooled down.
Necessary preliminary tasks:
•
Remove acoustic cover.
•
Remove air cleaner.
•
Remove exhaust system.
•
Remove H.P. turbocharger.
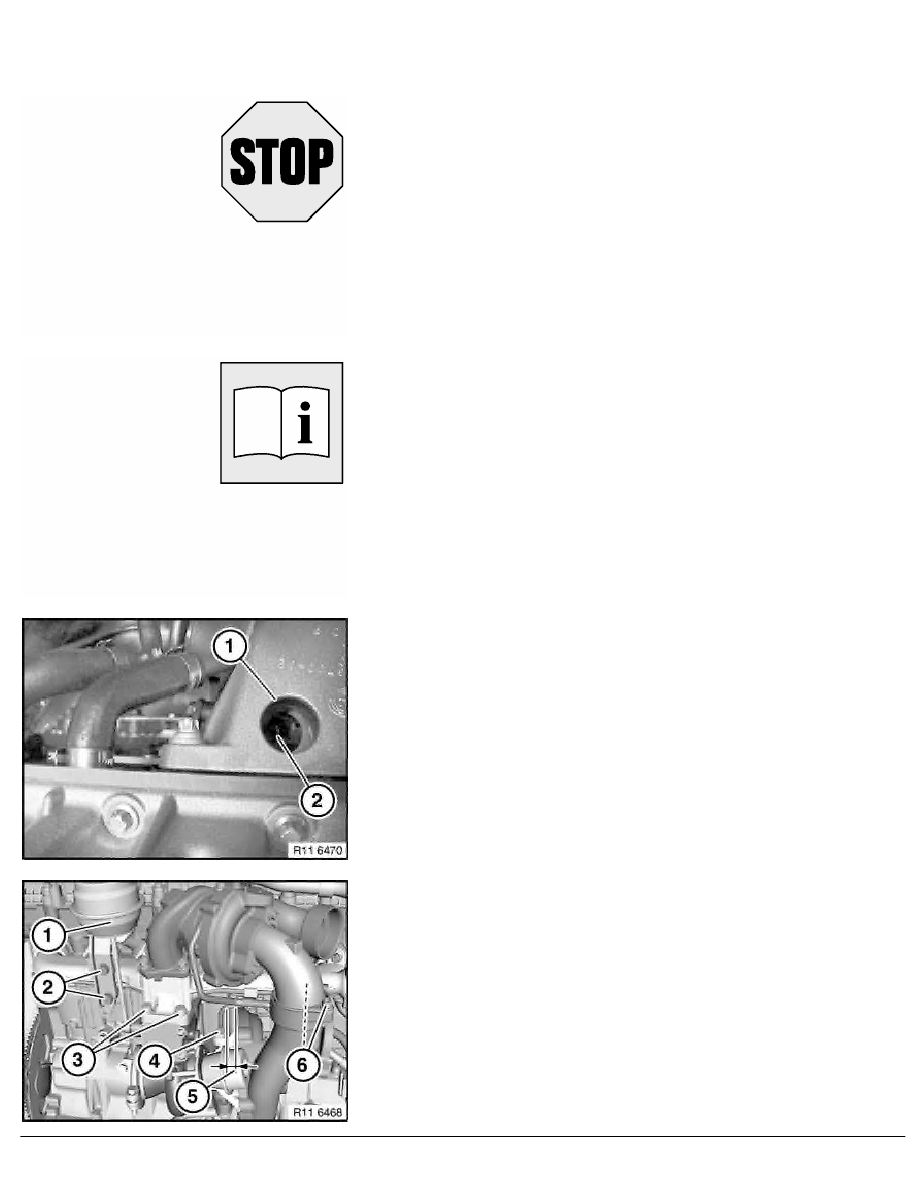
Note:
Bolt on low-pressure turbocharger is only accessible from below.
Release bolt (2) through opening (1) in engine carrier.
Tightening torque: 11 65 3AZ
.
Release screws (2).
Lay vacuum control unit (1) to one side.
Note:
Vacuum control unit (1) is removed and installed with the L.P.
turbocharger.
Release banjo bolt (4) and oil line.
Tightening torque: 11 42 5AZ
.
Installation:
Screw down oil feed line (5) parallel to turbocharger housing.
RA Removing and installing / replacing low-pressure turbocharger (large turbocharge
BMW AG - TIS
22.02.2013 01:55
Issue status (12/2007) Valid only until next DVD is issued
Copyright
Page - 1 -