
5 Series E60 535d (M57TU) SAL
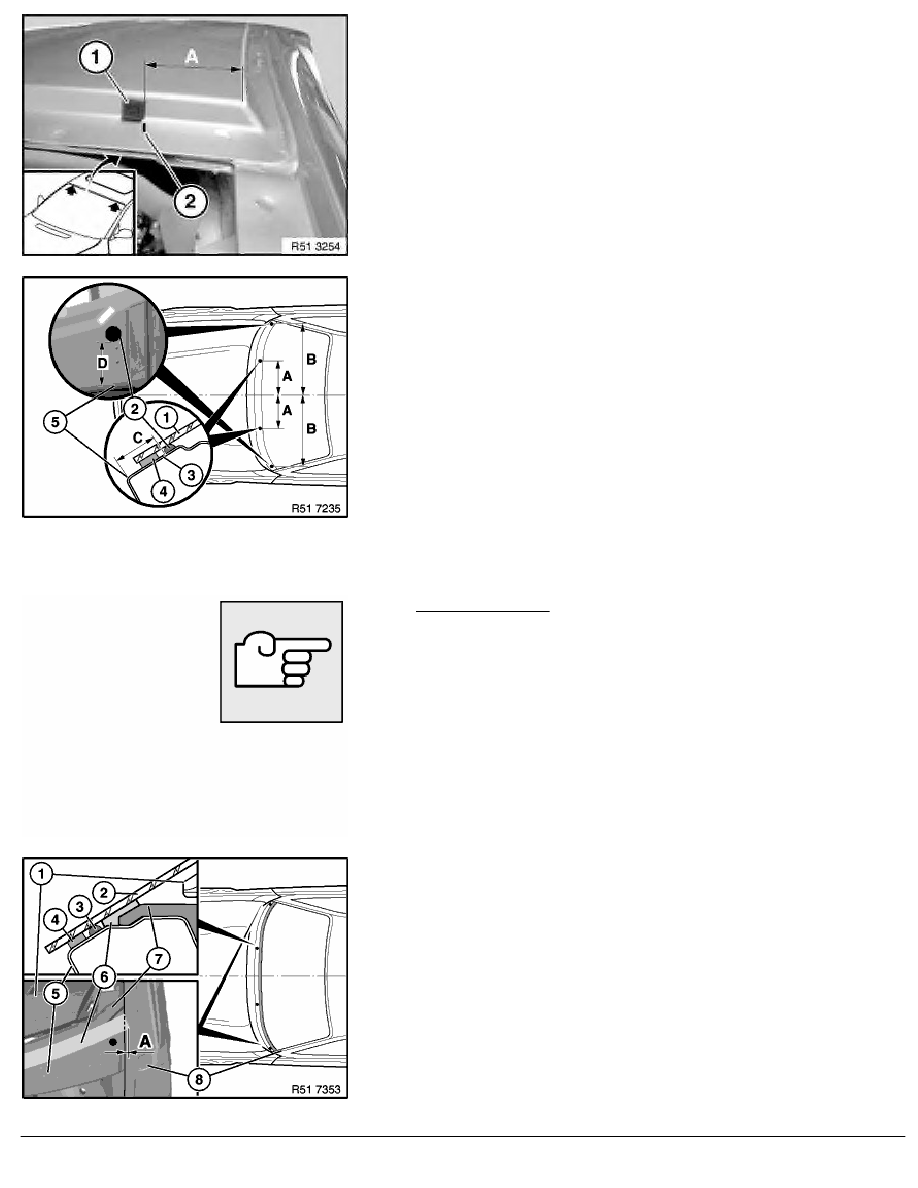
Cut square spacer buffer (1) at top to approx. 9 mm (radius
outlet).
Stick on one square spacer buffer (1) in each case on left/right at
spacing (A).
A= approx. 50 mm
Note:
Marking (2) is no longer present.
Stick on two new semicircular spacer buffers (2) in each case as
follows:
-
at distance (A or B) from middle of cowl panel
-
at distance (C or D) at end of metal radius (5)
A
approx. 300 mm
B
approx. 665 mm
C
approx. 18 mm
D
approx. 30 mm
1
Windscreen
4
Glue bead
5
Outlet radius
Version with HUD:
Installation:
Before bonding, install windscreen with seal at top and check
HUD; if necessary, press expanding foam tape down with hand
roller.
Important!
Press down expanding foam tape (6) shortly before installing
windscreen (2) (with hand roller if reusing) or stick on if
replacing. A relaxed expanding foam tape could crush
adhesive bead (4) (leaks, wind noises).
Replacement:
Stick expanding foam tape (6) 1/3 on cowl panel (5) and 2/3 on
sound insulation (7).
Expanding foam tape (6) may only be stuck up to
measurement (A) on side frame (8).
A
approx. 6.5 mm
RA Removing and installing/replacing windscreen
BMW AG - TIS
22.02.2013 10:22
Issue status (12/2007) Valid only until next DVD is issued
Copyright
Page - 3 -