
5 Series E60 M5 (S85) SAL
Important!
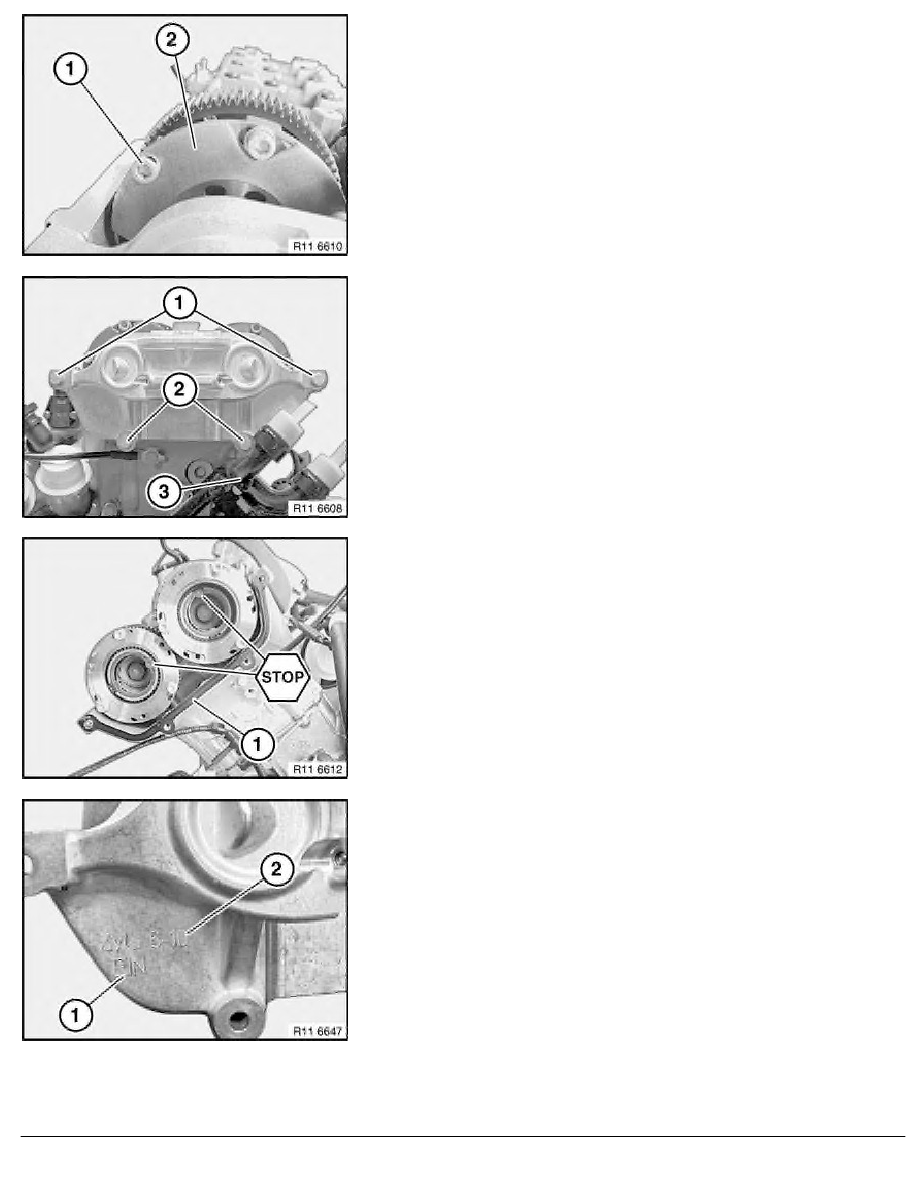
Hexagon socket screws (1) may fall into the engine
compartment after they have been released (risk of damage).
Release screws (1).
Crank engine at central bolt until 6 hexagon socket screws of the
adjustment unit have been released.
Remove coolant pipe (3).
Release screws (1).
Unfasten screws (2).
Remove VANOS adjustment unit towards front.
Important!
Do not open Seeger circlip rings of VANOS gears.
Installation:
Replace seal (1).
Installation:
VANOS adjustment units are marked to avoid being mixed up.
The lettering EIN (1) must point to the inlet camshaft.
Cylinder assignment (2), cyl. 1-5 or 6-10.
Important!
Risk of mixing up parts!
RA Removing and installing / replacing left VANOS adjustment unit (S85)
BMW AG - TIS
22.02.2013 16:38
Issue status (12/2007) Valid only until next DVD is issued
Copyright
Page - 2 -