
5 Series E60 M5 (S85) SAL
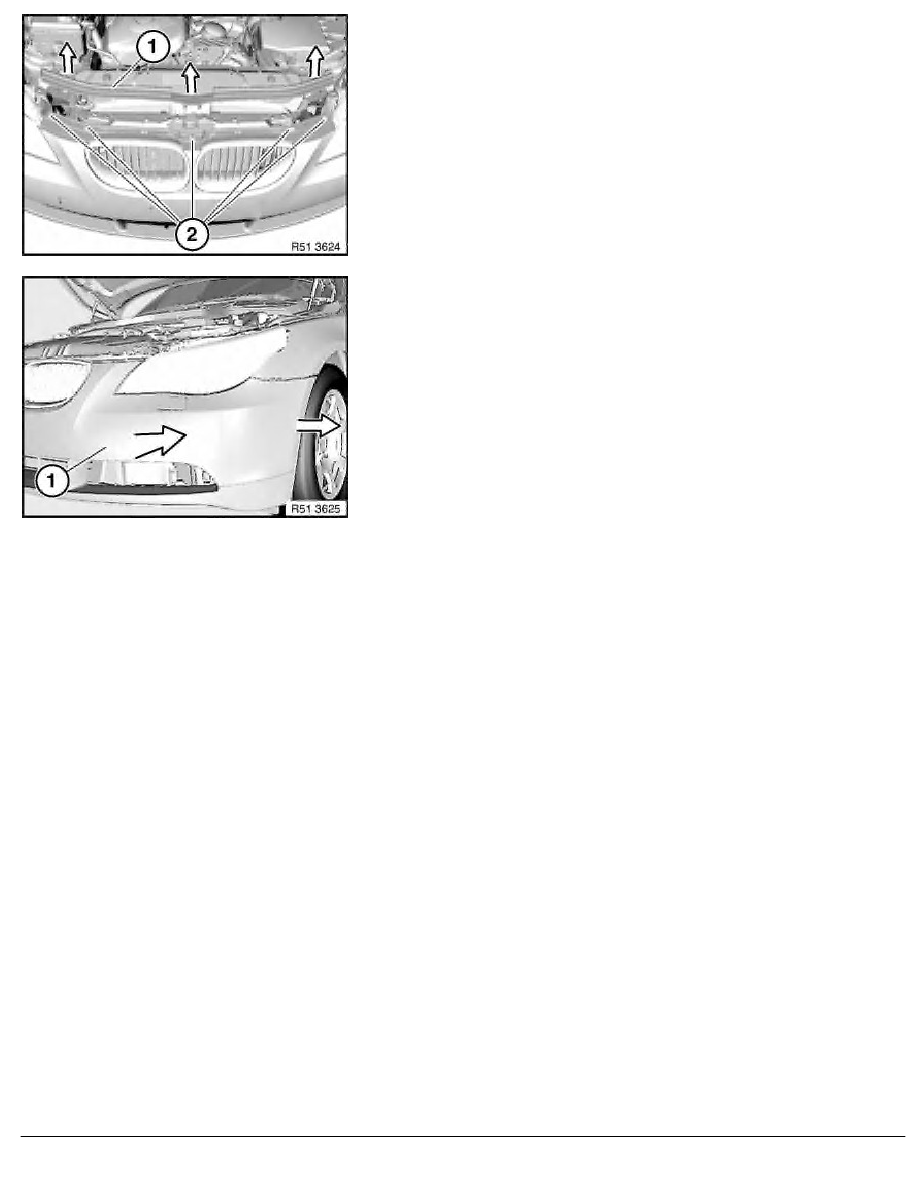
Unclip strip (1) in direction of arrow and release screws (2)
underneath.
Tightening torque 51 11 9AZ
.
Press bumper trim (1) against direction of travel and release from
side holders in direction of arrow.
Note:
The catches on the side holders are pressed down by moving the
bumper trim (1) against the direction of travel. This enables the
bumper trim (1) to be detached from the side.
Depending on version, disconnect plug connections from fog lamp
or from Park Distance Control.
Remove bumper trim (1) straight forwards with a 2nd person
helping.
RA Removing and installing front bumper trim
BMW AG - TIS
22.02.2013 23:41
Issue status (12/2007) Valid only until next DVD is issued
Copyright
Page - 2 -