
5 Series E60 M5 (S85) SAL
67 31 510
Removing and installing/replacing drive unit
for seat tilt adjustment
Necessary preliminary tasks:
•
Remove front seat
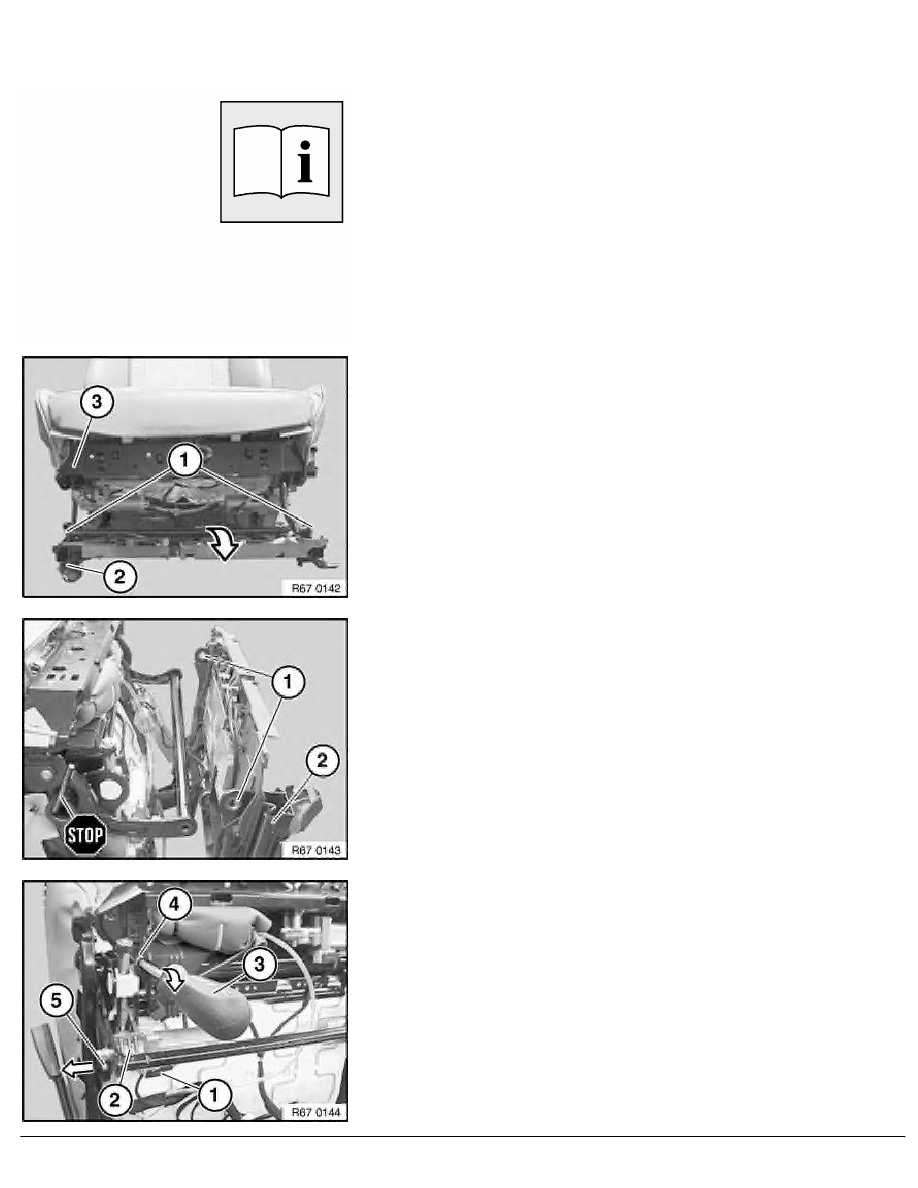
Note:
Front left trim shown removed for purposes of clarity.
Release screws (1).
Fold back seat rail (2) slightly from seat frame (3) in direction of
arrow.
Important!
Risk of damage!
Avoid subjecting electric leads to tensile load.
Warning!
Risk of injury!
Do not move torsion bar.
Installation:
Make sure plastic bushings (1) are correctly seated in seat
rail (2).
Faulty plastic bushings (1) cause noises and must be replaced.
Disconnect plug connection (1) on drive unit for seat tilt
adjustment (2).
Note:
Relieve load on drive unit for seat tilt adjustment (2).
To do so, insert a suitable slotted screwdriver (3) into
receptacle (4), press drive unit for seat tilt adjustment (2)
downwards slightly using a lever action and release screw (5).
Then slowly move screwdriver (3) upwards and relieve load on
drive unit for seat tilt adjustment (2) completely.
RA Removing and installing/replacing drive unit for seat tilt adjustment
BMW AG - TIS
23.02.2013 08:59
Issue status (12/2007) Valid only until next DVD is issued
Copyright
Page - 1 -