5 Series E61 520i (N43) TOUR

Important!
Do not use any tools to remove the lower section of the air
spring.
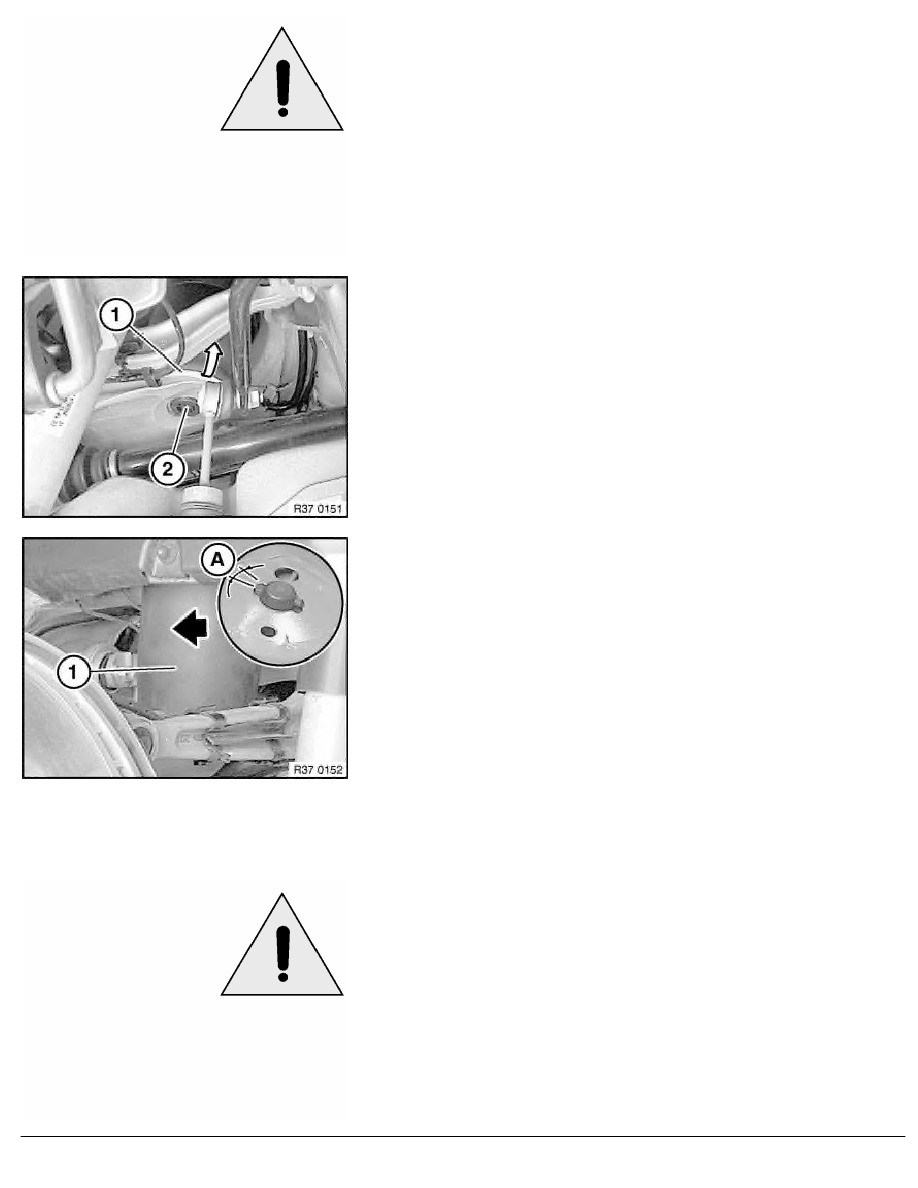
Tilt lower section of air spring (1) by hand towards front/side.
Installation:
Lower section of air spring (1) can only then be engaged with
retainer (2) if the air spring has already been turned clockwise up
to the stop.
Align lower section of air spring (1) to retainer (2) and press until
lower section of air spring (1) can be heard to snap into place.
Note:
Retainer (2) does not have to be replaced.
Press lower section of air spring upwards and turn air spring (1)
against resistance of turning lock counterclockwise through
A = 25
°
(turning lock on upper section of air spring is allowed to
break off here).
Press air spring (1) together and place to one side.
Installation:
Insert air spring (1) into take-up locator or frame side member
and turn clockwise through A = 25
°
. This ensures correct
alignment of lower section of air spring to retainer.
Important!
The air line must not slip out of the groove in the upper air
spring section during installation. For this purpose, the air line
must be pulled downwards during installation.
Important!
Do not kink, twist or crush lines.
RA Removing and installing/replacing left or right air spring
BMW AG - TIS
03.02.2013 20:20
Issue status (12/2007) Valid only until next DVD is issued
Copyright
Page - 2 -
