
Removing and Installing Front Active Stabilizer for 5 Series E61 523i (N52) TOUR
37 11 010
Removing and installing/replacing front active
stabilizer
Important!
Adhere to the utmost cleanliness. Do not allow any dirt to
enter the hydraulic system.
Seal off pipe connections with plugs.
Note:
A light film of grease on the anti-friction bearing in no way impairs
the operational capability of the stabilizer.
In a warranty case you must always provide a fault memory
printout, even where there is no fault memory entry, with the
defective part.
Necessary preliminary tasks:
•
Remove front assembly underside protection
•
Remove stabilizer link on both sides from stabilizer
Important!
Risk of damage! Pressure lines must not have any contact
with the stabilizer (minimum distance 5 mm)!
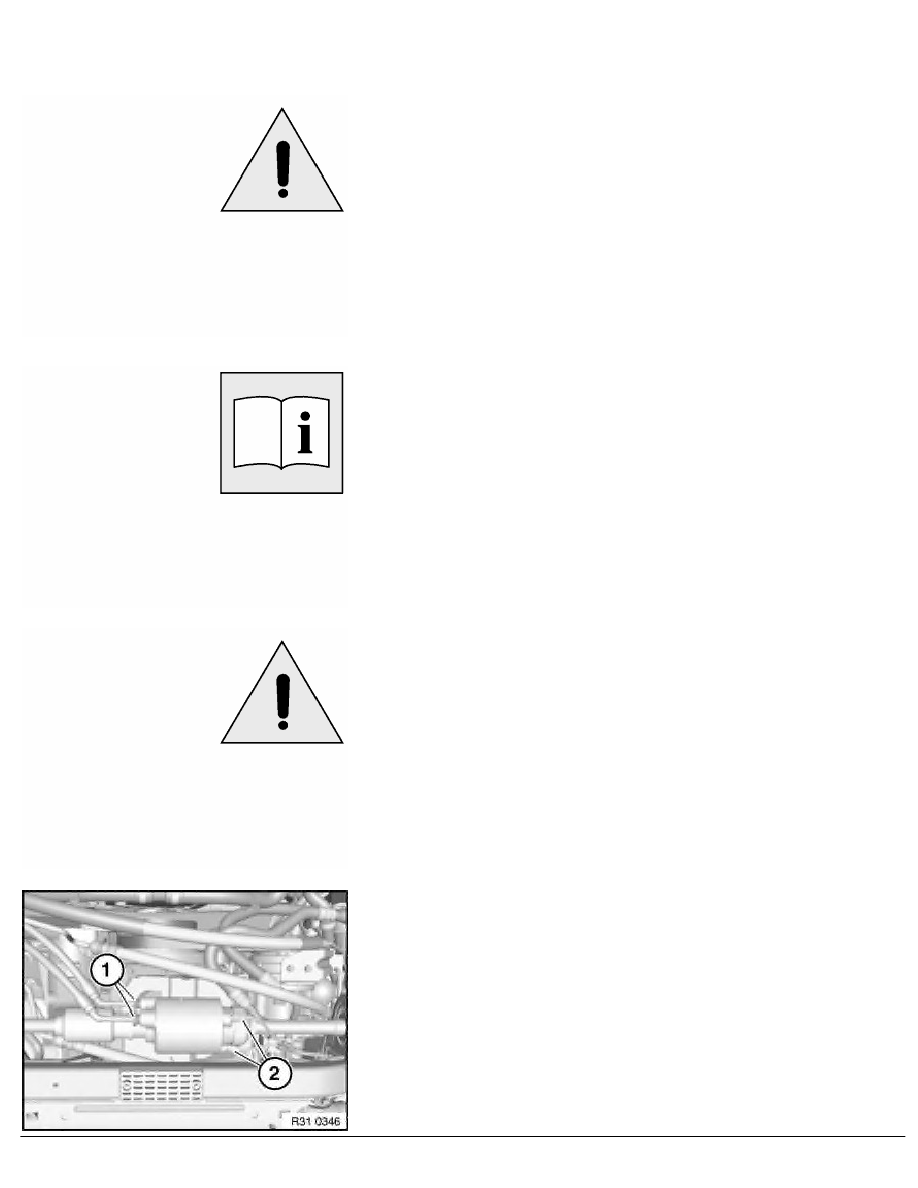
Mark installation position of pressure lines to oscillating motor.
Release nuts (1, 2).
Remove pressure and vent lines from oscillating motor.
Installation:
Carry over identification to new component.
Pressure lines are protected against being mixed up by different
thread diameters on the oscillating motor connection.
Tightening torque 37 14 18AZ
.
RA Removing and installing/replacing front active stabilizer
BMW AG - TIS
05.02.2013 08:02
Issue status (12/2007) Valid only until next DVD is issued
Copyright
Page - 1 -