
5 Series E61 523i (N52) TOUR
Important!
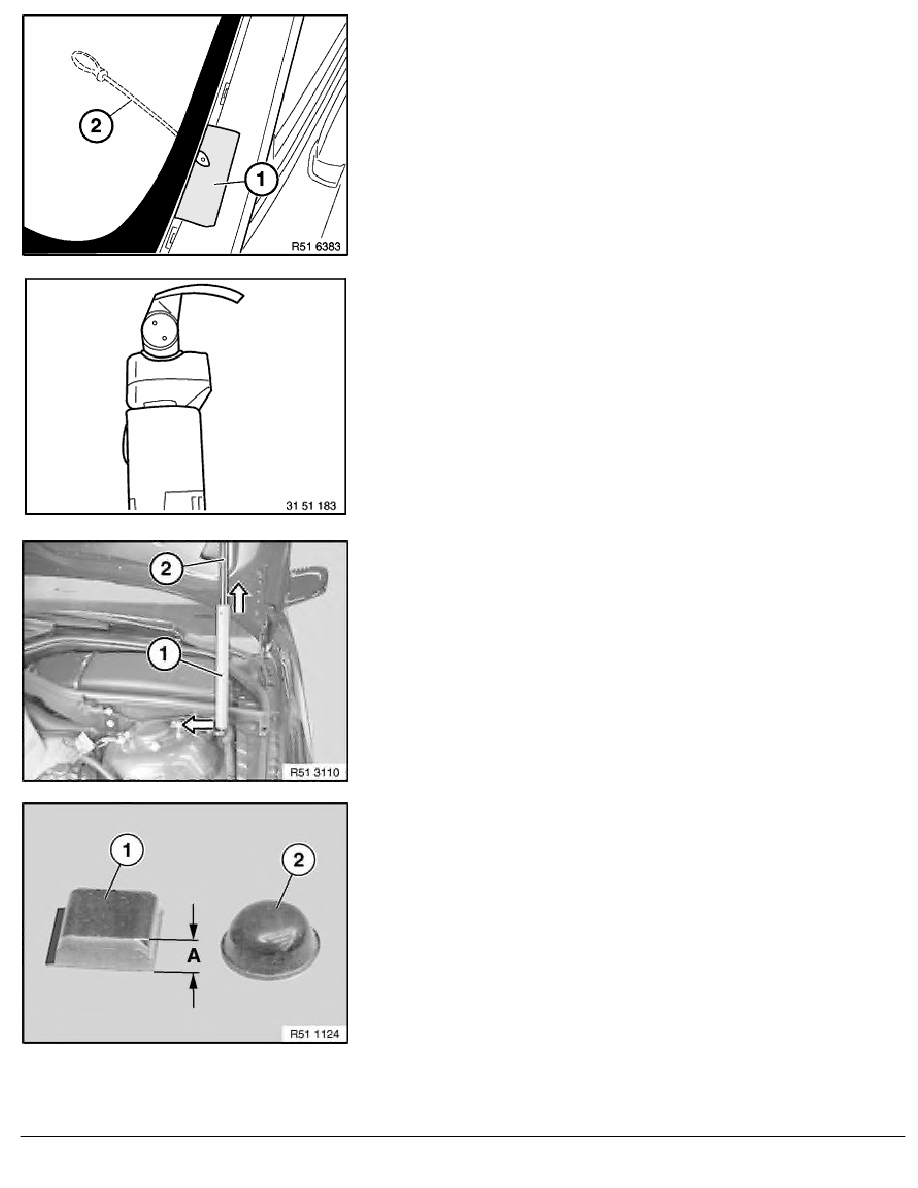
Tape off body in area of piercing point with fabric adhesive
tape (1).
Push wire starter (2) from Roll Out 2000
through adhesive
bead.
Replacement only:
Mount U-shape blade (sourcing reference: BMW Parts Service)
on tool:
24 mm blade length for sides and top.
36 mm blade length for bottom and bottom/sides.
Regrind blade with a grinding stone while machine is running (new
blades also).
Carefully insert blade between body cutout and windscreen.
Guide handle of knife parallel to windscreen.
Cut through adhesive bead as closely as possible to windscreen.
Note:
When cutting is carried out at the bottom, the engine hood must
be in the service position.
Wires and hoses remain connected.
Move engine bonnet/hood into service position.
Cut through windscreen adhesive bead at bottom.
Lift out windscreen with special tools 51 3 010 .
Pull off adhesive tapes all round.
Fitting spacer buffers (spacers):
Two different spacer buffers are fitted.
1
Square spacer buffer (shape B = 12.7 x 10 mm height
stop, wind noises)
2
Semicircular spacer buffer (form A =
∅
11 x 5 mm)
A= 3.8 mm
Important!
To avoid windscreen breakage and wind noises:
Completely remove remnants of removed spacer buffers and
maintain installation location exactly.
RA Removing and installing/replacing windscreen
BMW AG - TIS
05.02.2013 10:35
Issue status (12/2007) Valid only until next DVD is issued
Copyright
Page - 2 -