
5 Series E61 523i (N52) TOUR
Installation:
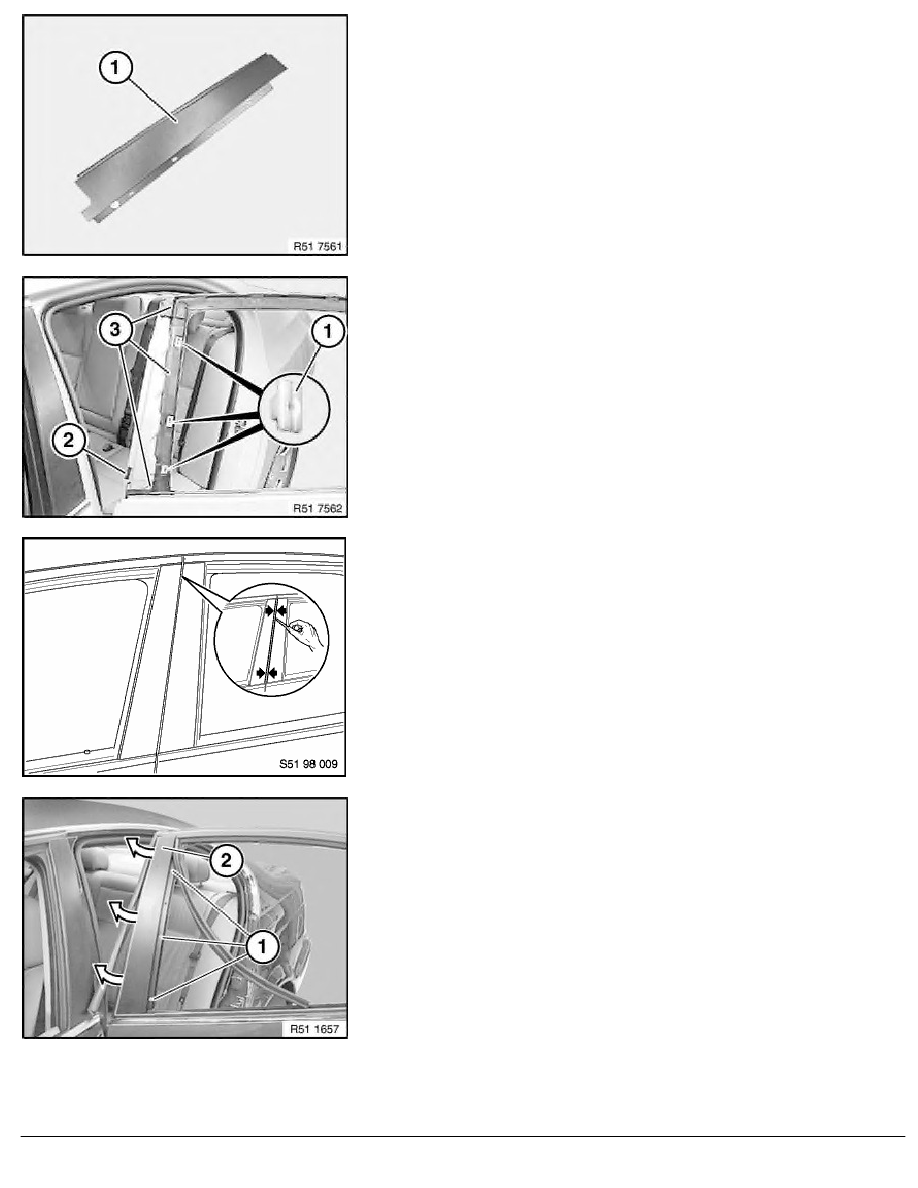
Trim (1) must not be damaged.
Installation:
Following parts must not be damaged or missing:
1
Plastic nuts
2
Felt strip
3
Seal
Installation:
To prevent wind noises.
Check gap with a 0.05 mm feeler gauge.
Slide feeler gauge between B-pillar trims on front and rear doors.
When the finishers are correctly adjusted, it must be possible to
feel a slight suction resistance over the entire length of the
finisher.
If the gap is too big, this may result in wind noises.
Installation:
If necessary, release screws (1).
Press trim (2) towards front and tighten down screws (1).
If gap is still too big, adjust trim on window frame of front door.
RA Removing and installing/replacing trim on window frame of rear door (front), lef
BMW AG - TIS
05.02.2013 10:46
Issue status (12/2007) Valid only until next DVD is issued
Copyright
Page - 2 -