
5 Series E61 523i (N52) TOUR
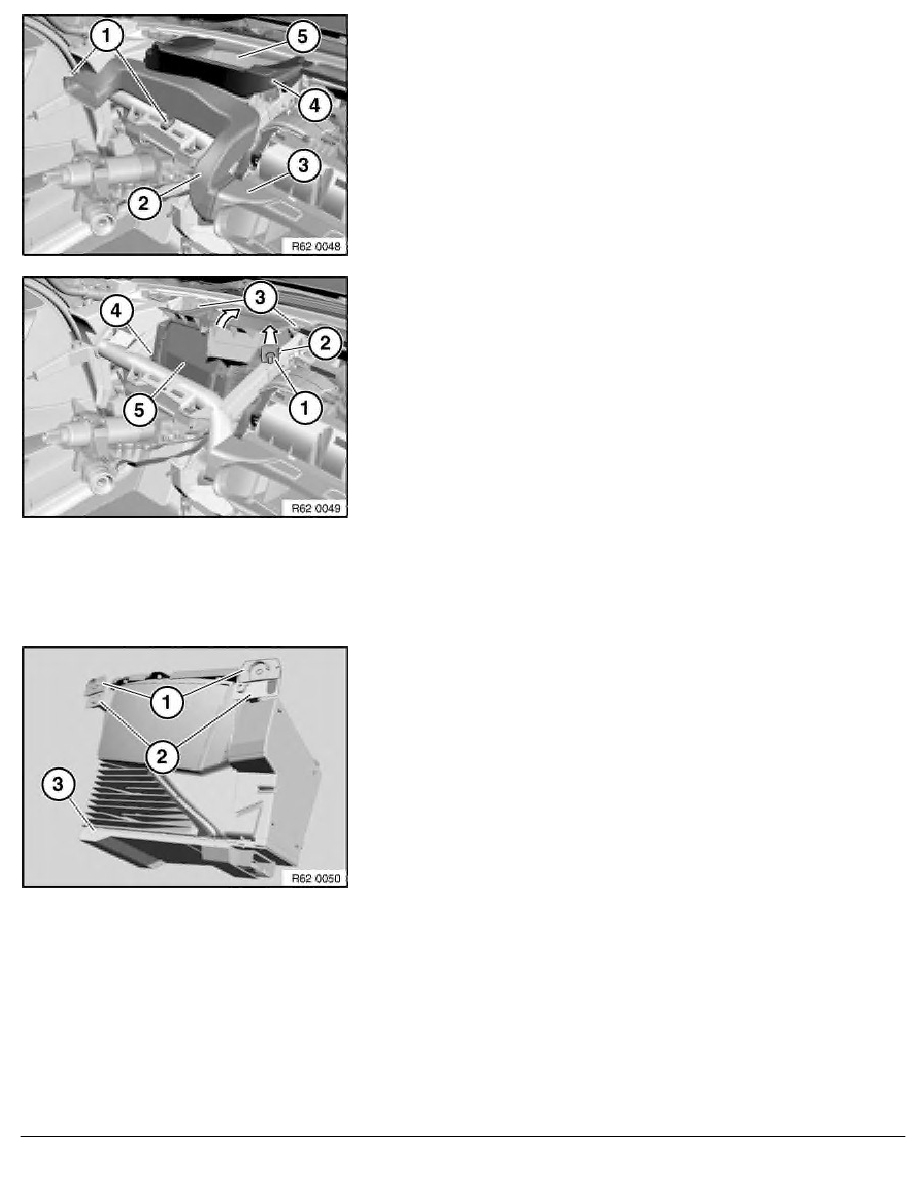
Release screws (1).
Remove air duct (2) from air distributor (3).
If necessary, remove fitted foam seal (4) from head-up
display (5).
If necessary, unclip fitted flexible shaft (display adjustment).
Installation:
•
Clean head-up display lens.
•
Adjust head-up display (5) .
•
Make sure eccentric (2) is in correct installation position.
•
If fitted, make sure flexible shaft is in correct installation
position.
Release lock nut (1) and remove.
Remove eccentric (2) in direction of arrow.
Release screws (3).
Pull head-up display (5) back slightly and fold upwards.
Unlock and disconnect plug connection (4) and remove head-up
display (5).
Installation:
Make sure centering caps (1) are correctly seated on lugs (2) of
head-up display (3).
RA Removing and installing/replacing head-up display
BMW AG - TIS
05.02.2013 14:56
Issue status (12/2007) Valid only until next DVD is issued
Copyright
Page - 2 -