
5 Series E61 525xi (N52) TOUR
51 12 156
Removing and installing rear bumper trim
Note:
The operation is described on the left side; proceed in the same
way for the right side.
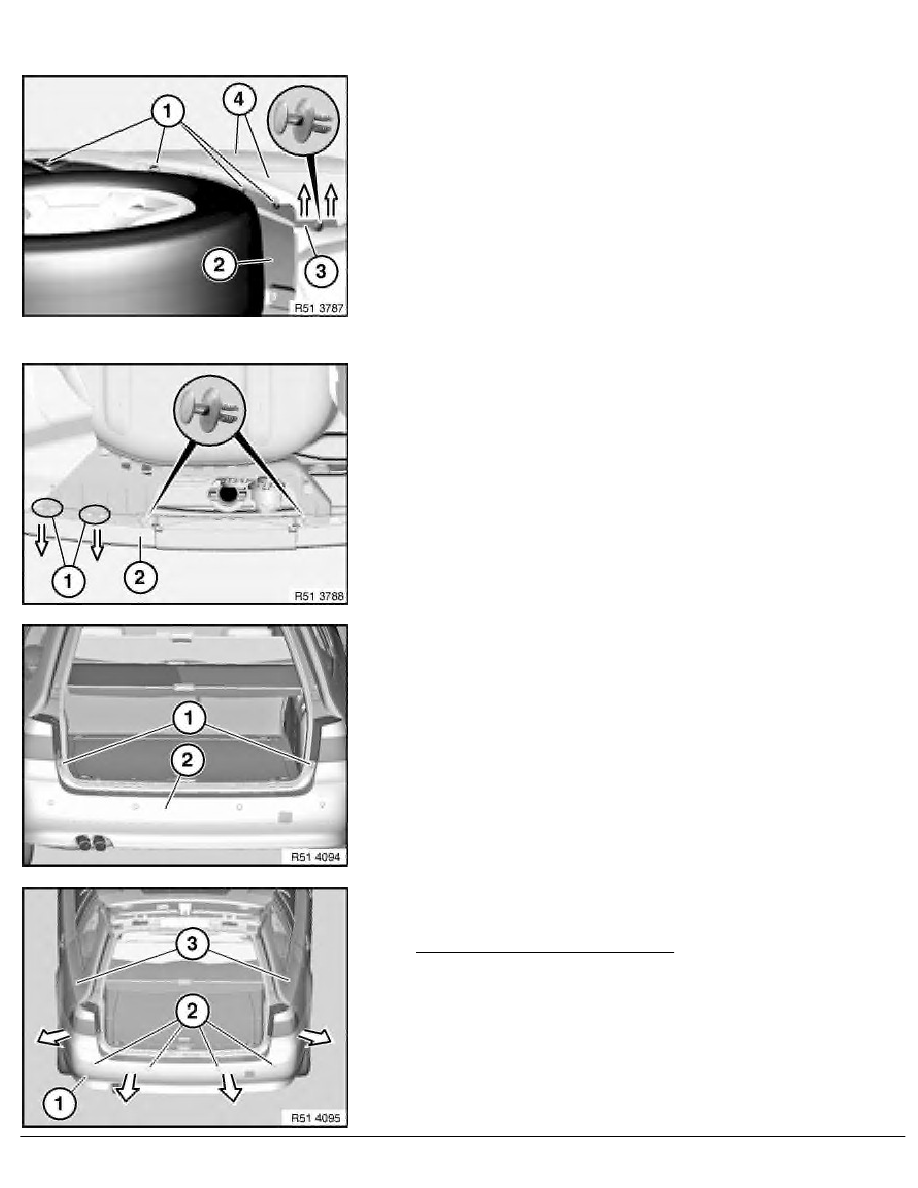
Release screws (1) on wheel arch trim (2).
Release expander rivet.
Pull bumper trim (4) out of mounting (3).
Installation:
Make sure bumper trim (4) is correctly positioned in relation to
mounting (3).
If necessary, replace faulty expander rivet.
Release expansion rivets on bottom middle guide.
Release bumper trim (2) from catches (1).
Installation:
If necessary, replace faulty expander rivets.
Lever out covers (1) from bumper trim (2) and release screws
underneath.
Unclip bumper trim (1) from side panels (3) in outward direction.
Remove bumper trim (1) in direction of arrow towards rear.
Version with Park Distance Control:
If necessary, pull off bumper trim (1) a little and disconnect plug
connections of ultrasonic sensors (2).
Remove bumper trim (1) with aid of a second person.
RA Removing and installing rear bumper trim
BMW AG - TIS
18.02.2013 10:01
Issue status (12/2007) Valid only until next DVD is issued
Copyright
Page - 1 -