6 Series 630i (N53) Coupe

Warning!
Danger of injury!
Failure to comply with the following instructions may result
in the vehicle slipping off the lifting platform and critically
injuring other persons.
When supporting components, make sure that
•
the vehicle can no longer be raised or lowered
•
the vehicle does not lift off the locating plates on the
lifting platform
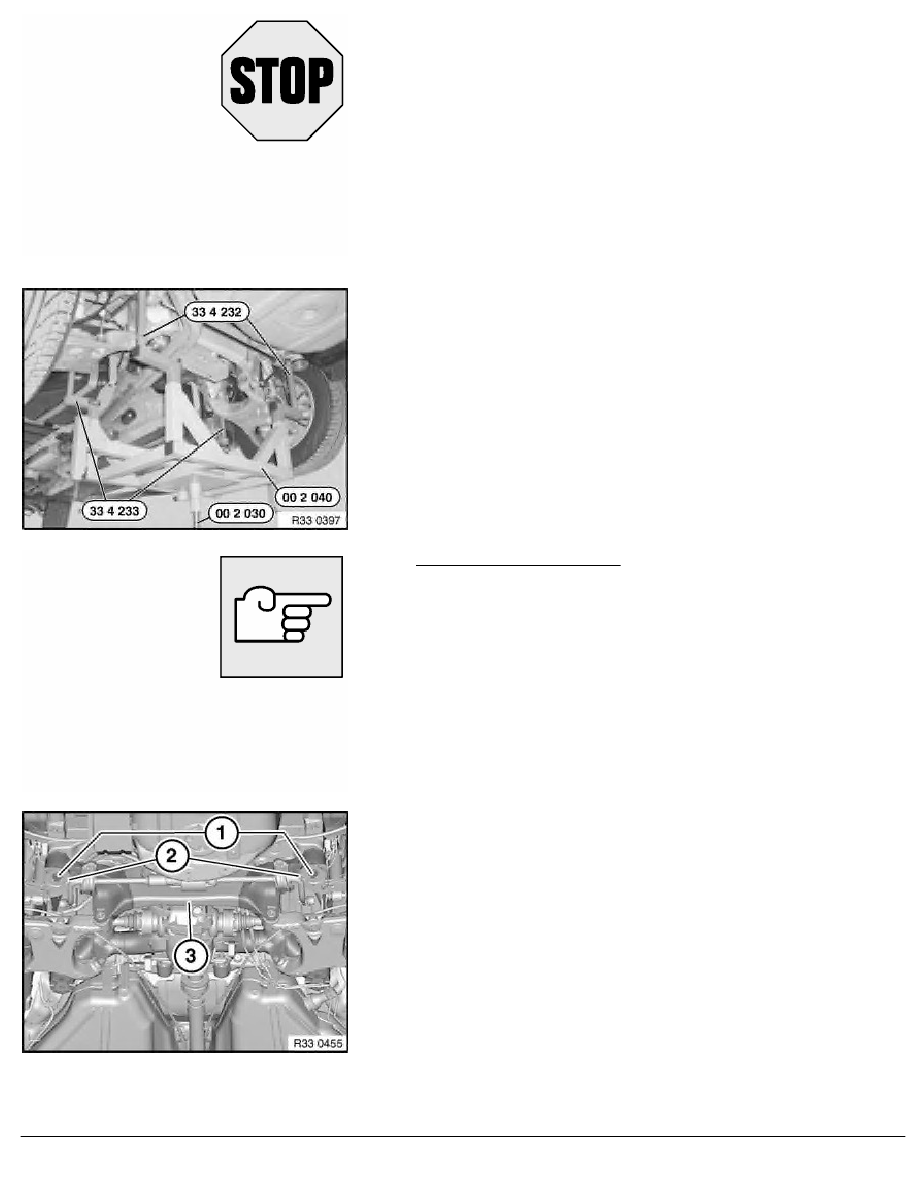
Insert special tools 33 4 233 and 33 4 232 into corresponding
mountings of special tool 00 2 040 .
Align special tool 00 2 040 to rear axle carrier.
Support rear axle carrier by raising special tool 00 2 030 .
Version with Dynamic Drive:
Disconnect pressure lines at point of separation II and seal with
plugs.
Remove tension struts.
Release screws (1) and remove stop plate (2).
Lower rear axle carrier (3).
Installation:
Check threads for damage; if necessary, repair with Helicoil thread
inserts.
First install tension struts and then tighten down bolts (1).
Tightening torque 33 33 3AZ
.
RA Removing and installing complete rear axle carrier
BMW AG - TIS
17.01.2013 15:00
Issue status (12/2007) Valid only until next DVD is issued
Copyright
Page - 2 -
