
6 Series 645Ci (N62) Coupe
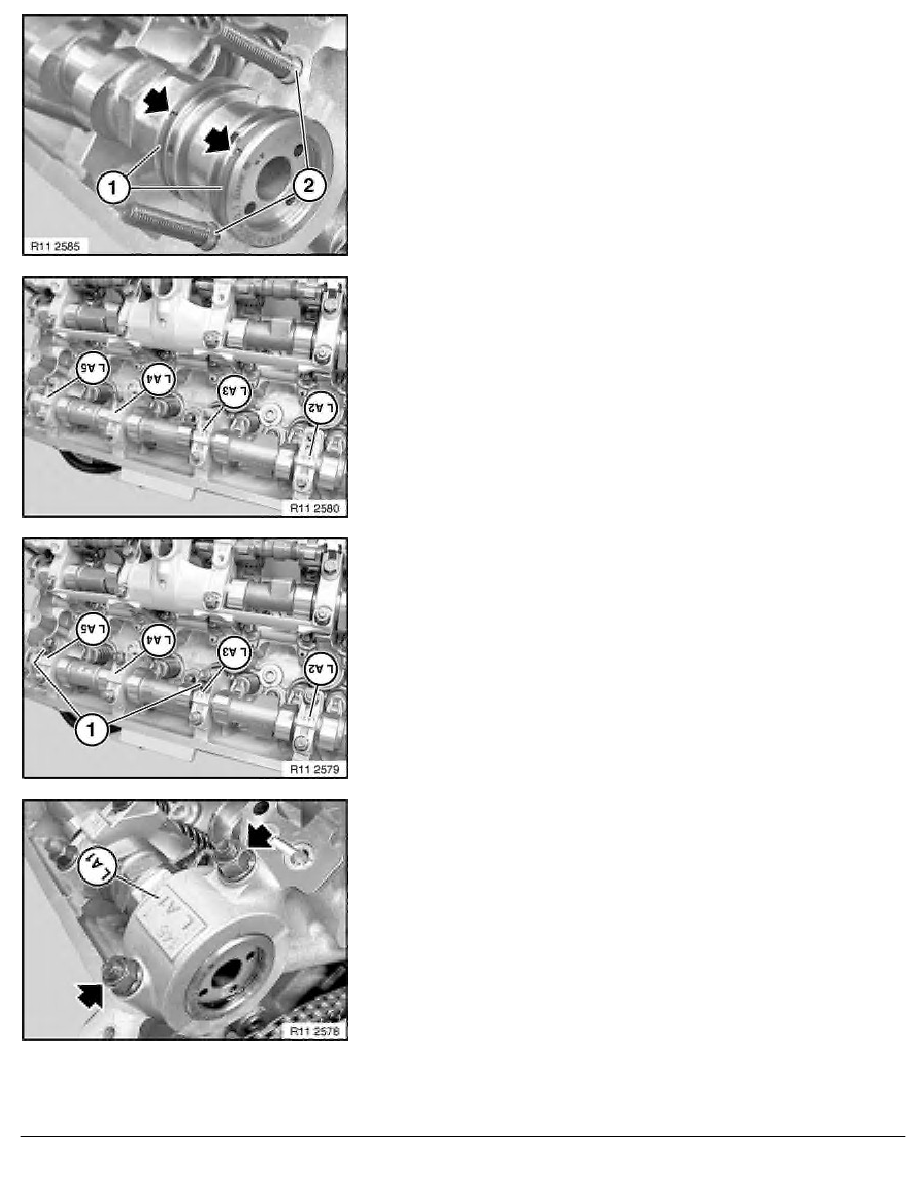
Check dowel sleeves (2) for damage and correct installation
position.
Ends of compression rings (1) point upwards.
Make sure compression rings (1) are engaged at ends.
Important!
Camshaft bearing caps of cylinders 1 to 4 and 5 to 8 must
not be mixed up.
Note:
Bearing caps of exhaust camshaft are marked on cylinder bank 1
to 4 with L A1 to L A5 from inlet side.
Fit bearing caps L A2 to L A5.
Note:
Retaining clips (1) for oil line are fitted on bearing caps 3 and 5.
Insert nuts and tighten by hand without play.
Tighten down nuts on bearing caps L A2 to L A5 in 1/2 turn
increments evenly from inside to outside.
Tightening torque 11 31 1AZ
.
Important!
Camshaft bearing caps of cylinders 1 to 4 and 5 to 8 must
not be mixed up.
Fit bearing cap L A1 in such a way that marking is legible from
inlet side.
Install nuts and tighten down.
Tightening torque 11 31 1AZ
.
RA Removing and installing/replacing right exhaust camshaft (N62/N62TU)
BMW AG - TIS
18.01.2013 05:48
Issue status (12/2007) Valid only until next DVD is issued
Copyright
Page - 5 -