
6 Series E64 630i (N53) CONVER
Installation:
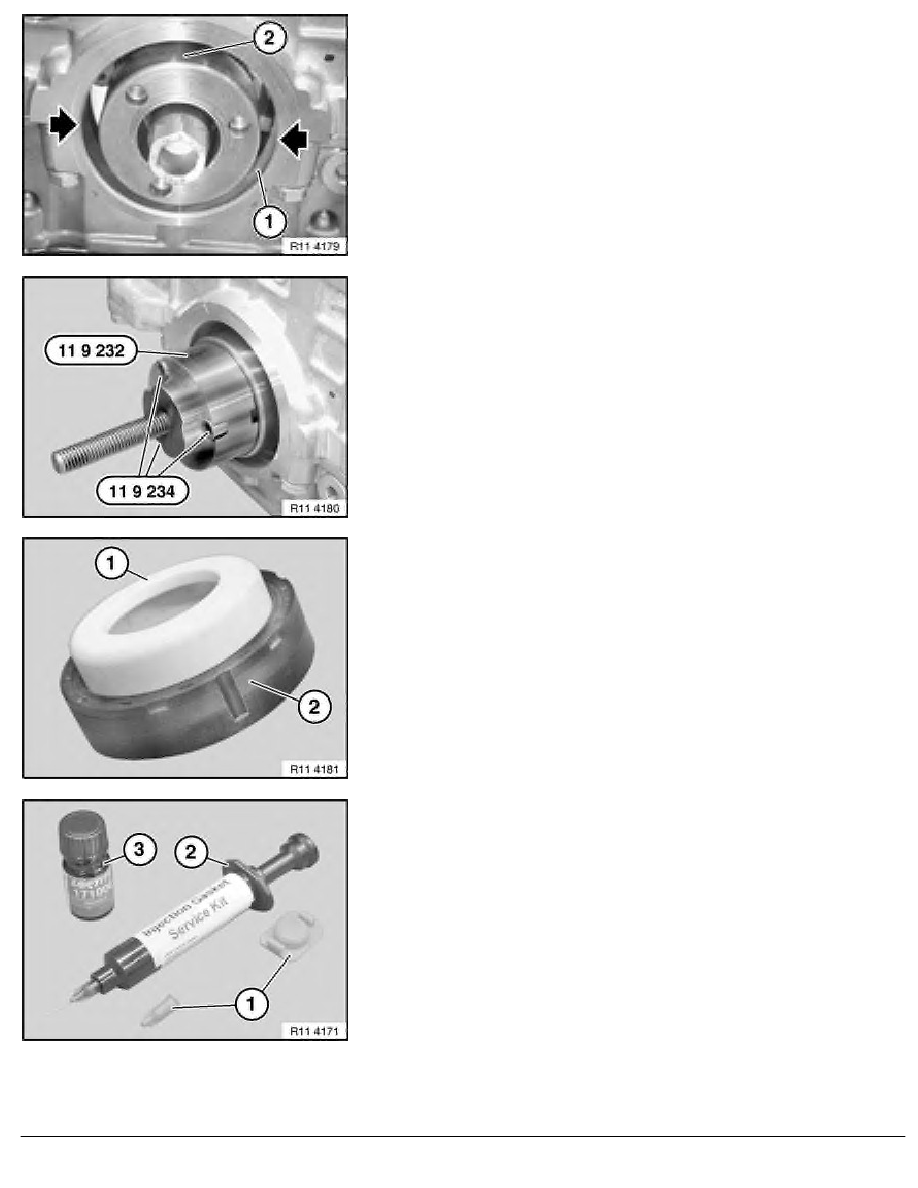
Clean sealing surface (1) and degrease thoroughly in area of
housing partition.
Apply a light coat of oil to running surface (2) of crankshaft seal.
Illustration N42.
Screw special tool 11 9 232 with screws (special tool
11 9 234 ) to crankshaft.
Note:
Support sleeve (1) is supplied with crankshaft seal (2).
When crankshaft seal (2) is installed, only support sleeve (1)
may be used as a slip sleeve.
Crankshaft seal (2) has a groove on both left and right sides.
Important!
After installation, the grooves must be sealed with sealing
compound.
Note:
The required parts are available from the BMW Parts Service
(Electronic Parts Catalogue ETK).
Remove screw caps (1) from injector (2).
Screw on metering needle.
Insert piston for pressing out.
Injector (2) contains the sealing compound Loctite,
manufacturer's number 128357.
Bottle (3) contains the primer Loctite, manufacturer's
number 171000.
RA Replacing front crankshaft seal (N53)
BMW AG - TIS
30.01.2013 06:22
Issue status (12/2007) Valid only until next DVD is issued
Copyright
Page - 3 -