
7 Series E38 740iL (M62) SAL
Caution!
To avoid breaking windshield:
Before sticking on new spacer buffers,
remove remains of old spacer buffers completely.
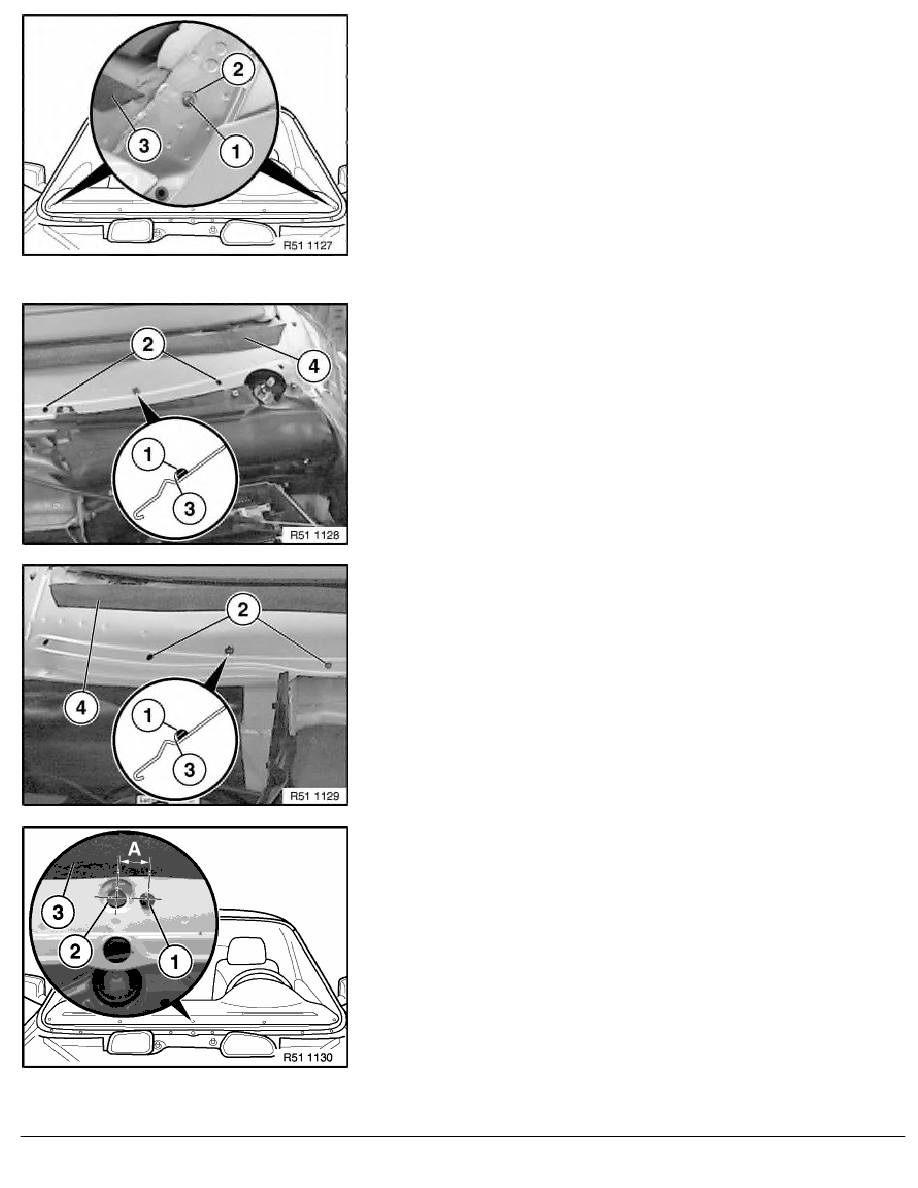
Stick on semicircular spacer buffers (1) "outside" in moulding
(2) on left/right.
3
Expanding foam tape
Note:
Expanding foam tape (3) over gap between sound insulation
and cowl panel must be fitted from left to right, fit if necessary.
In direction of travel, left:
Stick on semicircular spacer buffers (1) "center/outside" between
bores (2).
Note:
Attach semicircular spacer buffer (1) to end of metal
radius (3).
4
Expanding foam tape
In direction of travel, right:
Stick on semicircular spacer buffers (1) "center/outside" between
bores (2).
Note:
Attach semicircular spacer buffer (1) to end of metal
radius (3).
4
Expanding foam tape
Attach semicircular spacer buffer (1) "centrally" at distance (A) on
right side (left side in direction of travel) at same height as bore
(2).
(A) 25 mm
3
Expanding foam tape
RA Removing and installing front windscreen
BMW AG - TIS
18.02.2013 08:41
Issue status (12/2007) Valid only until next DVD is issued
Copyright
Page - 7 -