
7 Series E38 740iL (M62) SAL
Lift windshield with special tool 51 9 002 out of body cutout and
place on assembly stand.
Switch off vacuum pump.
Turn windshield on assembly stand so that inner side faces
upwards.
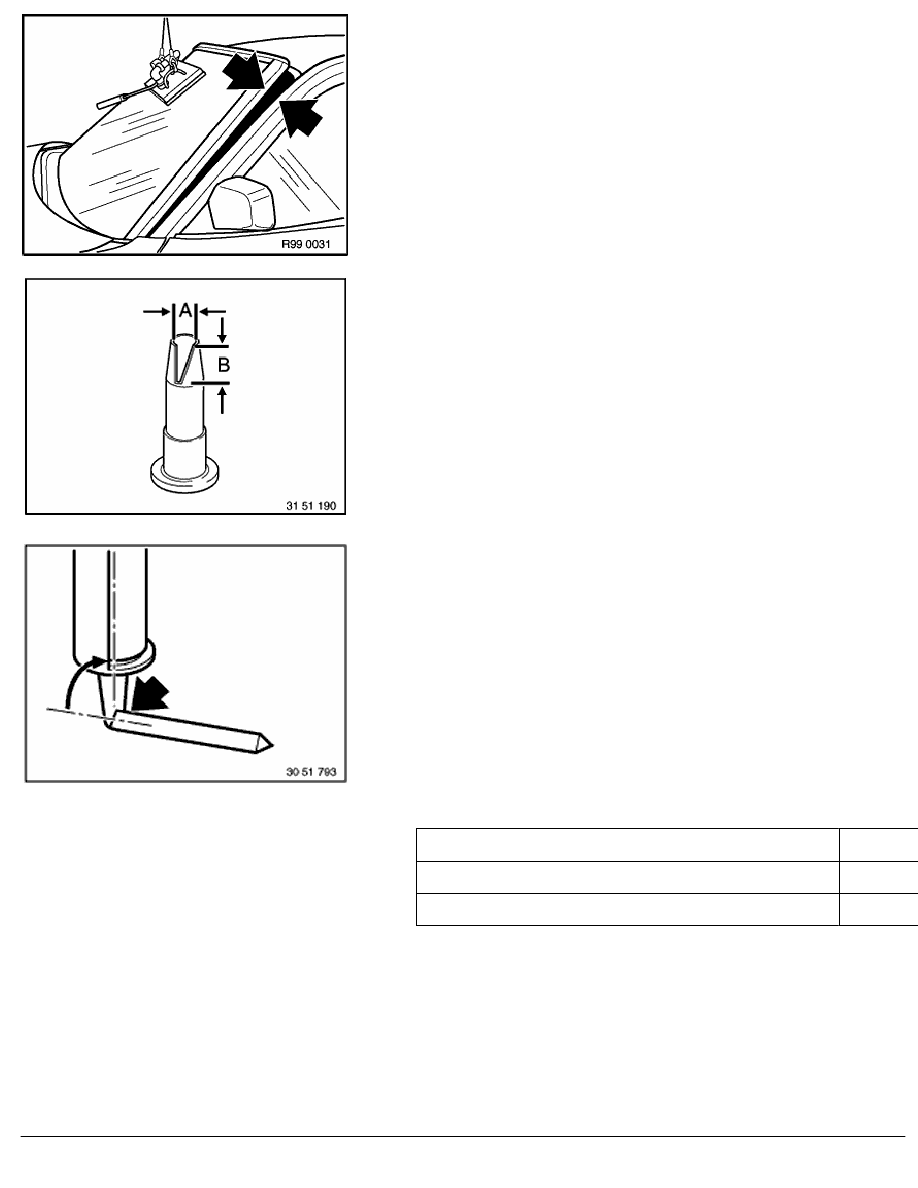
Cut nozzle to size.
Dimensions:
(A) 7
+1
mm
(B) 11
-2
mm
Note:
For an even application of adhesive bead:
Use a cartridge gun (operated pneumatically or electrically,
sourcing reference: BMW Parts Service).
Check expiration date of glue!
If necessary, apply a test bead before gluing.
Cartridge must be held perpendicularly to the windscreen glass.
Note:
Approx. 1 1/4 adhesive cartridges are required for the
windshield.
Effect of differing adhesive quantities:
Insufficient adhesive:
Excessive adhesive:
Windshield positioned too low in body cutout
Windshie
Stresses may occur (risk of broken windshield)
Wind noise may occur
RA Removing and installing windshield (Protection)
BMW AG - TIS
18.02.2013 08:42
Issue status (12/2007) Valid only until next DVD is issued
Copyright
Page - 13 -