
7 Series E38 750i (M73) SAL
Immediately before installing windshield,
remove glue residue in body cutout to approx. 0.5 mm thickness.
To avoid damaging paintwork in body cutout,
carefully remove glue residue with a scalpel.
Caution!
Clean freshly cut residual glue bead with 2-propanol or glass
activator only;
do not, under any circumstances, use Sika bonding agent
205/5.
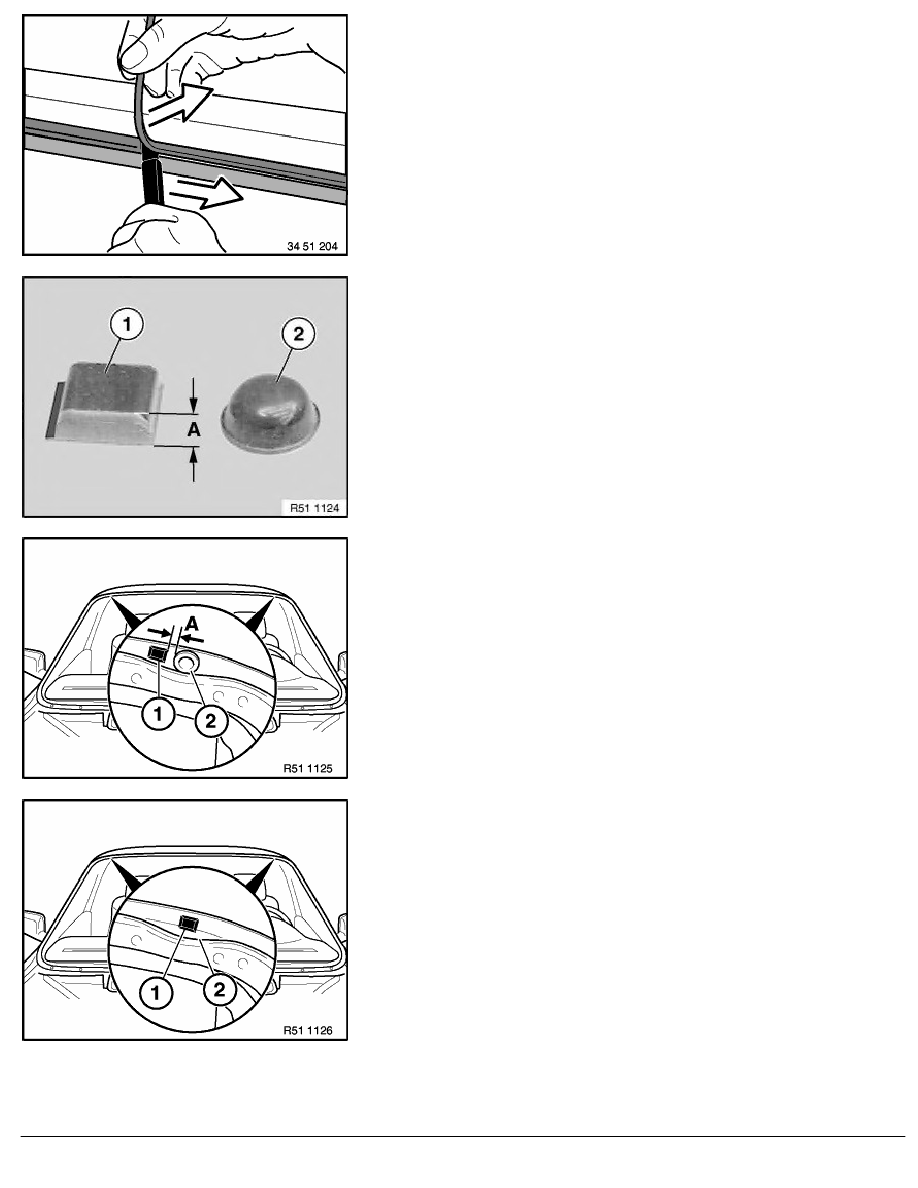
Installation of spacer buffers:
Two different spacer buffers are fitted. Keep exactly to the
installation position (risk of broken windshield).
1
Square spacer (height stop, wind noises)
2
Semicircular spacer buffer (spacing for adhesive bead)
(A) 3.8 mm
Caution!
Wind noises may result if measurement (A) is not 3.8 mm.
Version with slide/tilt sunroof:
Stick square spacer (1) at distance (A) to center, near water
drainage bore (2), for
slide/tilt sunroof on left/right.
(A) 5 mm
Model without sliding/tilting sunroof:
Attach square spacer (1) to center of cavity (2).
Note:
The water drainage bore is located here in models fitted with
sliding/tilting sunroofs, see one work step previously.
RA Removing and installing front windscreen
BMW AG - TIS
19.02.2013 21:08
Issue status (12/2007) Valid only until next DVD is issued
Copyright
Page - 6 -