
7 Series E38 750i (M73) SAL
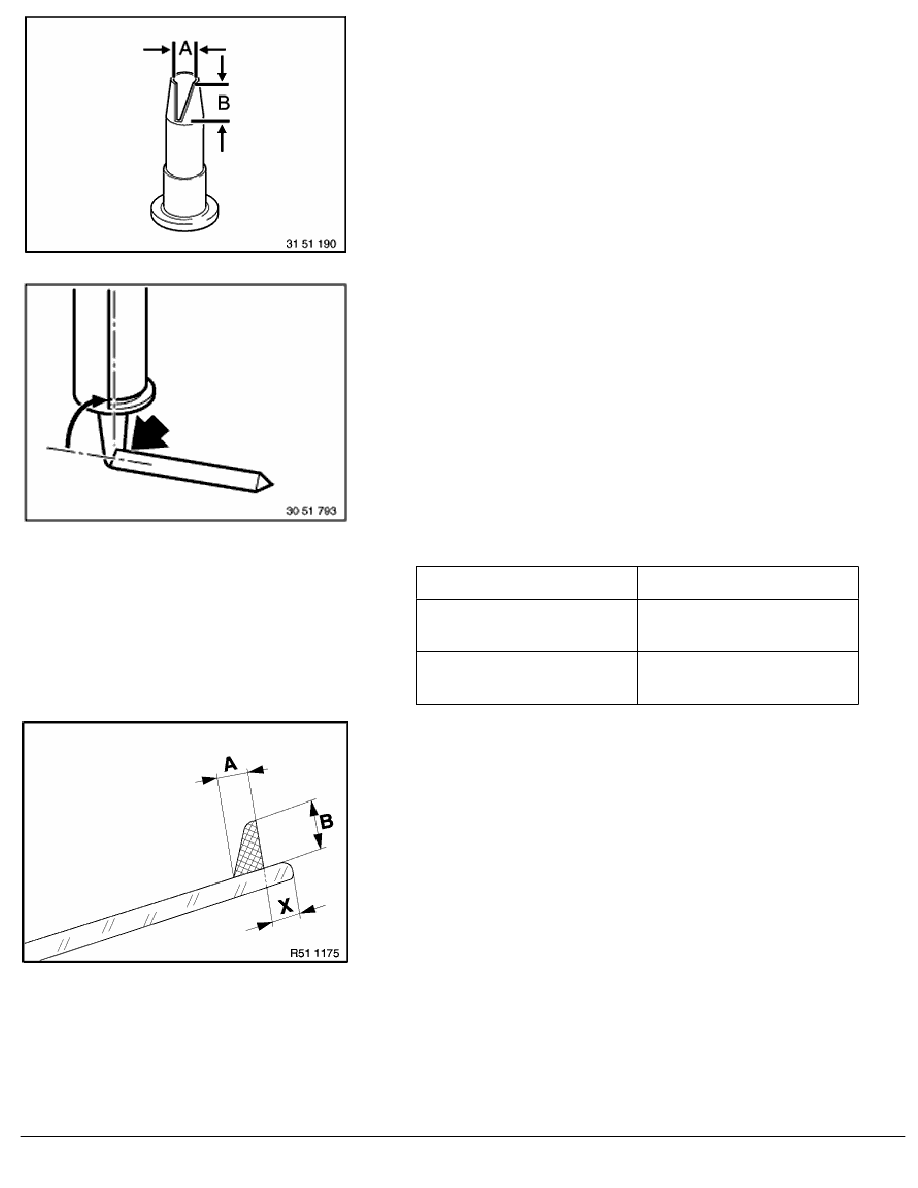
Cut nozzle to size.
Dimensions:
(A) 7 mm
(B) 10
-1
mm
Note:
For an even application of adhesive bead:
Use a cartridge gun (operated pneumatically or electrically,
sourcing reference: BMW Parts Service).
Check expiration date of glue!
If necessary, apply a test bead before gluing.
Cartridge must be held perpendicularly to the windscreen glass.
Note:
Approx. 1 1/4 adhesive cartridges are required for the
windshield.
Effect of differing adhesive quantities:
Insufficient adhesive:
Excessive adhesive:
Windshield positioned too
low in body cutout
Windshield positioned too
high in body cutout
Stresses may occur (risk of
broken windshield)
Wind noise may occur
Shape of glue bead:
(A) 7 mm
(B) 10
-1
mm
Caution!
Apply adhesive bead swiftly (and uniformly) and install
windshield. Maximum skin formation time of adhesive is
10 minutes.
Maintain distance (X) to edge of windshield,
refer to measurement (A) to (C) in next work step.
RA Removing and installing front windscreen
BMW AG - TIS
19.02.2013 21:08
Issue status (12/2007) Valid only until next DVD is issued
Copyright
Page - 8 -