
7 Series E38 750iL (M73) SAL
Fit seal (1) to top of windshield and press into place.
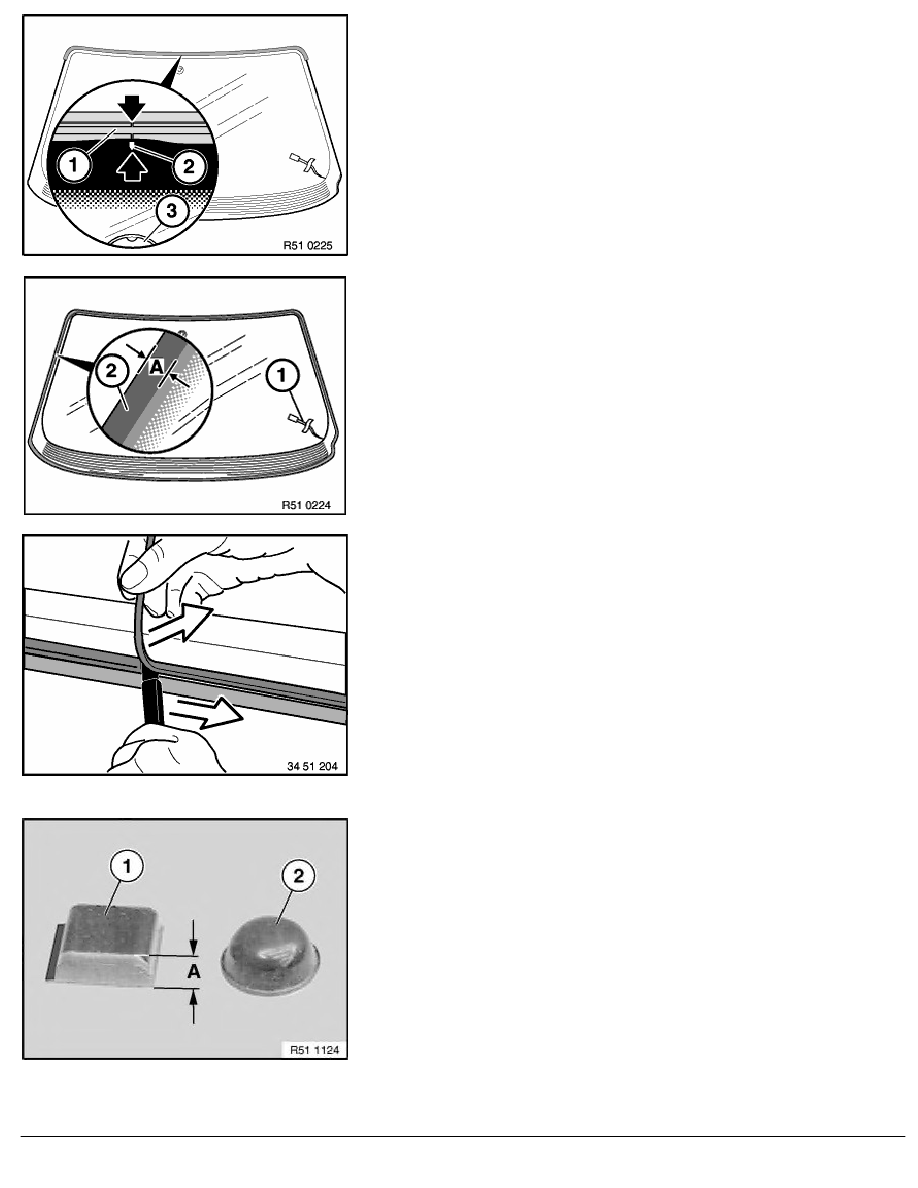
Note:
Seal (1) and windshield are marked in the center (2).
(3)
Mirror base
Secure cable (1) (rear window heating) with adhesive tape.
Treat windshield in glued area (A) with materials approved by
BMW (repair kit, sourcing reference: BMW Parts Service),
refer to 51 31 ...
(A) = 21 mm
Note:
Note specified ventilation time!
Immediately before installing windshield:
Remove glue residue in body cutout to approx. 0.5 mm
thickness.
Note:
Cut off old glue carefully with a heavy-duty scalpel to avoid
damaging the paint finish in body cutout.
Caution!
Clean freshly cut residual bead with alcohol only.
Do not under any circumstances use Sika bonding
agent 205/5 or glass primer 205/5.
Installation of spacer buffers:
Two different spacer buffers are fitted. Adhere precisely to
installation position (broken windshield).
(1)
Square spacer (height stop, wind noises)
(2)
Semicircular spacer buffer (spacing for adhesive bead)
(A) 3.8 mm
Caution!
Wind noises may result if measurement (A) is not 3.8 mm.
RA Removing and installing windshield (Protection)
BMW AG - TIS
21.02.2013 01:49
Issue status (12/2007) Valid only until next DVD is issued
Copyright
Page - 9 -