
7 Series E65 730d (M57T2) SAL
Note:
Installation of windscreen wiper arm is described separately from
removal.
Replacement:
•
Convert windscreen wiper blade
•
Convert cover with hose in windscreen wiper arm
Installation:
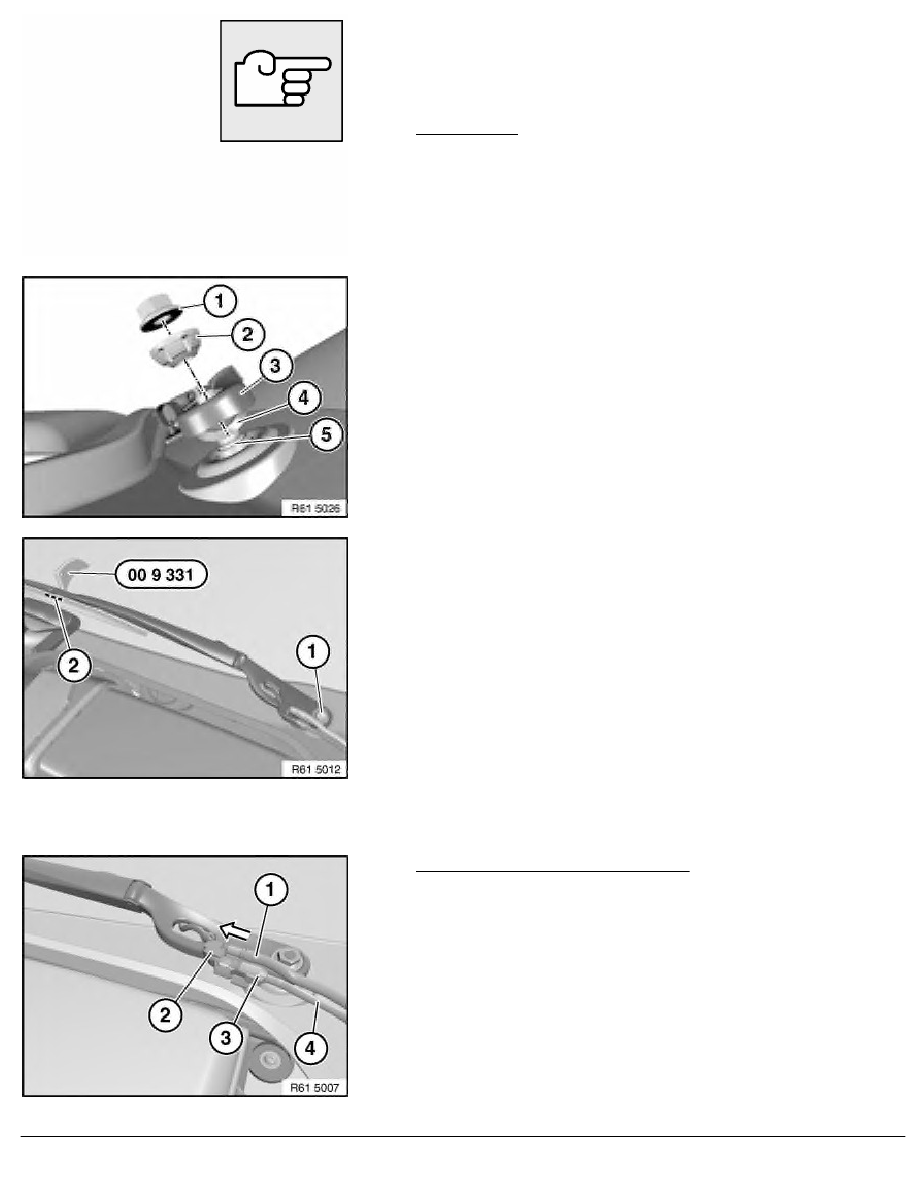
Replace adjusting disc (4).
Join adjusting disc (4) and wiper arm (3) to each other (fit) and
attach together on shaft (5).
Replace adjusting element (2).
Screw adjusting element (2) and nut (1) partially onto shaft (5)
but do not screw down fully yet.
Important!
Danger of loosening!
Observe tightening specifications without fail.
Position wiper blade above marking (2) on windscreen.
Place special tool 00 9 331 at height of pivot point of wiper blade
on windscreen. Turn wiper arm until no gap can be seen between
special tool 00 9 331 and wiper blade. Hold wiper arm in this
position.
Tighten nut (1). Tightening torque 61 61 12AZ
.
Observe settling time (15 minutes).
Rebend nut (1). Tightening torque
61 61 12AZ
.
Version A (water jet hose connected):
Important!
Risk of damage!
At low outside temperatures, carefully heat water jet hose (1)
in area of distributor (2) with hot air blower.
Turn water jet hose (1) and attach in direction of arrow.
To prevent cable (4) from being chafed on water jet hose (1),
cable (4) must be below water jet hose (1).
Close plug connection (3).
RA Removing and installing (replacing) left windscreen wiper arm (driver's side)
BMW AG - TIS
03.02.2013 02:06
Issue status (12/2007) Valid only until next DVD is issued
Copyright
Page - 3 -