
7 Series E65 740i (N62TU) SAL
Important!
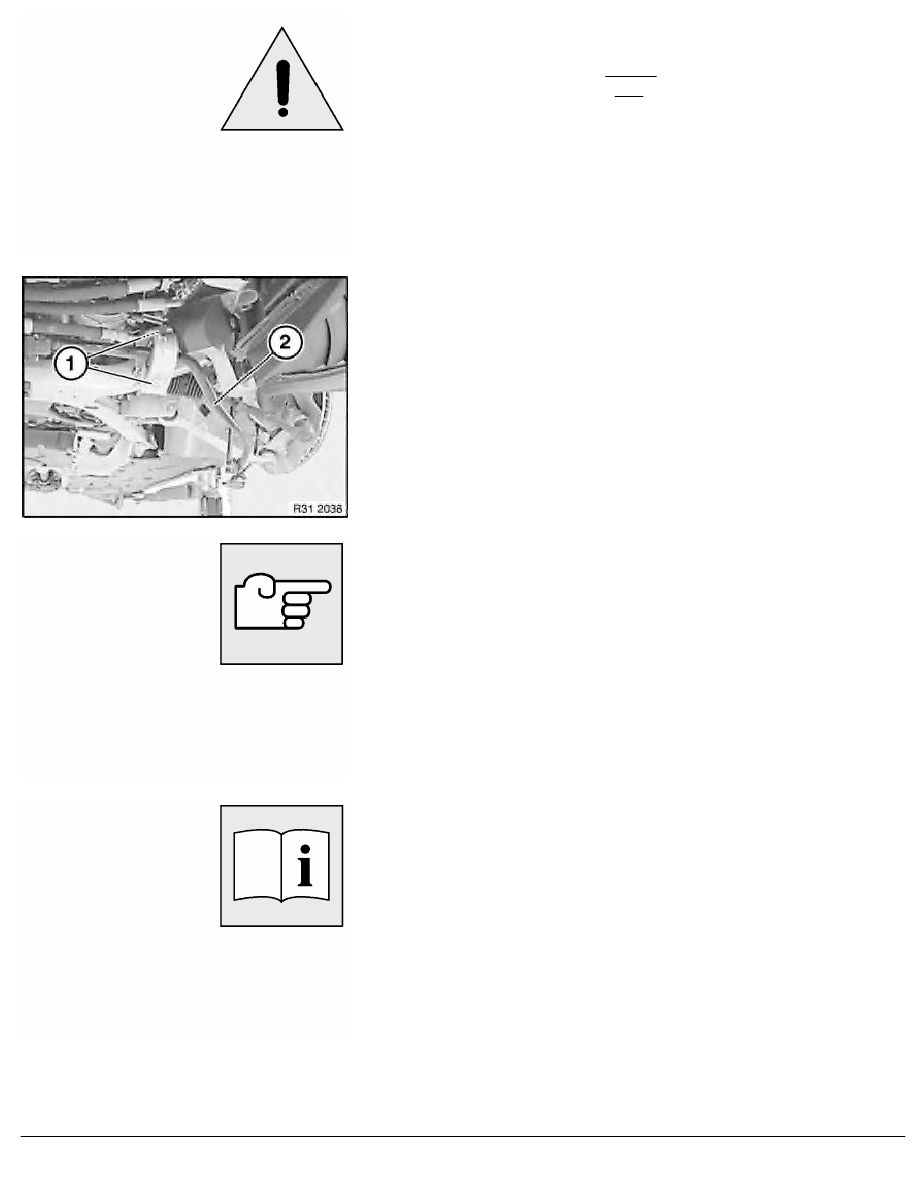
To prevent the stabilizer from being distorted, secure first the
left retaining bracket (without elongated holes) and then the
right retaining bracket (with elongated holes) to the front axle
carrier.
If necessary, remove holder with hydraulic line(s) from retaining
bracket.
Release screws (1) on both sides.
Remove stabilizer from front axle carrier.
Check anti-friction bearing on both sides for damage; if necessary,
replace stabilizer (observe note at start of repair instruction).
Installation:
Check rubber mount on both sides, replace if necessary.
Tightening torque 31 35 1AZ
.
Replacement:
Remove rubber mount on both sides from stabilizer.
After installation:
•
Fill and bleed hydraulic system
•
Check pipe connections for leaks
•
If necessary, carry out initial Dynamic Drive operation
RA Removing and installing/replacing front active stabilizer
BMW AG - TIS
11.02.2013 07:52
Issue status (12/2007) Valid only until next DVD is issued
Copyright
Page - 2 -