
7 Series E65 740i (N62TU) SAL
51 24 150
Removing and installing/replacing hydraulic
unit for rear lid actuation (electrohydraulic-
fully automatic)
Necessary preliminary tasks:
•
Read and comply with Notes on automatic rear lid actuation
(electrohydraulic-fully automatic)
•
Remove right luggage compartment wheel arch trim
Have a cleaning cloth ready to catch emerging fluid.
E67 only:
•
Remove supplementary trim
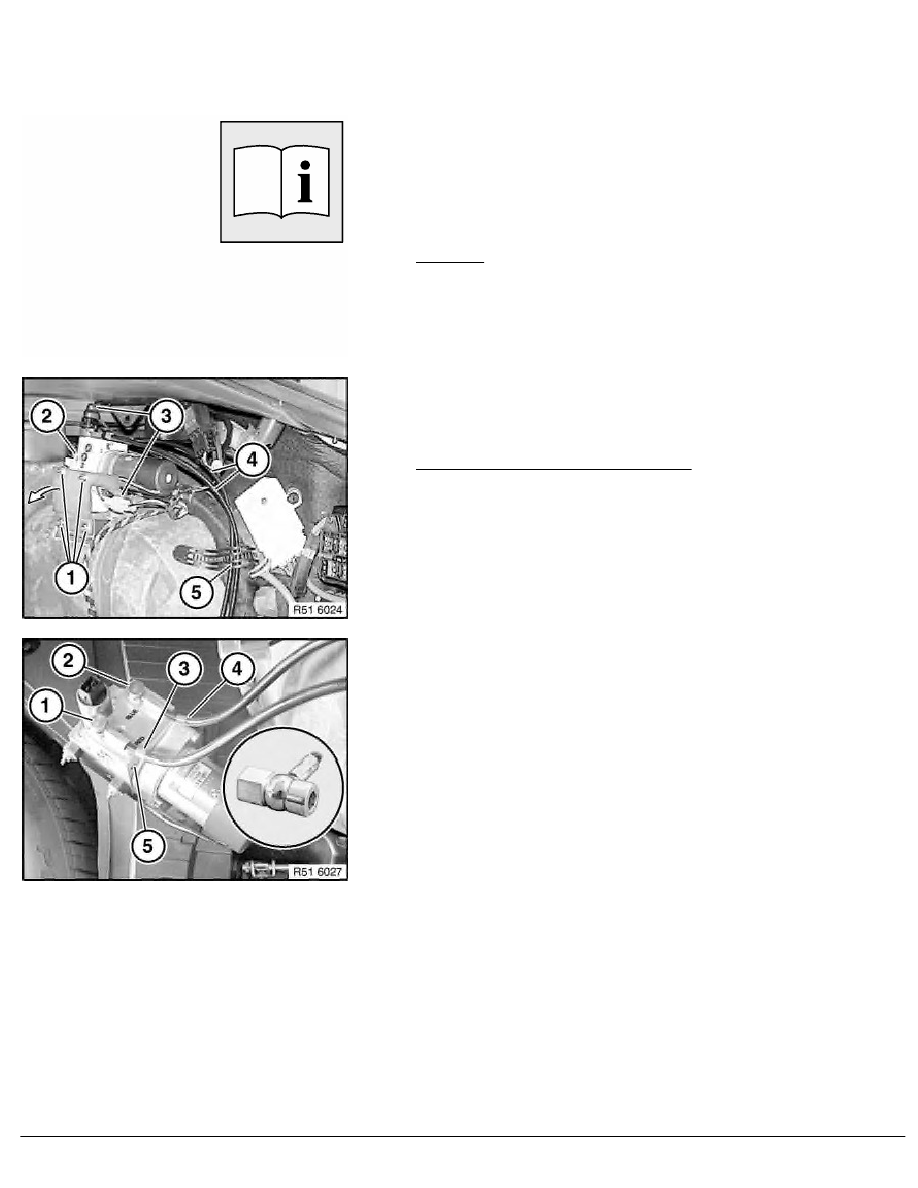
Unscrew nuts (1).
Remove holder and pull out hydraulic unit (2).
Disconnect plug connections (3).
For removal of hydraulic cylinder only:
Unhook cable holders (5) and feed out hoses (4).
Tightening torque 51 24 4AZ
.
Tightening torque 51 24 7AZ
.
Detaching hoses on hydraulic unit:
Important!
Catch emerging fluid with a cleaning cloth.
Release banjo bolts (1) and (2).
Installation:
1
Banjo bolt on hydraulic unit "RED"
2
Banjo bolt on hydraulic unit "BLUE"
3
Adhesive tape on hose is "red"
4
Adhesive tape on hose is "blue"
Tightening torque 51 24 1AZ
.
Note:
If the hydraulic unit (5) is replaced or stays removed for an
extended period of time, seal the bores in the hydraulic unit and
the hose connections for the hydraulic cylinder.
RA Removing and installing/replacing hydraulic unit for rear lid actuation (electro
BMW AG - TIS
11.02.2013 10:51
Issue status (12/2007) Valid only until next DVD is issued
Copyright
Page - 1 -