
7 Series E66 730Li (N52) SAL
37 13 110
Removing and installing/replacing pressure
line for oscillating motor/rear axle
Important!
Adhere to the utmost cleanliness. Do not allow any dirt to
enter the hydraulic system.
Seal off pipe connections with plugs.
After installation:
•
Fill and bleed hydraulic system
•
Check pipe connections for leaks
•
If necessary, carry out initial operation for Dynamic Drive
Necessary preliminary tasks:
•
Remove bottom right wheel arch trim
•
Remove right underbody paneling
•
Remove rear right wheel arch trim
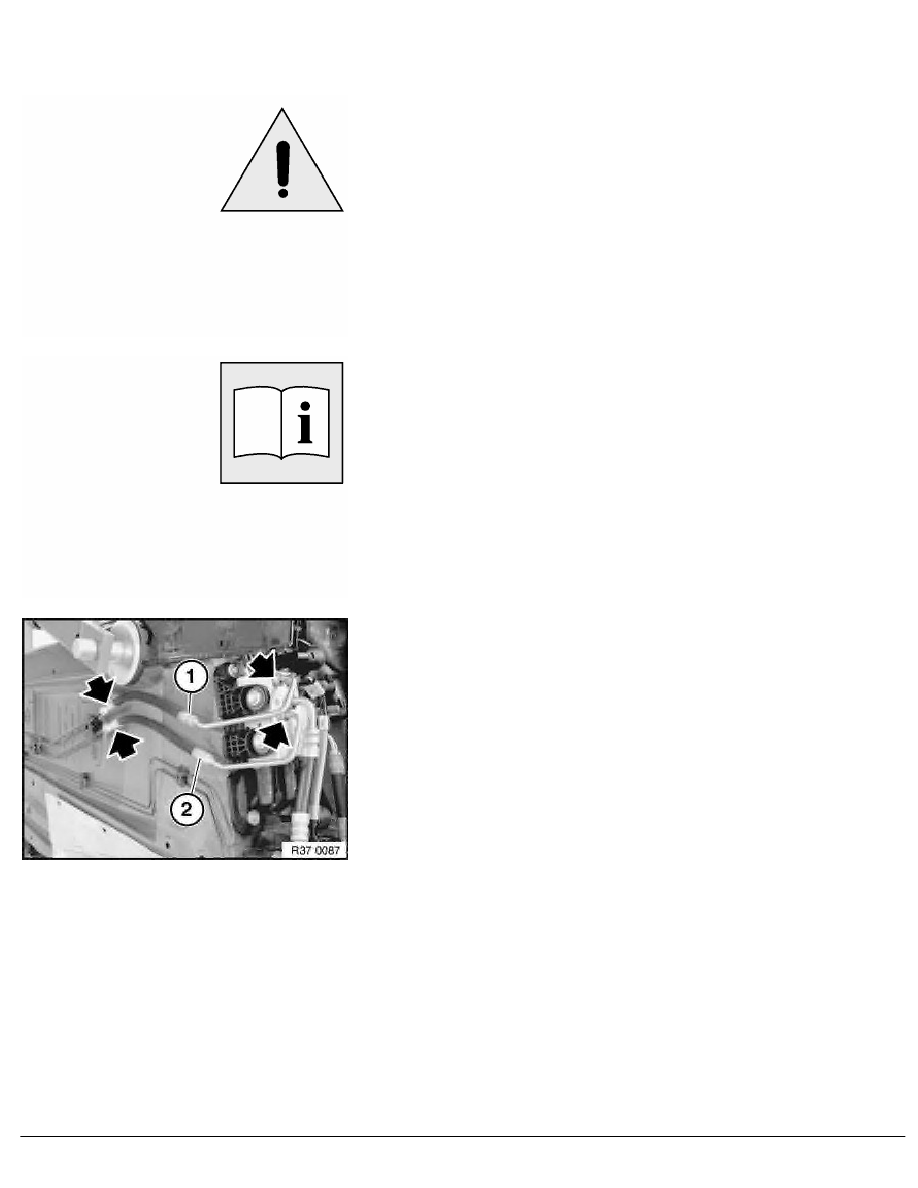
Release nuts on valve block.
Tightening torque 37 14 12AZ
.
Release nuts at junction I.
Tightening torque 37 14 13AZ
.
Disconnect pressure lines (1, 2).
Installation:
Pressure lines are protected against being mixed up by different
thread diameters on the valve block connection.
Make sure pressure lines are laid without tension and with
sufficient spacing to adjoining components.
RA Removing and installing/replacing pressure line for oscillating motor/rear axle
BMW AG - TIS
07.02.2013 03:29
Issue status (12/2007) Valid only until next DVD is issued
Copyright
Page - 1 -