
7 Series E66 730Li (N52) SAL
Installation:
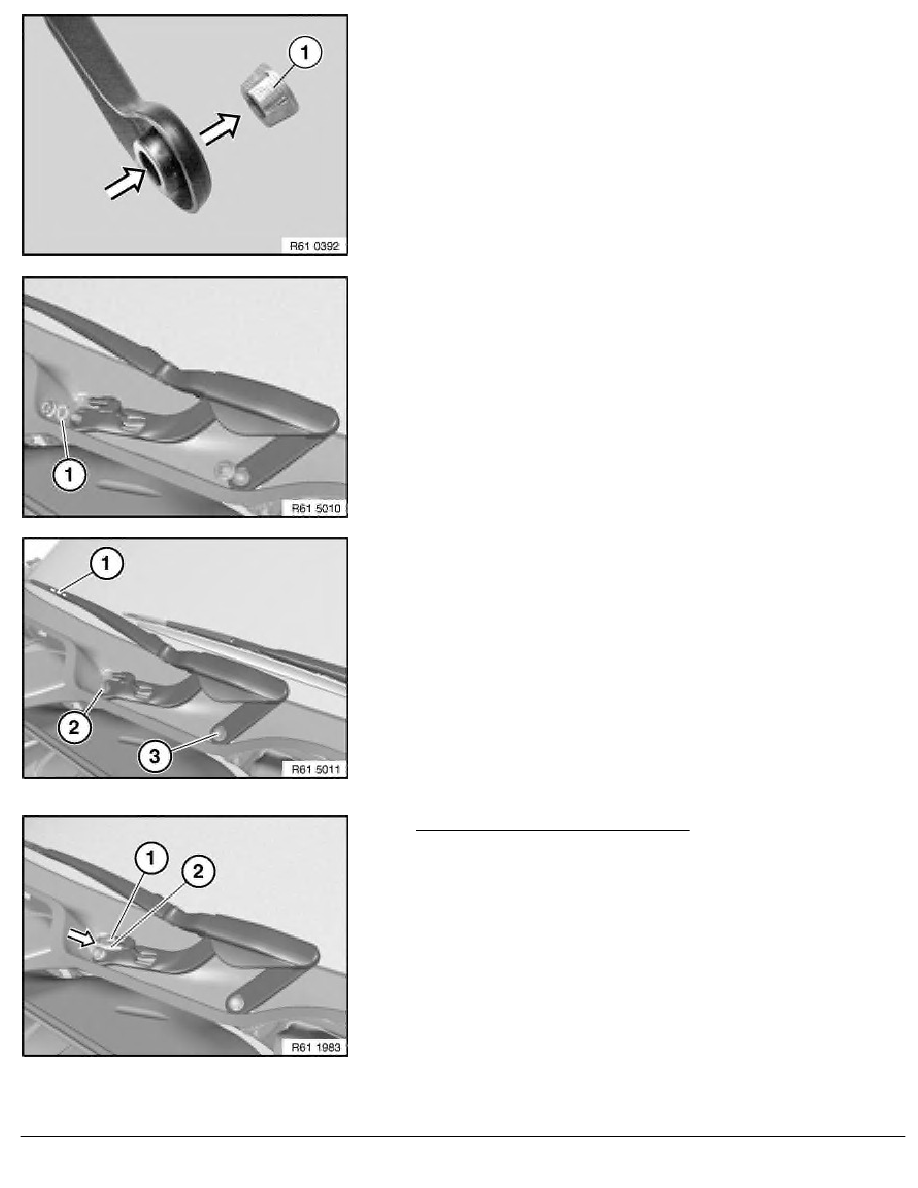
Checking seating of mounting element (1) in windscreen wiper
arm.
A tightly fit mounting element (1) in wiper arm can be reused.
A loose mounting element (1) must be replaced.
Attach windscreen wiper arm to shafts of wiper mounting bracket.
Fit mounting disc (1).
Partially screw nuts onto shafts of wiper mounting bracket, but do
not screw down fully yet.
Important!
Danger of loosening!
Observe tightening specifications without fail.
Position windscreen wiper blade via marking (1) on windscreen
and hold wiper arm in this position.
Tighten nut (2). Tightening torque 61 61 16AZ
.
Tighten nut (3). Tightening torque 61 61 13AZ
.
Observe settling time (15 minutes).
Rebend nut (3). Tightening torque
61 61 13AZ
.
Version A (water jet hose connected):
Important!
Risk of damage!
At low outside temperatures, carefully heat water jet hose (2)
in area of distributor with hot air blower.
Turn water jet hose (2) and attach in direction of arrow.
Close plug connection (1).
RA Removing and installing (replacing) right windscreen wiper arm (passenger side)
BMW AG - TIS
07.02.2013 21:28
Issue status (12/2007) Valid only until next DVD is issued
Copyright
Page - 3 -