
X Series E53 X5 3.0d (M57TU) OFFRD
Raise hood lid.
Release screws (1) on left/right.
Installation:
Vertical adjustment, refer to Gap dimensions, body.
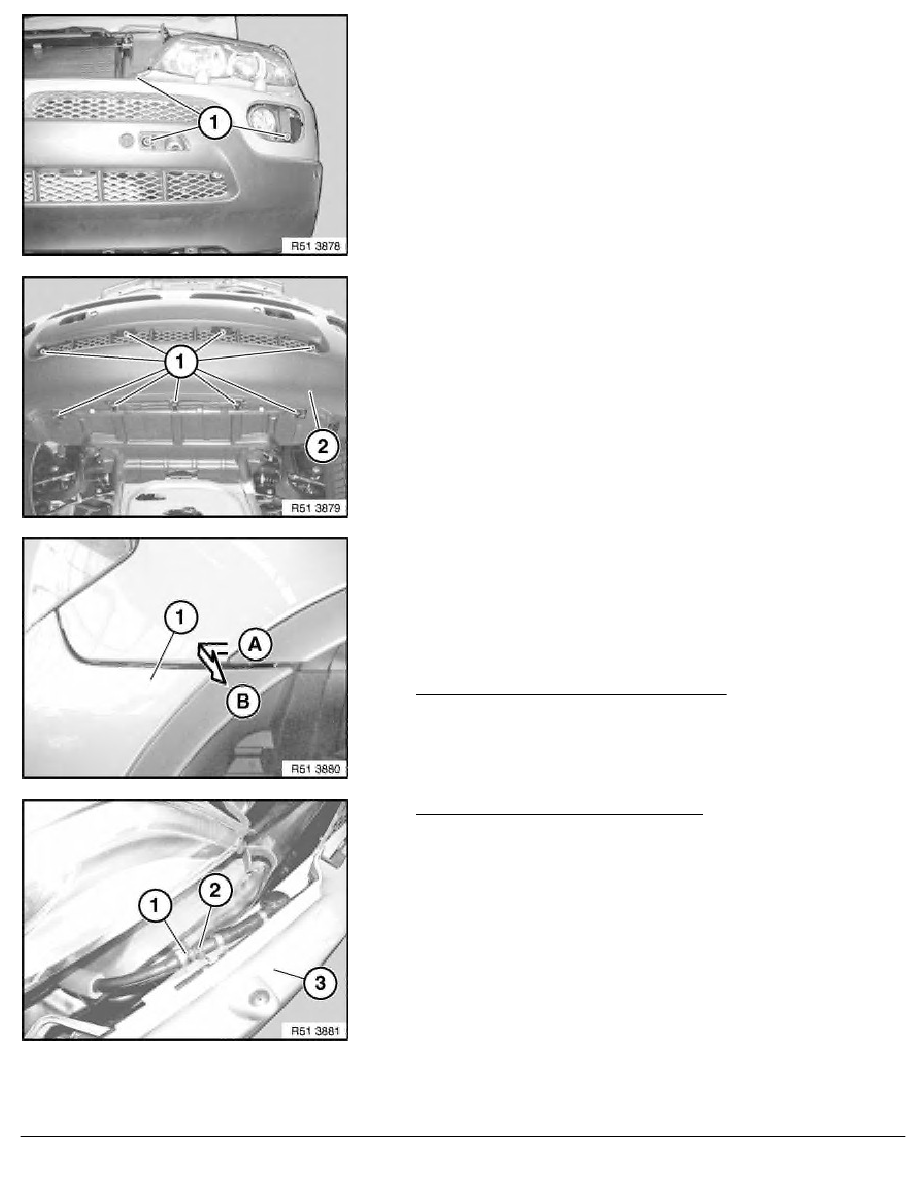
Release screws (1) on bumper trim (2).
Important!
Do not damage bumper trim when pulling off.
Pull bumper trim (1)
A) in direction of travel to unlock catches on holder
B) pull off outwards from holder
Version without headlight cleaning system:
Pull bumper trim (1) forwards a little.
If necessary, disconnect plug connections on ultrasonic sensors
and/or front fog lamps. Remove bumper trim (1) towards front.
Version with headlight cleaning system:
Note:
Have a rubber plug on hand.
If necessary, pull bumper trim (3) forwards a little. Unlock
hose (1), detach and seal pump outlet (2).
Remove bumper trim (1) towards front.
RA Removing and installing front bumper trim (from 10/03)
BMW AG - TIS
05.02.2013 12:01
Issue status (12/2007) Valid only until next DVD is issued
Copyright
Page - 2 -