X Series E53 X5 3.0i (M54) OFFRD

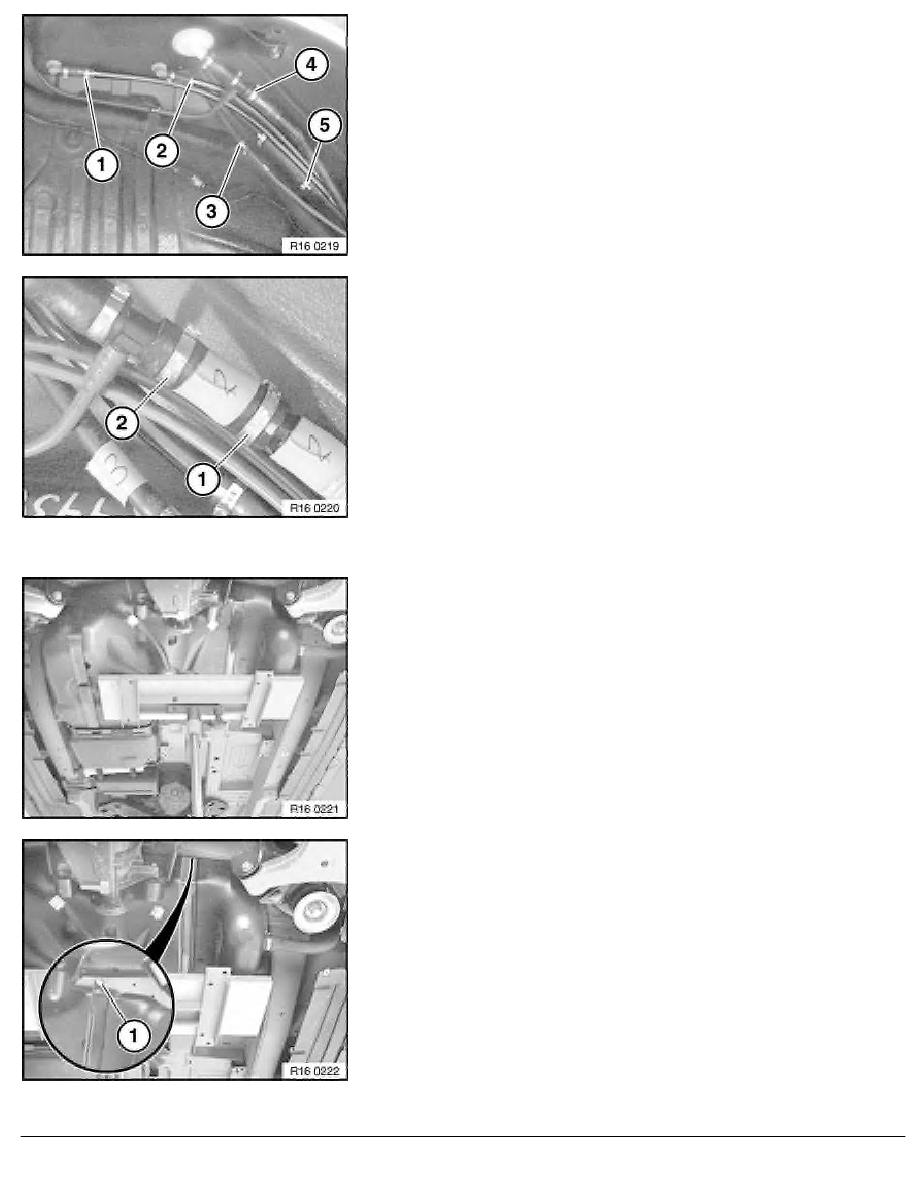
Mark following lines before and after separation point (adhesive
tape).
(1)
Overflow dia. 8 mm
(2)
Fuel tank vent dia. 8 mm
(3)
Overflow dia. 8 mm
(4)
Tank vent dia. 18 mm
(5)
Filling vent dia. 18 mm
Open hose clamps so that no hose clamp has to be pulled
through wheel arch aperture.
Example "Tank vent":
Unfasten hose clip (1).
Do not release hose clamp (2).
Detach lines from hoses.
Installation:
Replace hose clamps.
Tightening Torque, refer to 16 12 7AZ.
Tightening Torque, refer to 16 12 9AZ.
Support fuel tank on left fuel tank half.
Note:
When supporting fuel tank, tightening straps must not be
covered.
Release screw (1) for fuel tank mounting, rear right.
Tightening Torque, refer to 16 11 1AZ.
Unhook and remove tightening strap.
RA Removing and installing fuel tank
BMW AG - TIS
06.02.2013 17:40
Issue status (12/2007) Valid only until next DVD is issued
Copyright
Page - 7 -
