
X Series E53 X5 3.0i (M54) OFFRD
Tightening torque 33 32 20AZ
.
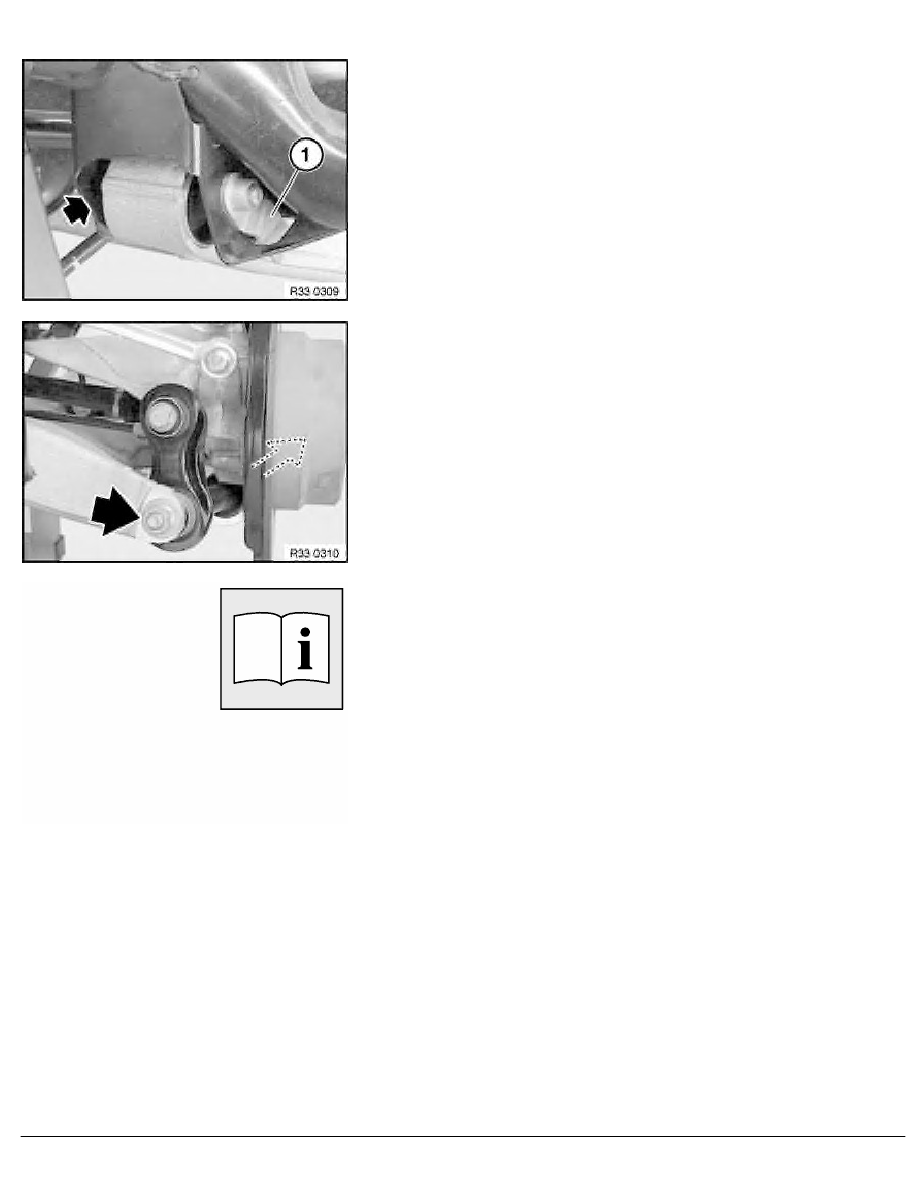
Release screw and remove locking nut (1).
Installation:
Replace locking nut.
Tighten bolt connection in normal position.
Tightening torque 33 32 20AZ
.
Unfasten nut.
Remove screw towards rear and remove swinging arm.
Installation:
Replace self-locking nut.
Tightening torque 33 32 22AZ
.
After installation:
•
Check that output shaft is correctly seated in rear differential.
•
Activate and fill air suspension system
•
Perform chassis alignment check
RA Removing and installing/replacing left or right swinging arm
BMW AG - TIS
06.02.2013 20:51
Issue status (12/2007) Valid only until next DVD is issued
Copyright
Page - 2 -