
X Series E53 X5 3.0i (M54) OFFRD
Mark new rear axle carrier parts according to previous cuts and
cut.
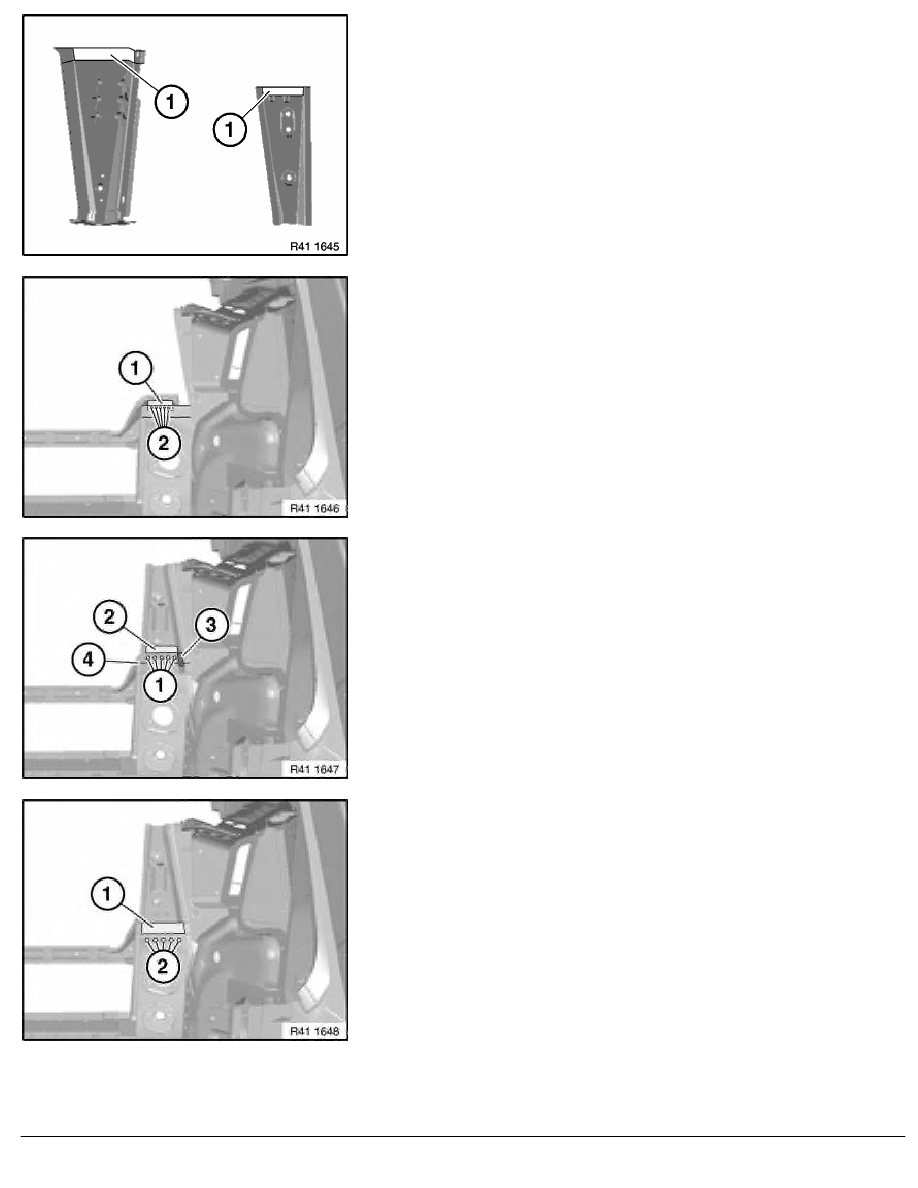
Drill carrier in areas (1) for plug welding.
Clean all connection points on new parts and body and coat with
weld primer.
Make reinforcement plate (1) approx. 40 mm in length from old
part and coat with weld primer.
Drill rear axle carrier lower section on body in area of
reinforcement plate (1) for plug welding.
Slide in reinforcement plate (1) half-way and plug-weld (2).
Adjust new rear axle carrier lower section to fit and then plug- (1)
and spot-weld (2).
Make reinforcement plate (3) approx. 40 mm in length from old
part and coat with weld primer.
Install reinforcement plate (3) and weld up all round.
Weld joint (4).
Plug-weld in area of reinforcement plate (3) from outer side.
Clean all welded connections, grind in outer area and coat with
weld primer.
Make reinforcement plate (1) approx. 40 mm in length from old
part and coat with weld primer.
Drill rear axle carrier upper section on body in area of
reinforcement plate (1) for plug welding.
Slide in reinforcement plate (1) half-way and plug-weld (2).
RA Replacing rear axle carrier upper and lower sections on left or right (partial r
BMW AG - TIS
06.02.2013 22:32
Issue status (12/2007) Valid only until next DVD is issued
Copyright
Page - 2 -