
X Series E70 X5 3.0d (M57T2) OFFRD
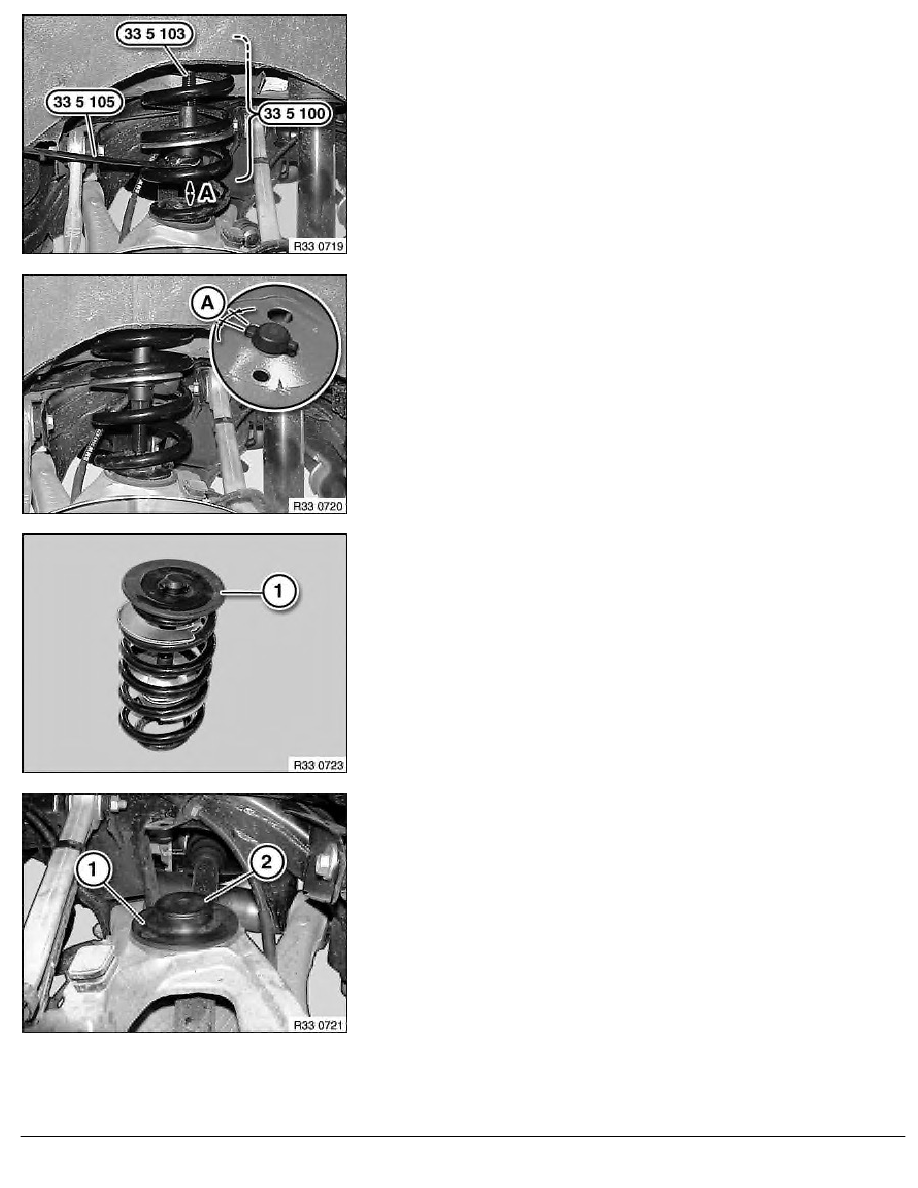
Check installation position of spring tensioner ( 33 5 100 ),
correct if necessary.
Note:
Make sure there is sufficient clearance (A = 7 cm) between
spindle 33 5 103 and lower spring pad.
Tension coil spring using special tool 33 5 105 ; if necessary,
grip coil spring.
Turn coil spring through A = 30
°
in counterclockwise direction.
Press wheel carrier downwards a little and remove coil spring
sideways.
Remove upper spring pad (1) from coil spring, check for damage
and replace if necessary.
If necessary, relieve tension on coil spring.
Installation:
Check lower spring pad (1) for damage.
Important!
Make sure spring pad is correctly installed in order to prevent
the coil spring from jumping out.
If necessary, lever out upper section (2) with a suitable tool and
replace spring pad with upper section.
RA Removing and installing / replacing rear left or right coil spring
BMW AG - TIS
03.02.2013 22:19
Issue status (12/2007) Valid only until next DVD is issued
Copyright
Page - 4 -