X Series E70 X5 3.0Si (N52K) OFFRD

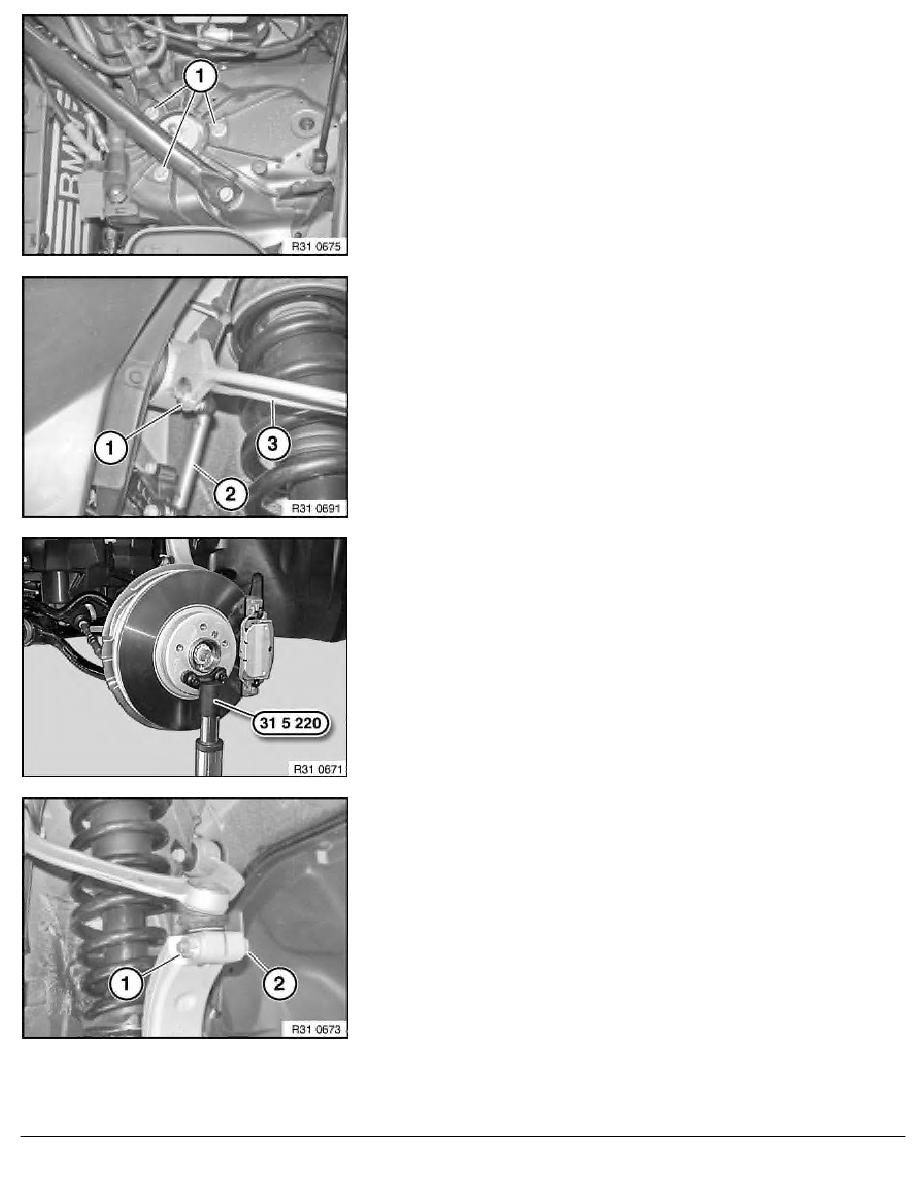
Unscrew nuts (1).
Installation:
Replace self-locking nuts.
Tightening torque 31 31 1AZ
.
Unscrew nut (1).
Remove jointed rod (2) from upper control arm (3).
Installation:
Replace self-locking nut.
Tightening torque 37 14 5AZ
.
Secure special tool 31 5 220 to drive flange with wheel studs.
Support swivel bearing with special tool 31 5 220 and
workshop jack.
Unfasten nut (1) and remove screw (2).
Installation:
Keep control arm to swivel bearing connection clean and free from
oil and grease.
Note insertion direction of screw.
Screw must rest correctly in groove of ball stud.
Replace self-locking nut.
Tightening torque 31 12 6AZ
.
RA Removing and installing/replacing top left control arm
BMW AG - TIS
06.02.2013 17:44
Issue status (12/2007) Valid only until next DVD is issued
Copyright
Page - 2 -
