
X Series E70 X5 3.0Si (N52K) OFFRD
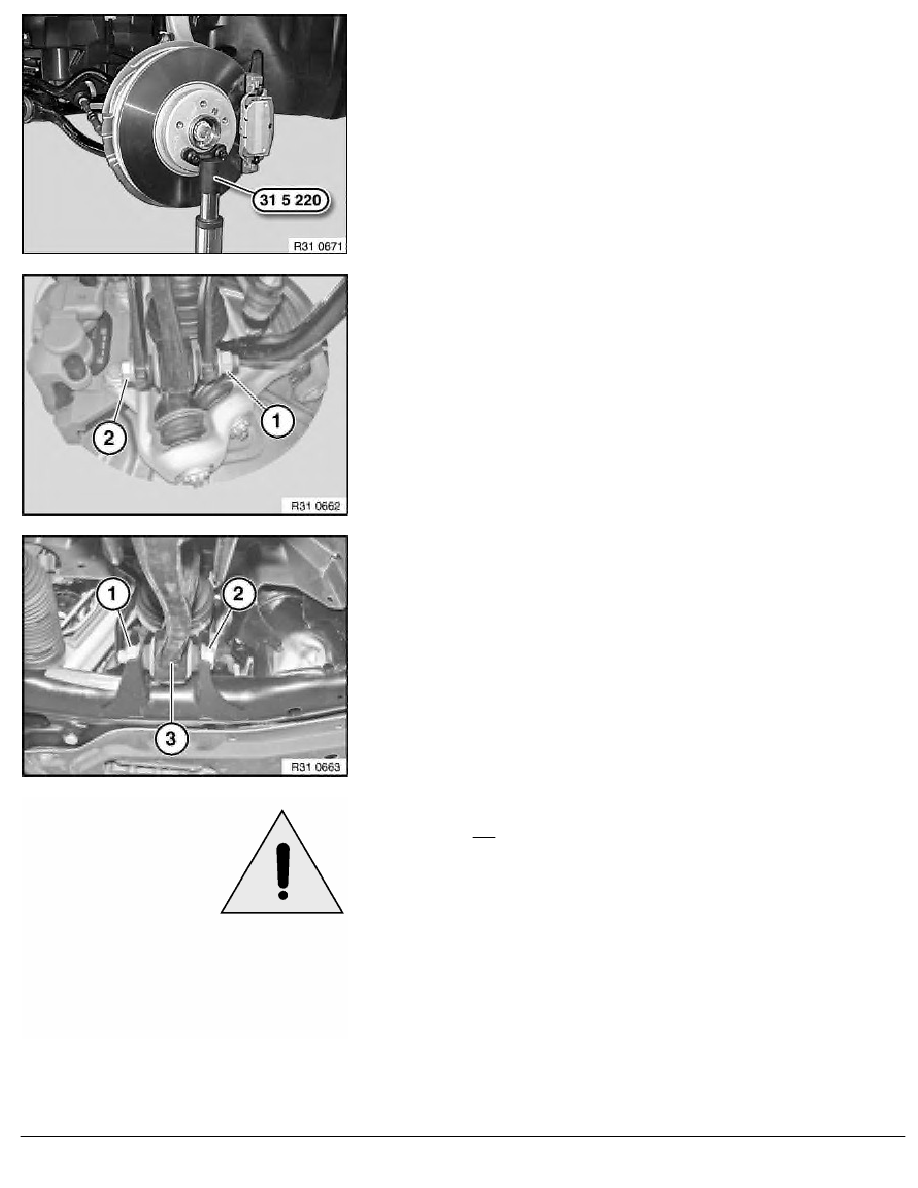
Secure special tool 31 5 220 to drive flange with wheel studs.
Support swivel bearing with special tool 31 5 220 and
workshop jack.
Release nut (1) and remove screw (2).
Installation:
Replace screw and nut.
Note insertion direction of screw.
Tighten bolt connection in normal position.
Tightening torque 31 12 7AZ
.
Unscrew nut (1).
Remove screw (2) and remove control arm (3) from front axle
carrier.
Installation:
Note insertion direction of screw.
Replace self-locking nut.
Tighten screw connection in normal position.
Tightening torque 31 12 3AZ
.
Important!
Do not release control arm from swivel bearing with impact
tool.
Make sure special tool rests correctly on steel bushing of
swivel bearing. The swivel bearing must be removed if the
steel bushing moves.
Rubber gaiter of control arm must not be damaged!
Do not pull stainless steel ring off journal.
RA Removing and installing/replacing left or right lower control arm
BMW AG - TIS
06.02.2013 17:45
Issue status (12/2007) Valid only until next DVD is issued
Copyright
Page - 2 -