
X Series E70 X5 3.0Si (N52K) OFFRD
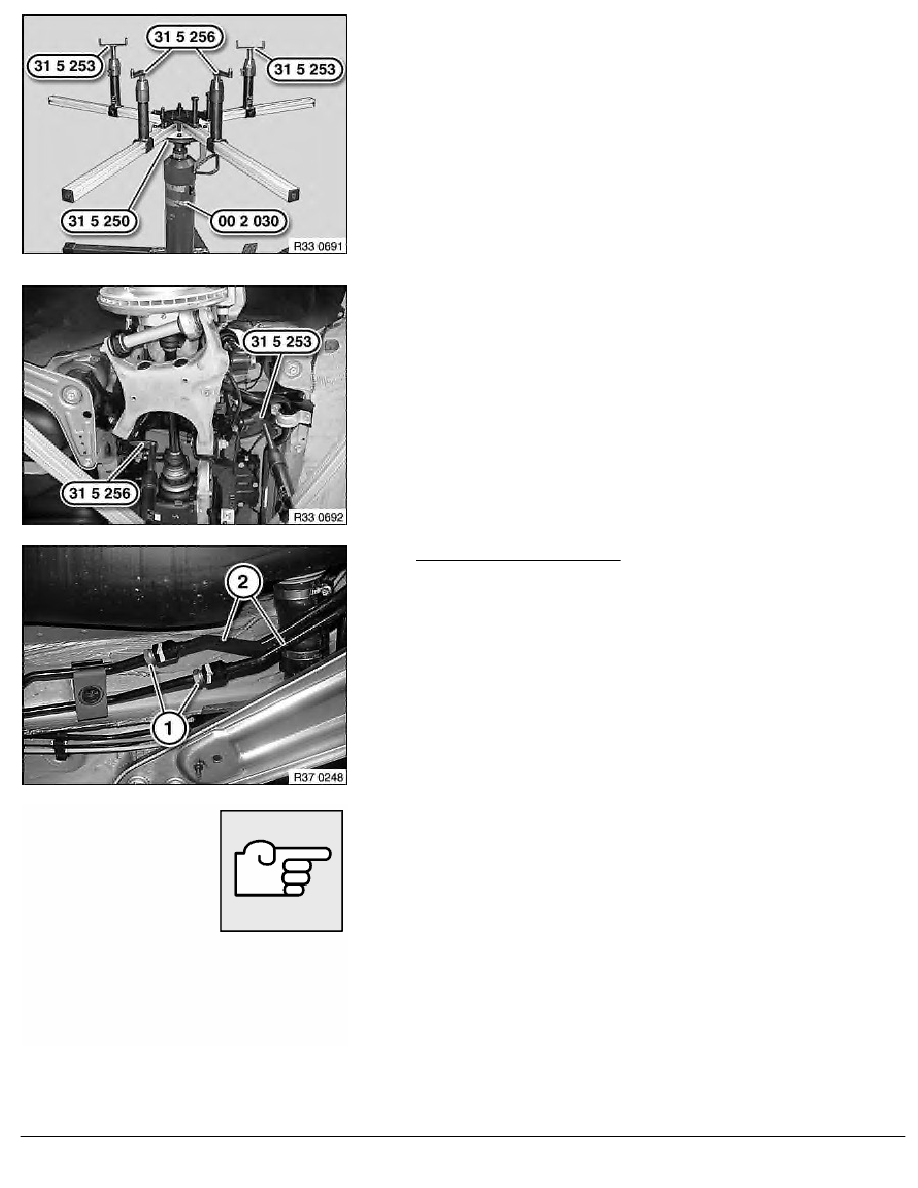
Engage special tool 31 5 250 with a 2nd person helping
completely on workshop jack 00 2 030 .
Insert special tools 31 5 253 in telescopic supports of a profile
rail pair.
Note:
In a profile rail pair two profile rails are connected to each by
toothing.
Insert special tools 31 5 256 in telescopic supports of other
profile rail pair.
Note:
The jacking points on the left side are shown.
Align special tool 31 5 256 to opening in rear axle carrier.
Align special tools 31 5 253 to cross-member arms on rear axle
carrier.
Version with Dynamic Drive:
Remove underbody panelling (rear section).
Important!
Pay attention to control lines (2) when lowering and raising.
Hydraulic lines must not be kinked/tensioned/bent!
Release banjo bolts (1).
Tightening torque 37 14 15AZ
.
Remove front and rear compression struts and carefully lower rear
axle carrier.
RA Removing and installing complete rear axle carrier
BMW AG - TIS
06.02.2013 19:10
Issue status (12/2007) Valid only until next DVD is issued
Copyright
Page - 3 -