
X Series E70 X5 3.0Si (N52K) OFFRD
Remove radiator box from engine carrier, extend out, press
upwards and support with workshop jack.
Installation:
Check rubber mounting of radiator box for correct seating.
Important!
Risk of damage!
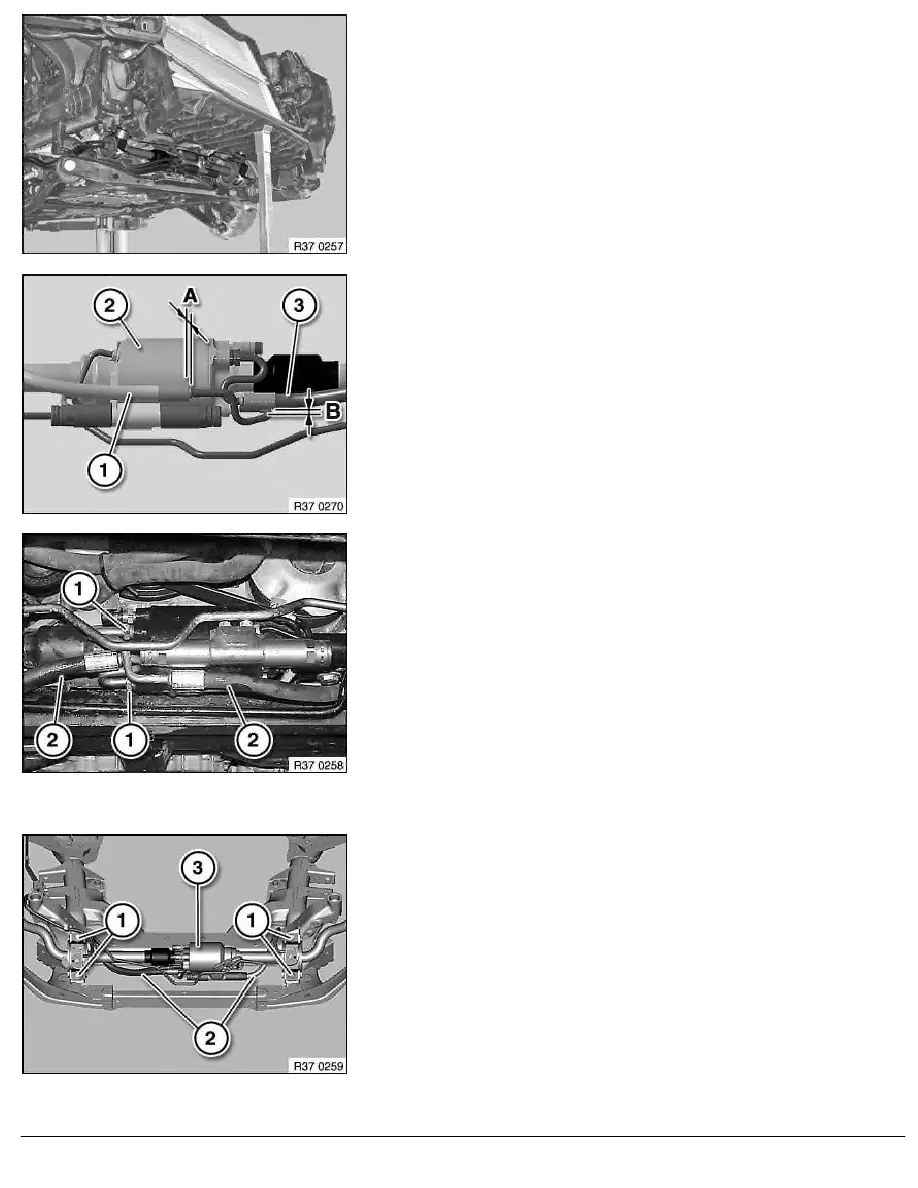
First adjust minimum distance (A) = 3 mm between
control line (1) and oscillating motor (2).
Then adjust control line (3) with minimum
distance (B) = 8 mm to control line (1).
Mark installation position of control lines to oscillating motor.
Release banjo nuts (1) and remove control lines (2) from
oscillating motor.
Seal control lines (2) and connections of oscillating motor with
sealing plugs.
Installation:
Carry over identification to new component.
Control lines are protected against being mixed up by different
thread diameters on the oscillating motor connection.
Tightening torque 37 14 18AZ
.
Remove both protective caps (of red rubber with pull band).
Release screws (1).
Tightening torque 37 14 20AZ
.
Remove both control lines (2) from upper retaining brackets and
tie up.
Remove upper retaining brackets.
Remove stabilizer (3) with rubber mounts from lower retaining
brackets.
Replacement: Remove both rubber mounts from stabilizer.
RA Removing and installing/replacing front active stabilizer
BMW AG - TIS
06.02.2013 20:23
Issue status (12/2007) Valid only until next DVD is issued
Copyright
Page - 2 -