
X Series E83 X3 2.5Si (N52K) OFFRD
Note:
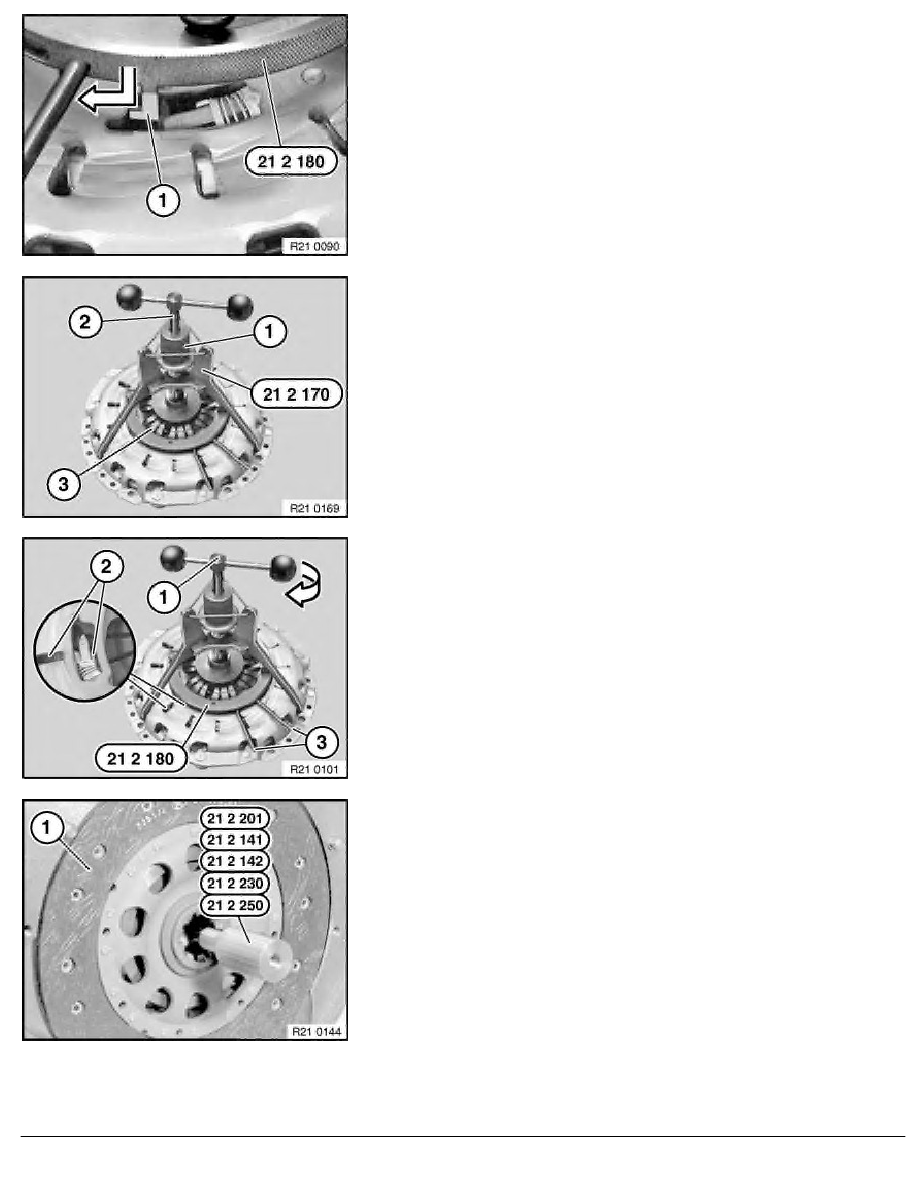
Locking hooks (1) of special tool 21 2 180 must engage in
openings in clutch.
Fit special tool 21 2 170 and tighten down at knurled screw (1).
Note:
Insert special tool 21 2 170 only in area of bores for dowel pins.
Screw in spindle (1) until adjustment ring of clutch (2) can be
turned with special tool 21 2 180 at handles (3).
Press special tool 21 2 180 together at handles (3) as far as it
will go and grip firmly.
At same time tighten down knurled screws (2).
Adjustment ring of clutch is now secured in new position.
Screw in spindle (1) until diaphragm spring is tensioned on stop.
Centre clutch plate (1) with special tool.
Important!
Install clutch plate in correct position.
Note designation for "engine side" / "transmission side".
Handle clutch plate with care. Do not touch surfaces of friction
linings.
Special tool
Transmission
21 2 201
GS6-37BZ
RA Removing and installing/replacing clutch (SAC)
BMW AG - TIS
11.02.2013 10:28
Issue status (12/2007) Valid only until next DVD is issued
Copyright
Page - 6 -