
X Series E83 X3 3.0Si (N52K) OFFRD
Important!
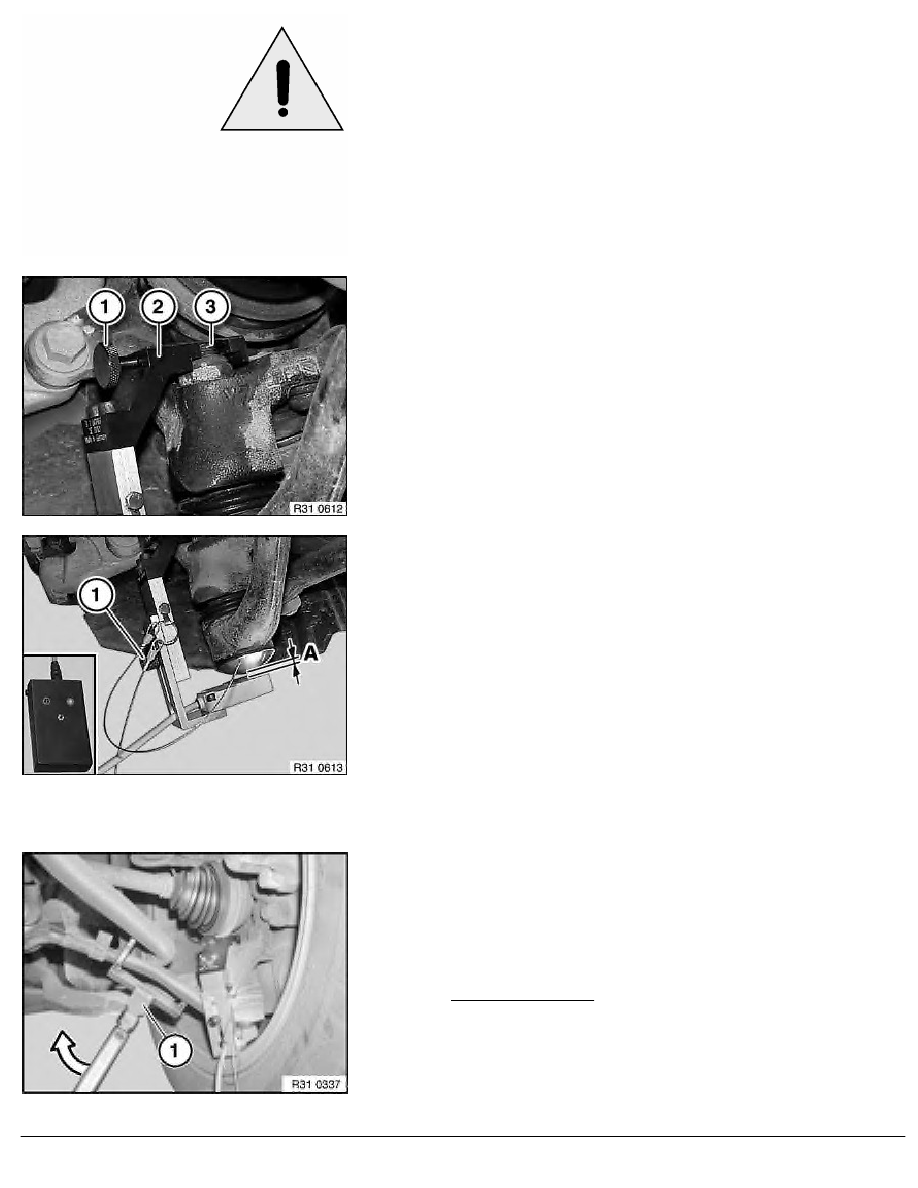
Measuring clip must not contact the control arm.
Fit measuring clip (2) on threaded stem (3) of joint and screw
down with locating screw (1).
Press button on evaluation electronics.
Note:
The device performs a self-test.
Both LEDs flash, then the red LED lights up permanently.
Move slide with measuring electronics upwards until green LED
lights up.
Note:
Gap (A) between measuring electronics and magnetic retainer
must be approx. 5-7 mm.
Then secure slide with clamping screw (1).
Press evaluation electronics button for approx. 2 seconds until
the green LED flashes.
Note:
The device is now calibrated and ready for measuring.
1.)
Test:
Set torque wrench to 60 Nm.
Introduce a force with hook wrench (1) in the direction
shown until torque is obtained.
Read off test result:
-
Red LED flashes: Joint must be replaced
-
Green LED flashes: Carry out 2nd test
RA Measuring play of wheel control joints
BMW AG - TIS
21.02.2013 06:47
Issue status (12/2007) Valid only until next DVD is issued
Copyright
Page - 2 -