
Z Series E85 M roadst (S54) ROADST
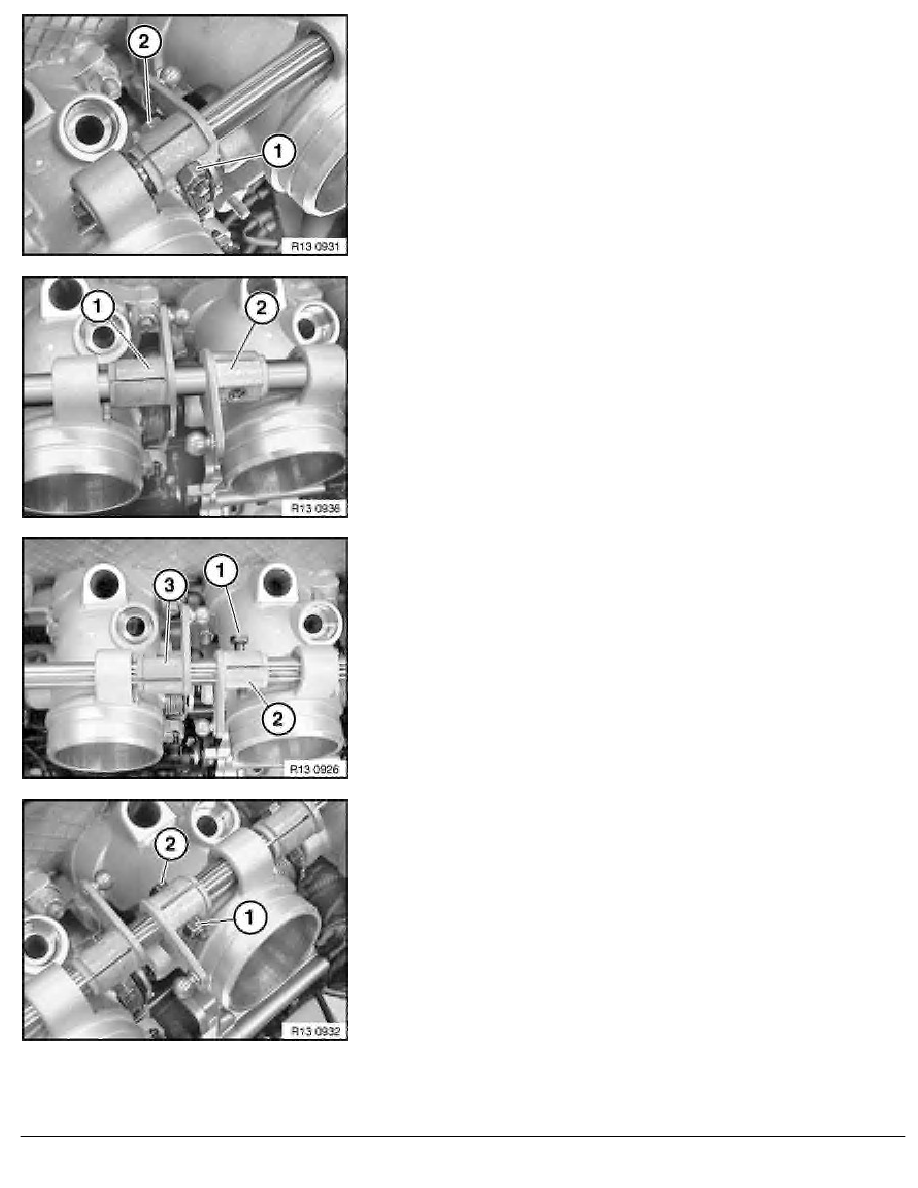
Tighten down screw connection of actuating lever with actuating
shaft. Observe the following instructions in so doing:
-
Use screws and nuts only once.
-
Only turn nut (1) and grip screw (2).
-
To screw down, use two open-end wrenches which are to be
placed at right angles to actuating shaft if at all possible. In
this way, no torque is exerted on actuating lever.
-
Retighten nut to tightening torque of 7 Nm.
Note:
Actuating lever (1) of throttle valve assembly and actuating
lever (2) of pull rod for throttle valve actuator are offset approx.
180
°
to each other.
Ball ends are turned to each other.
Insert fitting screw (1) as illustrated into actuating lever (2) of pull
rod.
Observe position of actuating lever (2) to actuating lever (3).
Tighten down screw connection of actuating lever on long pull rod.
Observe the following instructions in so doing:
-
Use screws and nuts only once.
-
Only turn nut (1) and grip screw (2).
-
To screw down, use two open-end wrenches which are to be
placed at right angles to actuating shaft if at all possible. In
this way, no torque is exerted on actuating lever.
-
Retighten nut to tightening torque of 7 Nm.
RA Removing and installing/sealing a throttle valve assembly (S54)
BMW AG - TIS
06.02.2013 21:42
Issue status (12/2007) Valid only until next DVD is issued
Copyright
Page - 6 -