
Z Series E85 M roadst (S54) ROADST
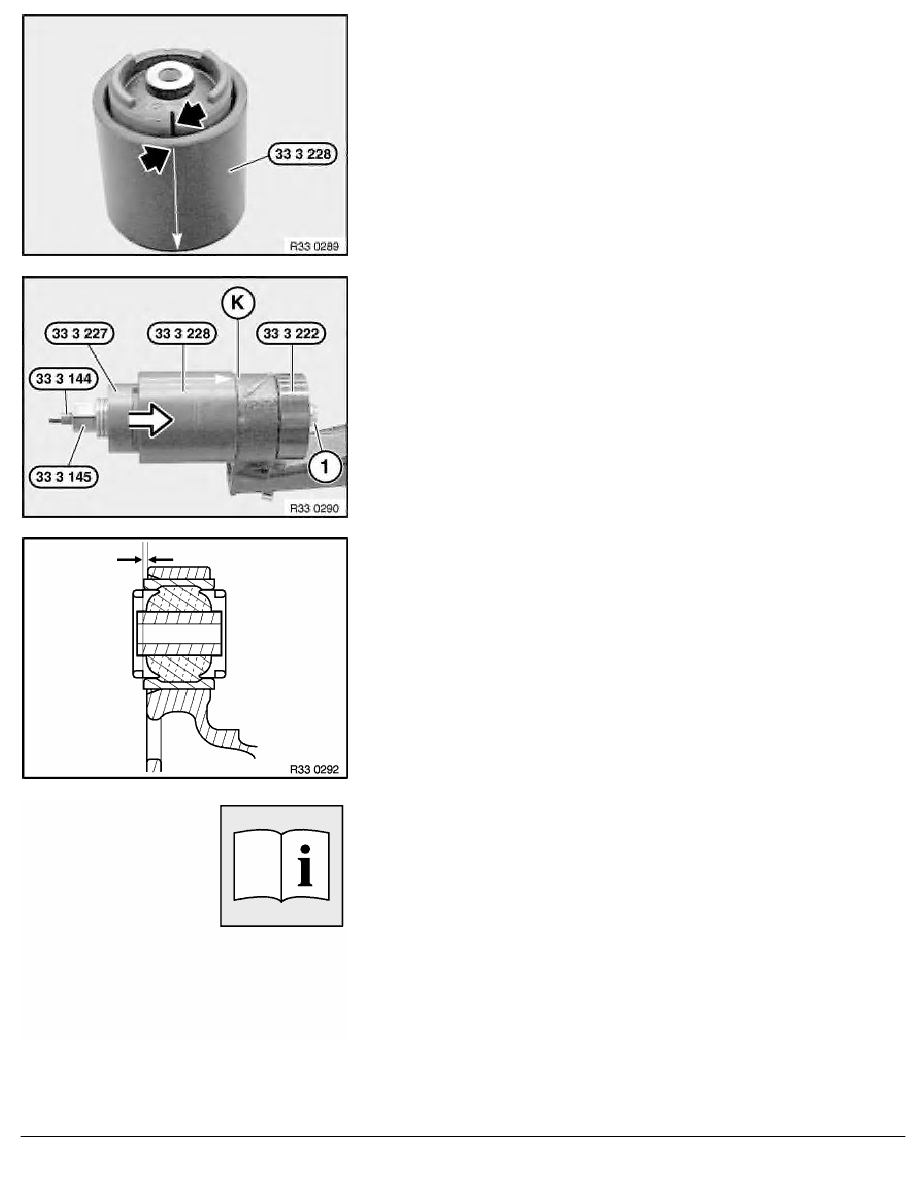
Keep rubber mount and trailing arm eye clean and free from oil
and grease.
Important!
Slot in rubber mount must match up with end of arrow on
special tool 33 3 228 !
Insert rubber mount in special tool 33 3 228 and align.
Important!
Arrow on special tool 33 3 228 must point to coloured
dot (K)!
Draw in rubber mount with special tools 33 3 144 , 33 3 145 ,
33 3 222 , 33 3 227 , 33 3 228 and nut (1) until special tool
33 3 228 becomes loose.
Draw in rubber mount to distance (A) = 2.5 mm.
After installation:
•
Check that output shaft is correctly seated in rear differential.
•
Perform chassis alignment check
RA Replacing a rubber mount in trailing arm, front
BMW AG - TIS
07.02.2013 00:06
Issue status (12/2007) Valid only until next DVD is issued
Copyright
Page - 2 -