
Z Series E85 Z4 2.5i (N52) ROADST
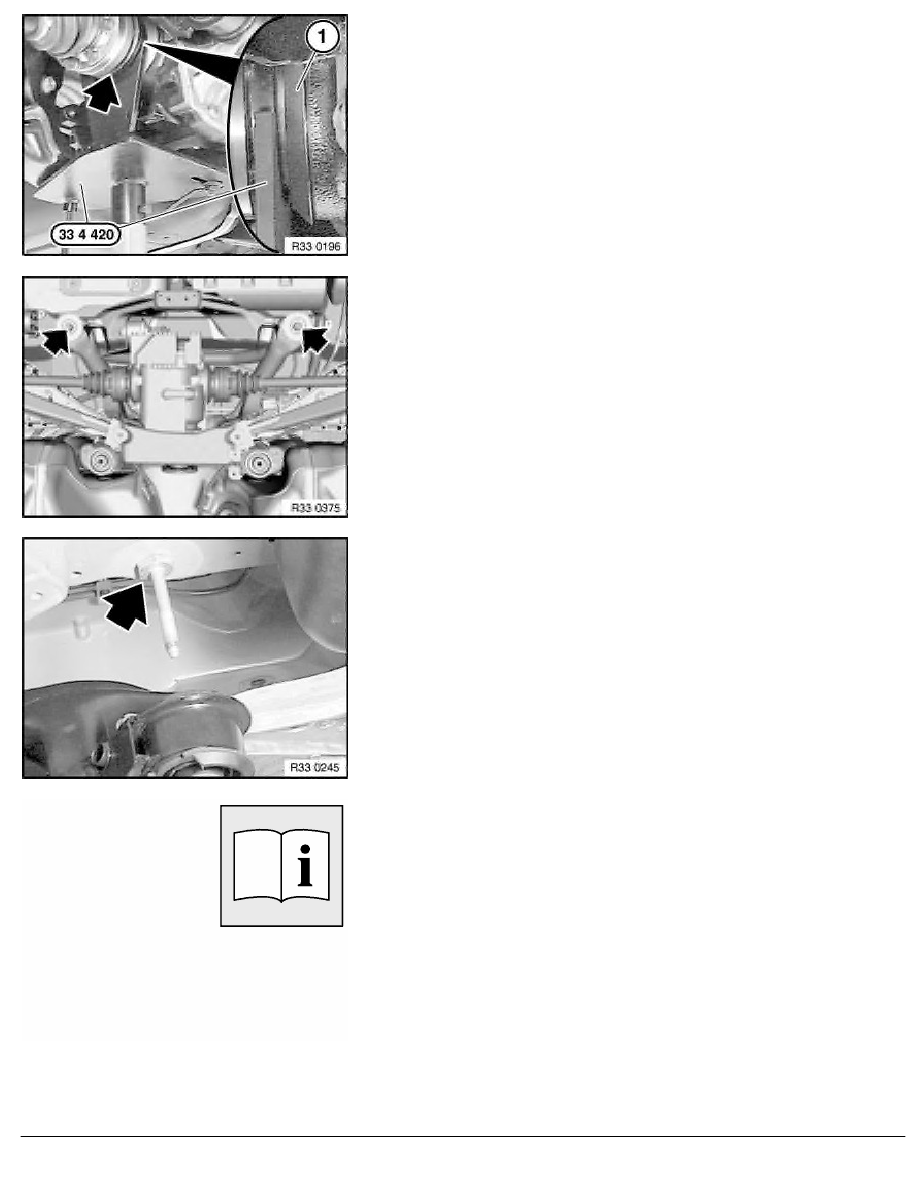
Support rear differential with workshop jack and special tool
33 4 420 .
Important!
Observe gap between special tool 33 4 420 and dust
plates (1).
To avoid grinding noises, make sure the dust plates (1) are
not damaged (e.g. bent).
Remove tension strut.
Release screws and remove stop plate.
Lower rear axle carrier and pass handbrake Bowden cables
through rear axle carrier.
Installation:
Check threads for damage; if necessary, repair with Helicoil thread
inserts.
Tightening torque 33 33 3AZ
.
Installation:
Check threaded pin for damage, replace if necessary.
Tightening torque 33 33 2AZ
.
After installation:
•
Adjust handbrake
•
Perform chassis alignment check
RA Removing and installing complete rear axle carrier
BMW AG - TIS
12.02.2013 07:02
Issue status (12/2007) Valid only until next DVD is issued
Copyright
Page - 3 -