
Z Series E85 Z4 3.0i (M54) ROADST
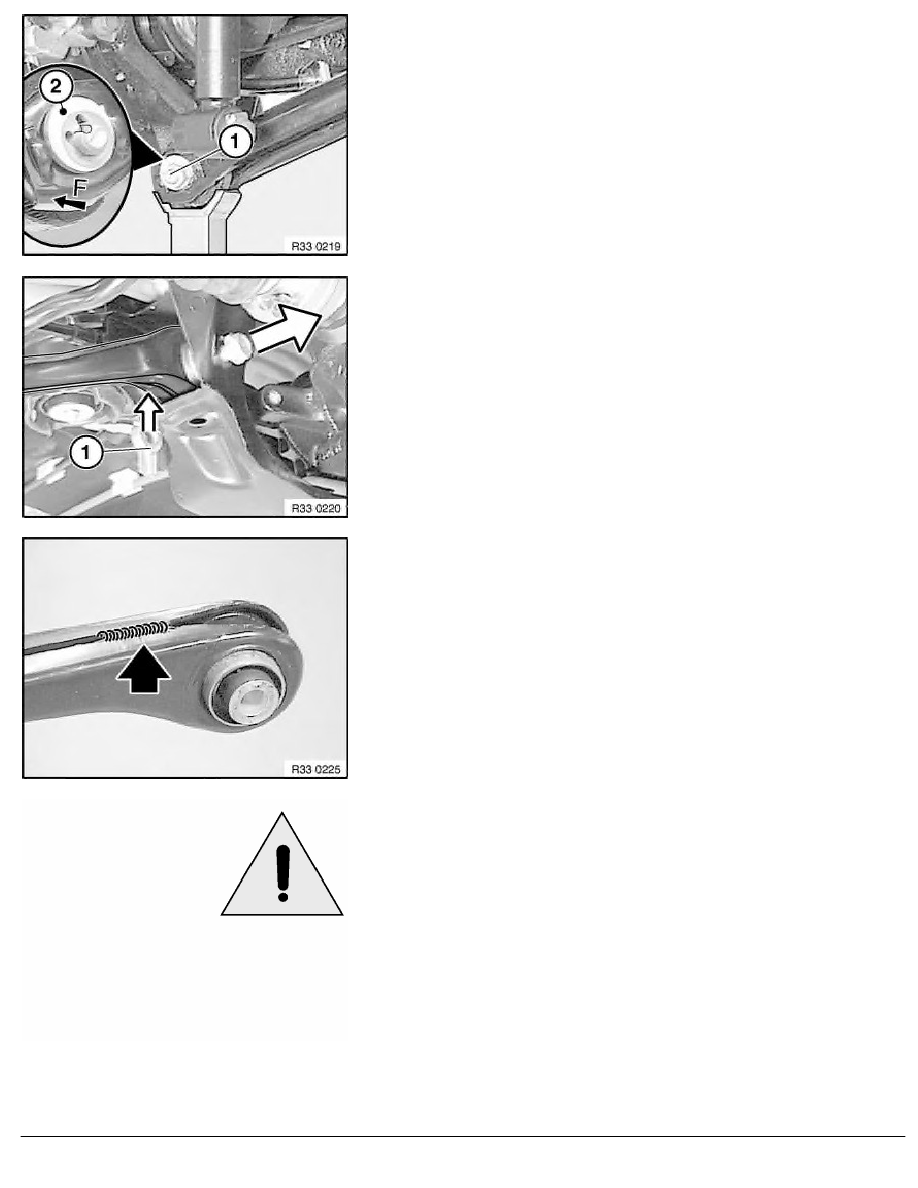
Release nut (1) and remove eccentric washer (2).
Remove eccentric screw towards front.
Installation:
Note insertion direction of eccentric screw.
Align eccentric screw by means of marking to lower control arm.
Fit eccentric washer (2).
Replace nut (1).
Tightening torque 33 32 25AZ
.
Release screw and remove thread plate (1) downwards.
Press rear differential to side and remove bolt.
Remove lower control arm at side.
Installation:
Insert thread plate (1) into opening in rear axle carrier.
Tighten bolt in normal position.
Tightening torque 33 32 15AZ
.
Installation:
Weld seam of control arm must point upwards.
After installation:
•
Lower workshop jack and remove.
•
Check that output shaft is correctly seated in rear differential.
•
Perform chassis alignment check
RA Removing and installing/replacing bottom left control arm
BMW AG - TIS
15.02.2013 16:19
Issue status (12/2007) Valid only until next DVD is issued
Copyright
Page - 3 -