
Z Series E85 Z4 3.0i (M54) ROADST
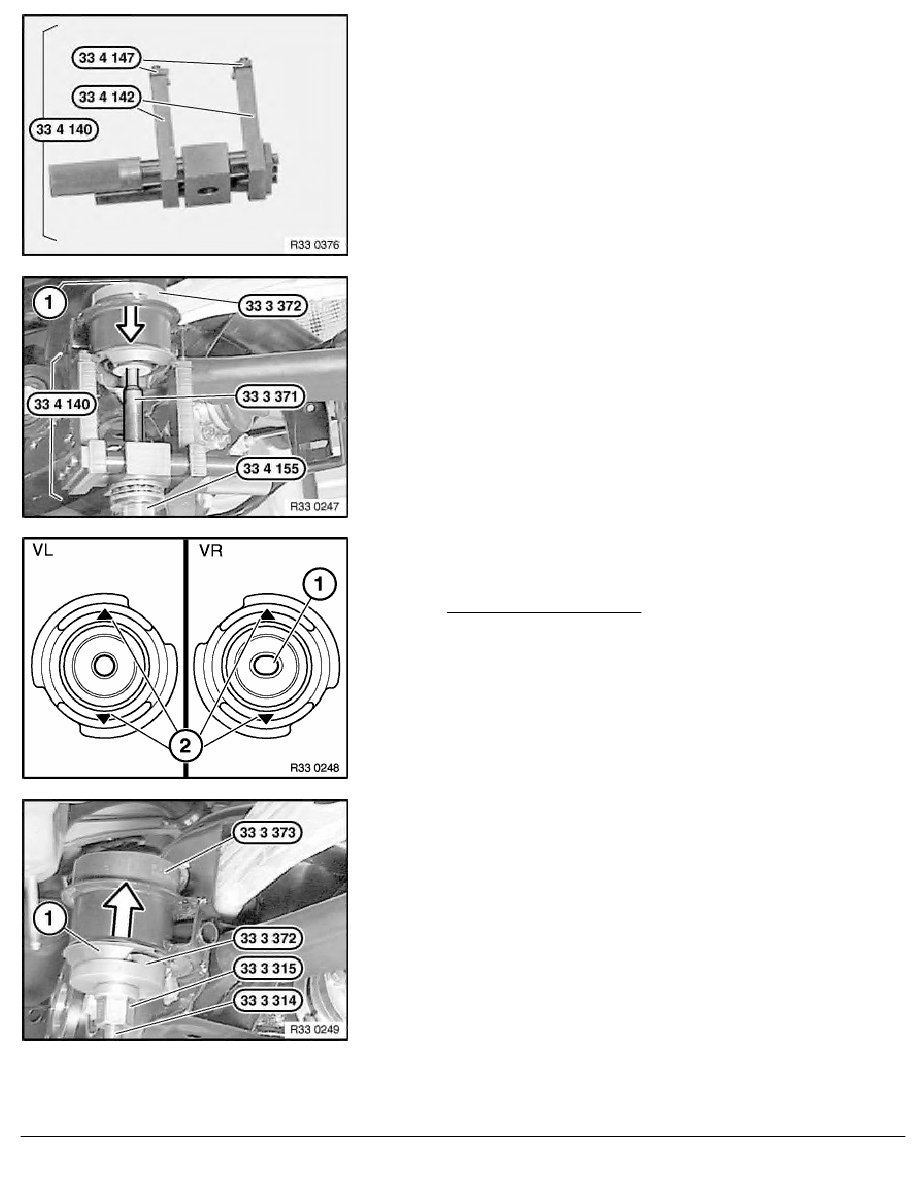
Assemble special tool 33 4 140 with 33 4 142 and
33 4 147 .
Position special tools 33 4 140 , 33 4 155 , 33 3 371 ,
33 3 372 and nut (1) on openings of rubber mount.
Note:
Ensure it is correctly supported on bushing of rear axle carrier.
Using a hot air blower, heat bearing bushing at max. 600
°
C outlet
temperature for approx. 2 minutes.
Pull out rubber mount by turning special tool 33 4 155 .
Coat rubber mount with Circo Light anti-friction agent.
Important!
Front rubber mounts differ:
Rubber mount VR = front right with elongated hole (1)
Rubber mount VL = front left
When rubber mount is fitted, arrows (2) must point down
longitudinal axis of vehicle.
Draw in rubber mount (1) with special tools
33 3 314 ,
33 3 315 , 33 3 372 and 33 3 373 as far as it will go.
RA Replacing two rubber mounts for rear axle carrier (rubber mounts, front)
BMW AG - TIS
15.02.2013 16:24
Issue status (12/2007) Valid only until next DVD is issued
Copyright
Page - 2 -