
Z Series E86 M coupe (S54) COUPE
Note:
Main bearing caps 1 to 5 are marked on exhaust side.
Main bearing caps 6 and 7 are not marked.
Main bearing cap 6 is guide bearing.
Remove screws securing main bearing caps.
Remove main bearing caps 1 to 7.
Lever out crankshaft.
Caution!
The increment gear cannot be released without the screws
being damaged or destroyed.
The Parts Service offers a crankshaft with fitted increment gear.
If in an exceptional case increment gear has to be removed:
Caution!
Protect crankshaft against damage.
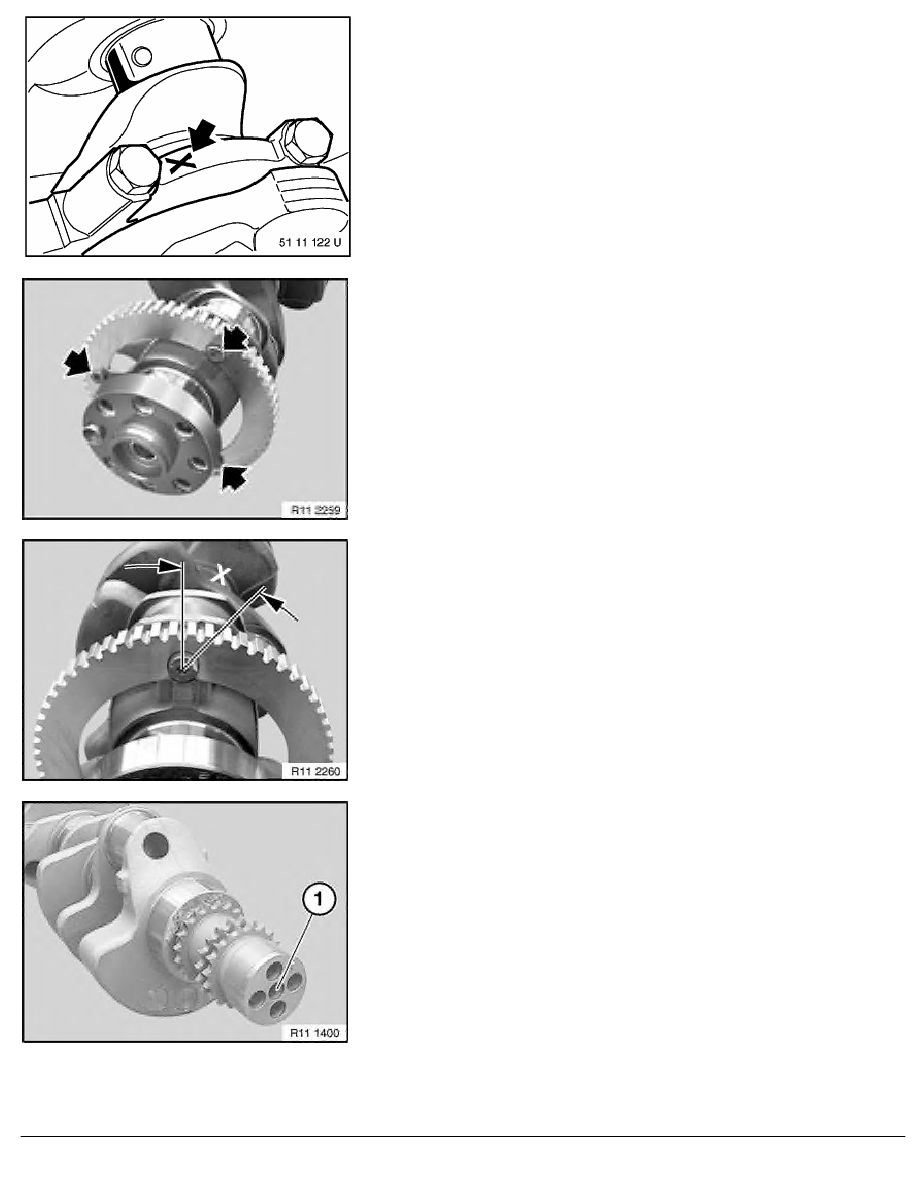
Release screws, drill out screw heads if necessary.
Installation:
Replace increment gear and screws.
Tighten down screws to 5 Nm.
Mark 45
°
angle on screw head and sensor gear.
Caution!
Screws can be tightened down to max. 45
°
.
Tighten down with 40
°
to 45
°
torsion angle.
If necessary, remove sprocket wheel:
Release screw in bore (1).
Detach sprocket wheel from crankshaft.
RA Replacing crankshaft (S54)
BMW AG - TIS
06.02.2013 21:12
Issue status (12/2007) Valid only until next DVD is issued
Copyright
Page - 2 -