Z Series E86 Z4 3.0Si (N52) COUPE

51 14 ...
Instructions for attaching number/letter
designation combination
Note:
The model designation is attached with adhesive and cannot
be re-used.
The model designation must be attached at room
temperature.
The model designation must be removed at stove-enameling
temperatures exceeding 80
°
C.
Note:
The following work steps are described using the "316 i" as the
example.
Removing:
Coat nylon string or strong yarn with tensides (e.g. washing-up
liquid).
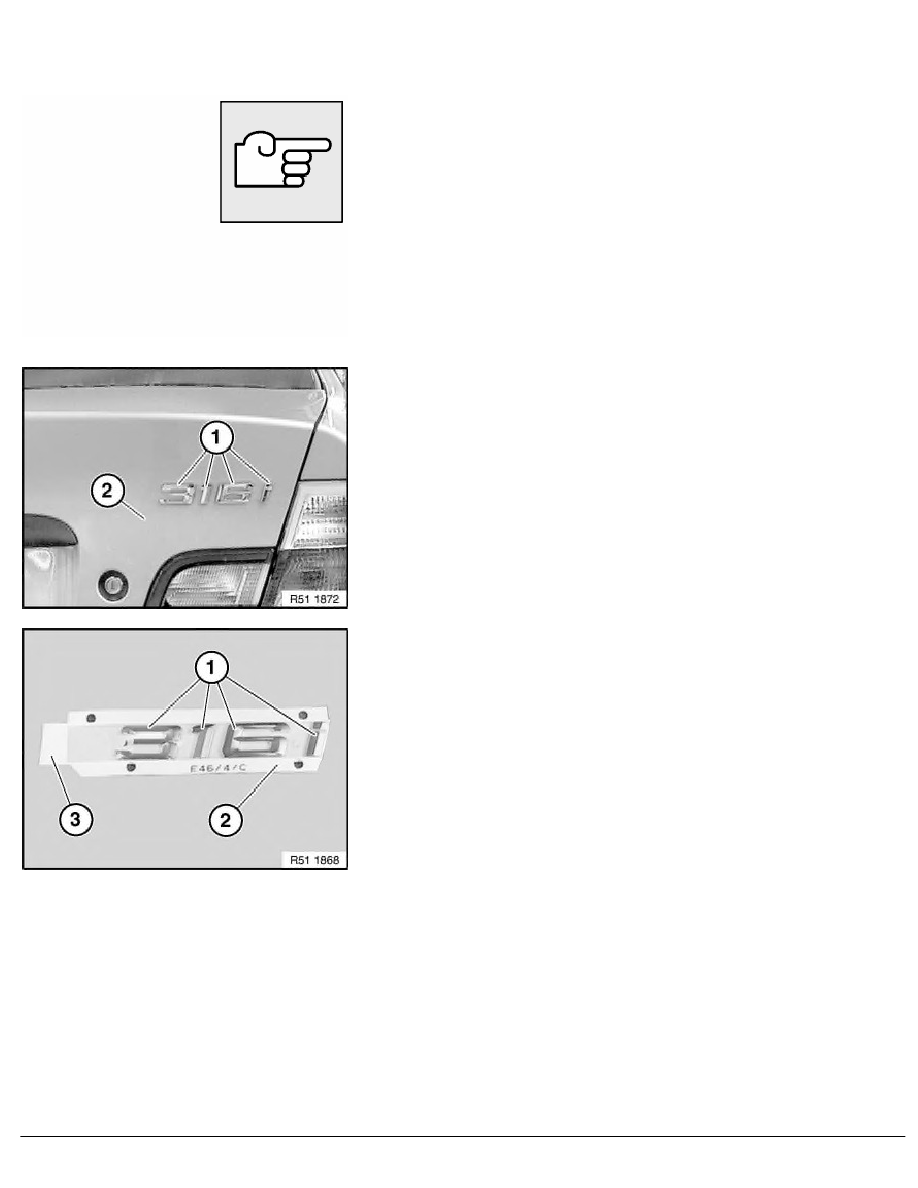
Cut through adhesive layer and remove model designation (1)
from rear lid (2).
Remove remainder of adhesive layer with adhesive remover
(sourcing reference: BMW Parts Service).
Assembly:
Number and letter combinations (1) of the model designation are
not connected to each other and are supplied on a carrier
film (2).
Important!
Adhesive areas must be dry and free of dust and grease.
Once it has been cleaned, do not touch the adhesive area
with bare hands.
Remove liner (3) (protective strip for adhesive surface).
Press on model designation firmly.
Remove carrier film (2).
RA Instructions for attaching number/letter designation combination
BMW AG - TIS
08.02.2013 13:39
Issue status (12/2007) Valid only until next DVD is issued
Copyright
Page - 1 -
