
Century V6-173 2.8L (1986)
Valve Body: Service and Repair
Hydra-Matic 440-T4 (4T60 & 4T60E)
1.
Disconnect battery ground cable and remove air cleaner assembly.
2.
Remove air cleaner housing and intake tube.
3.
Remove torque struts at engine mounts.
4.
Disconnect crossover pipe-to-left manifold clamp.
5.
Loosen crossover pipe-to-right manifold clamp.
6.
Remove two (2) bolts at top of transaxle mount bracket. Pry crossover pipe to allow removal of front bolt. DO NOT pry on crossover pipe
heat shield. If shield is bent, heat damage to other components may occur.
7.
Install engine support assembly J-28467 or equivalent.
8.
Rotate steering wheel until bolt securing intermediate shaft to steering gear is facing up, remove bolt, then disconnect intermediate shaft from
steering gear stub shaft.
9.
Remove upper case side cover retaining bolts.
10.
Raise and support vehicle, position jack and block of wood under engine to act as support during cradle removal, then remove left front wheel.
11.
Disconnect brake line support clip from underbody.
12.
Remove power steering line brackets, steering gear brackets and driveline vibration damper as needed.
13.
Remove pinch bolt from left steering knuckle and disconnect lower ball joint.
14.
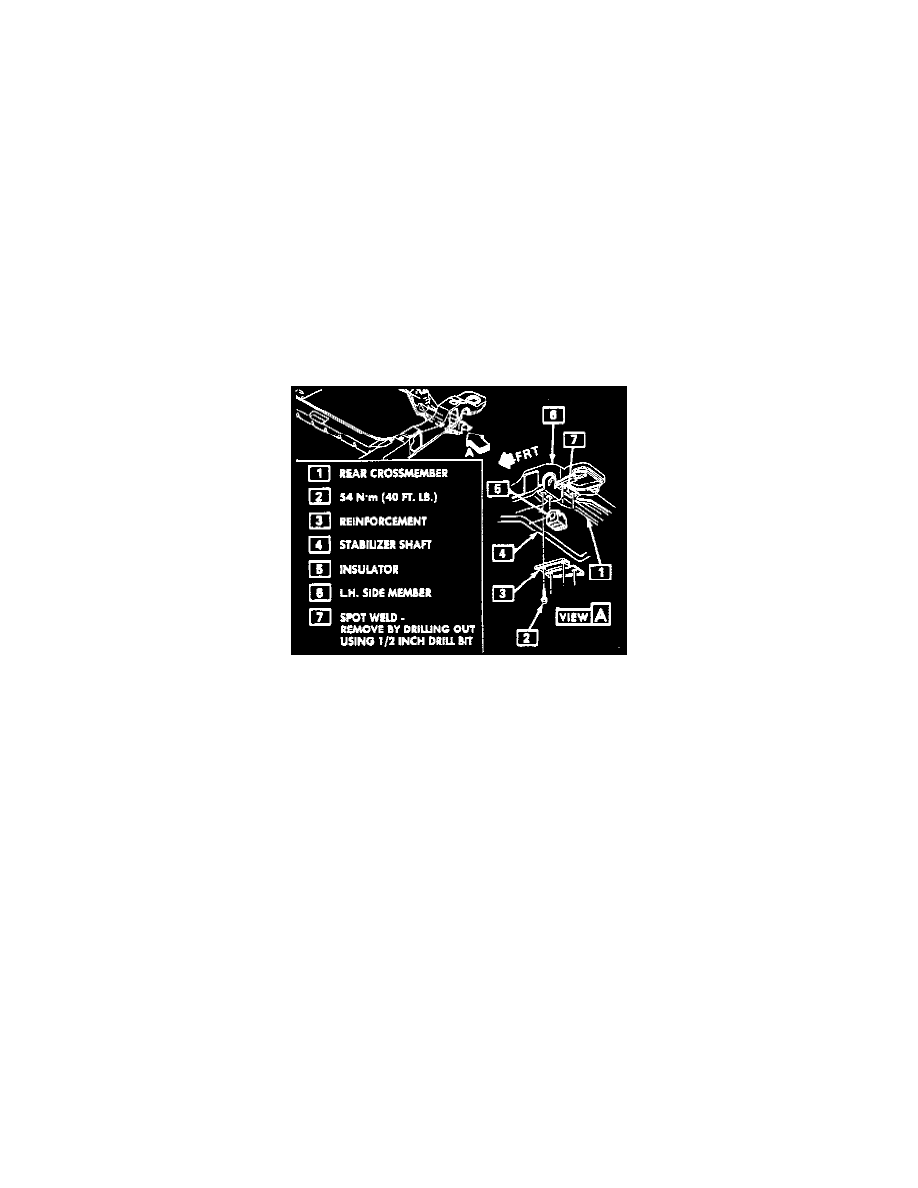
Disconnect stabilizer bar from left control arm, then remove both front stabilizer bar reinforcements and bushings from left and right side
members.
Fig. 3, Support cradle removal. Celebrity, Century, Cutlass Ciera & 6000
15.
On 1988 models, drill through spot weld located between rear holes of left front stabilizer bar rear holes of left front stabilizer bar mounting, Fig.
3, using 1/2 inch bit.
16.
On all models, disconnect engine and transaxle mounts from cradle.
17.
Remove side member to crossmember bolts.
18.
Remove bolts securing left side body mounts.
19.
Remove left side member and front crossmember assembly. It may be necessary to pull or gently pry crossmember loose.
20.
Disconnect and remove AIR pipe, if equipped.
21.
Remove jack and lower vehicle, then lower transaxle by adjusting engine support fixture.
22.
Remove remaining bolts securing transaxle side cover pan.
23.
Disconnect drive axle and remove nuts surrounding flange at channel plate. Do not pry against case side cover to remove axle. Insert pry bar
behind axle and use suitable block of wood as fulcrum when removing axle.
24.
Remove case side cover pan and gaskets.