Century V6-173 2.8L VIN W FI (1987)

Brake Bleeding: Service and Repair
Pressure
CAUTION:Pressure bleeding equipment must be the diaphragm type and must have a rubber diaphragm between the air supply and the brake fluid to
prevent air, moisture, oil and other contaminants from entering the hydraulic system.
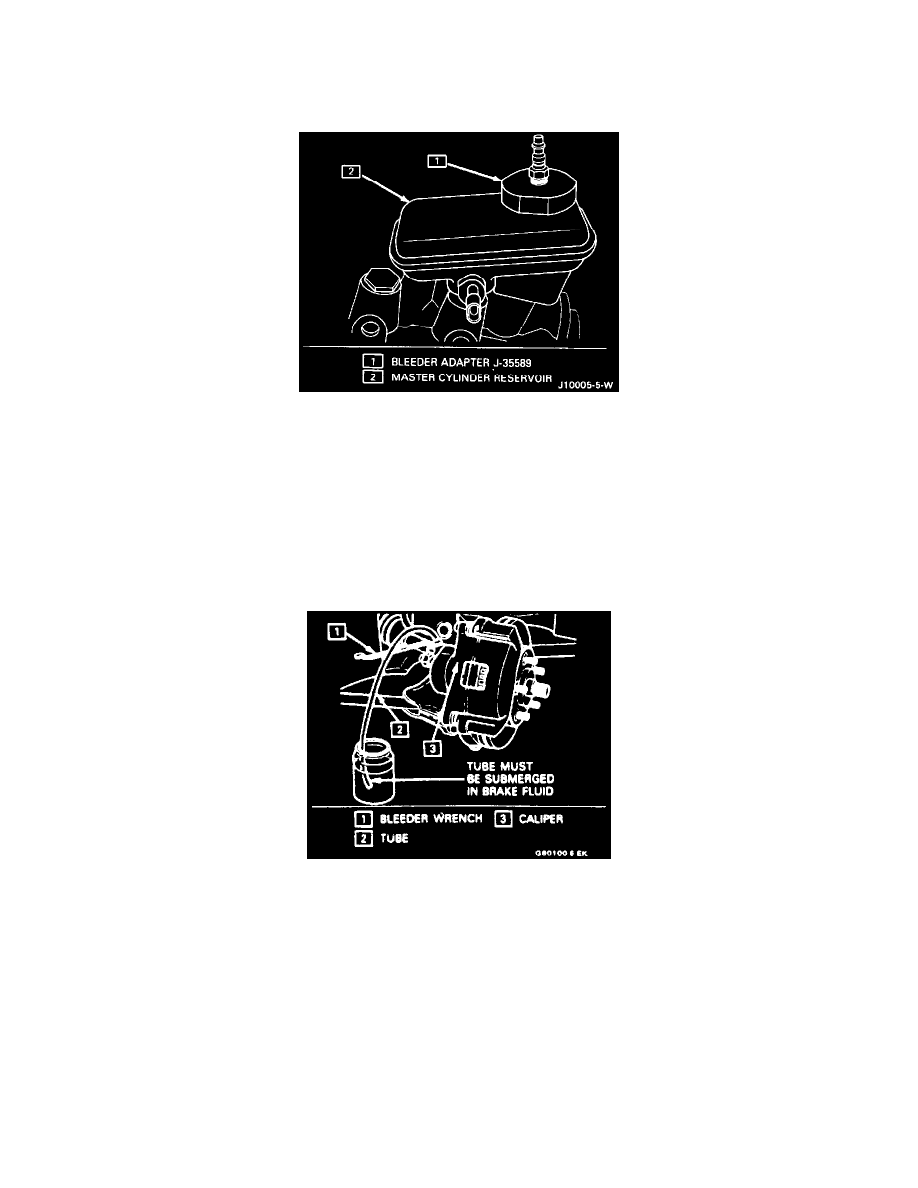
Installing Bleeder Adapter To Master Cylinder
1. Install brake bleeder adapter J-35589 to the master cylinder.
2. Charge diaphragm type brake bleeder J-29532 to 140-172 kPa (20-25 PSI).
3. Connect line to J-35589 and open line valve.
4. Raise car.
5. Bleed the brakes in the following sequence:
a. right rear
b. left front
c. left rear
d. right front
Purging Air From Hydraulic System
6. Attach a clear tube over bleeder valve and allow tube to hang submerged in a clear container partially filled with brake fluid.
7. Place a proper size box end wrench over the bleeder valve. Allow fluid to flow until no air is seen in the fluid.
8. Close the bleeder valve.
CAUTION:Be sure the bleeder valve seals.
9. Repeat steps 6 through 8 until all calipers have been bled.
10. Lower car.
11. Check the brake pedal for "sponginess." Repeat entire bleeding procedure to correct this condition. Check "BRAKE" warning lamp for indication
of low fluid level.
12. Remove brake bleeding equipment from master cylinder.
