
Century V6-181 3.0L (1983)
3.
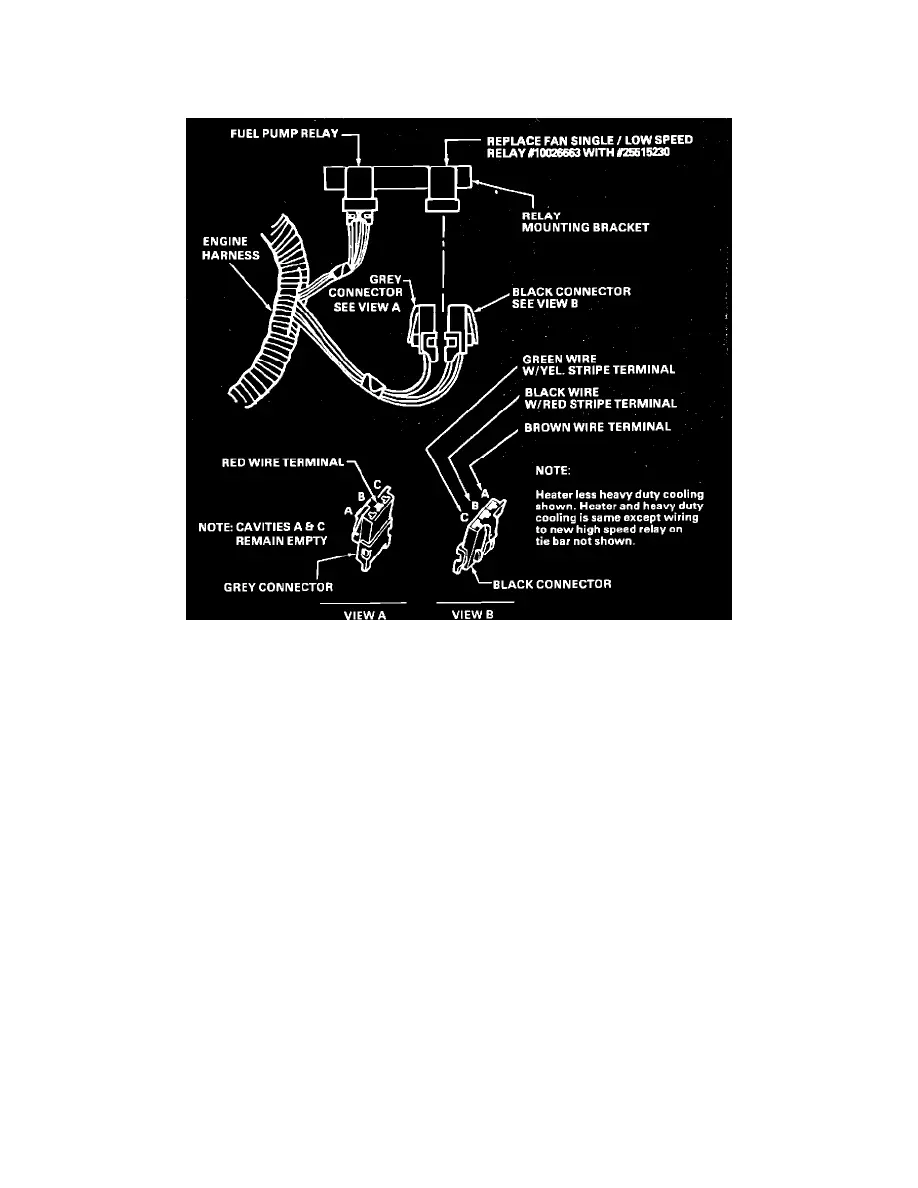
Lift up tang on bracket and remove fan single/low-speed relay. Disconnect wiring connector from relay. Unlock connector and remove the four
wire terminals and discard connector. Refer to Figures 4 and 5. (Figures 4 and 5 show procedure for high-speed fan relay. Procedure is the same
for single/low-speed relay except for location of relay on bracket.)
FIGURE 7 - INSTALLATION OF COOLANT FAN SINGLE/LOW SPEED RELAY AND WIRING
4.
Insert the four wire terminals removed in Step 3 into the two connectors furnished in kit as shown in Figure 7. Plug these connectors onto new
relay No. 25515230. Install relay on mounting bracket.
5.
Check cooling fan single/low-speed relay operation by grounding the relay dark green with yellow striped wire.
Any change from the following procedure could result in damage to the new relay.
a.
Insert a jumper wire probe in single/low-speed relay connector cavity so that probe contacts the terminal of the dark green with yellow
striped wire. Refer to Figure 7.
b.
Attach the other end of jumper wire to a suitable ground.
c.
Connect battery positive cable.
d.
Recheck to be sure you have a good connection between ground and relay dark green wire with yellow stripe.
e.
Turn ignition switch to "ON". Fan should run at single/low-speed. If fan does not operate, cause should be determined and corrected.
f.
Allow fan to operate for a minimum of ten (10) seconds. Turn ignition switch off and remove jumper wire.
6.
Assemble relay mounting bracket to wheelhouse.
7.
Install campaign identification label as instructed in Part III.