
Century V6-204 3.3L VIN N FI (1990)
Adjusting Brakes
1. Raise vehicle and support on jack stands.
2. Mark relationship of wheel to axle flange, then remove wheel and tire assembly.
3. Mark relationship of brake drum to axle flange.
4. Remove brake drum. If difficulty is encountered in removing the brake drum, the following steps may be of assistance.
^
Make sure parking brake is released.
^
Back off parking brake cable adjustment.
^
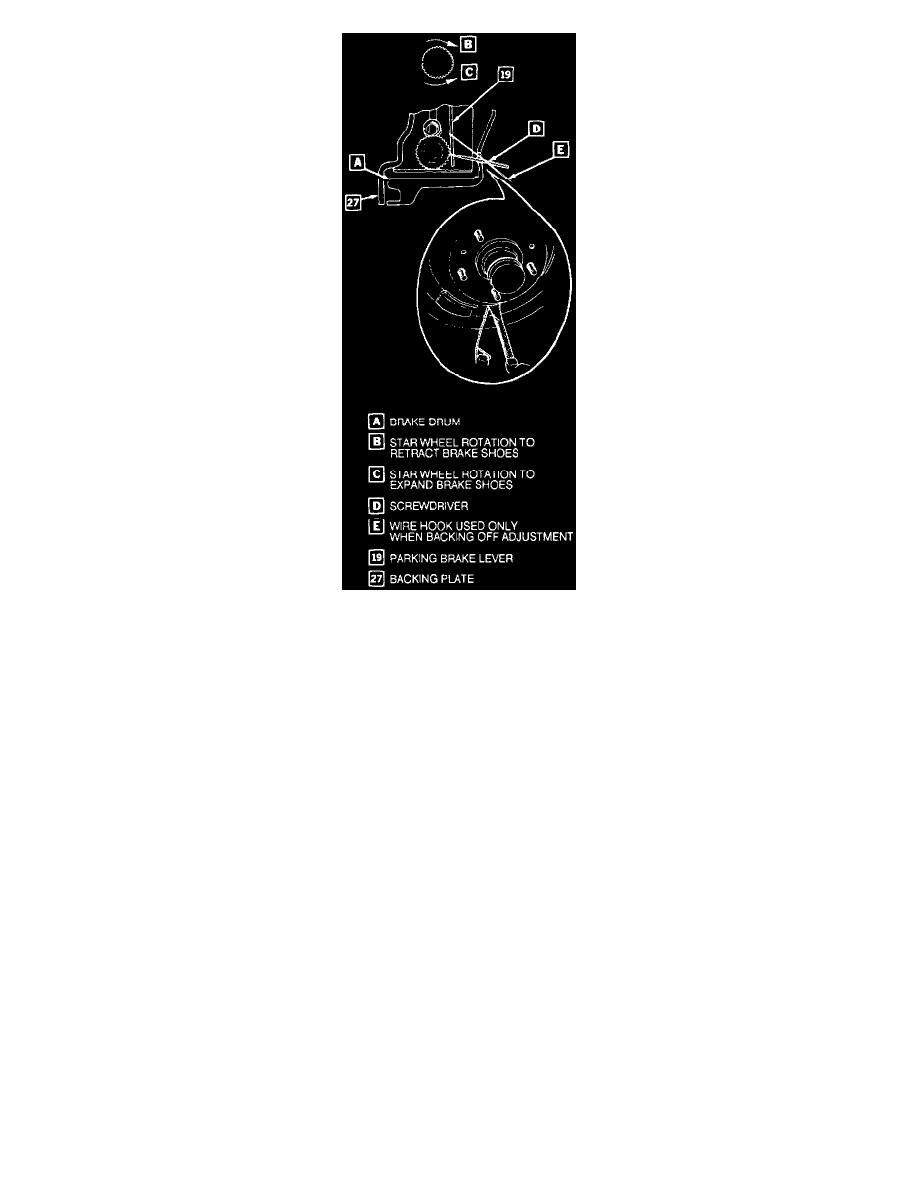
Remove adjusting hole knockout plate from brake drum and back off adjusting screw using screwdriver and adjusting tool. Use a small amount
of penetrating oil applied around the drum pilot hole.
NOTE: The knockout plate must be drilled out using a 11 mm (7/16 inch) drill. After adjustment, install rubber adjusting hole cover GM P/N
5464803 or equivalent into adjusting hole to prevent dirt or contamination from entering drum brake assembly.
^
Use a rubber mallet to tap gently on outer rim of the drum and/or around inner drum diameter by spindle. Take care not to deform the drum by
use of excessive force.
5. Remove return springs (1 and 2) using J 8049, J 29840 or equivalent pliers. For additional information on brake spring removal and installation
see Fundamentals and Basics. See: Fundamentals and Basics
6. Remove hold-down springs (3) and pins (5) using suitable pliers.
7. Remove actuator link (6) while lifting up on actuator lever (7).
8. Remove actuator lever (7), lever return spring (8) and bearing sleeve (4).
9. Remove parking brake strut (9) and strut spring (10).
10. Remove shoe and lining assemblies (11 and 12) after disconnecting parking brake cable.
11. Remove adjusting screw assembly (16) and adjusting screw spring (13).
12. Remove retaining ring (17), pin (18) and parking brake lever (19) from secondary shoe (12).