
Century V6-204 3.3L VIN N FI (1990)
10.
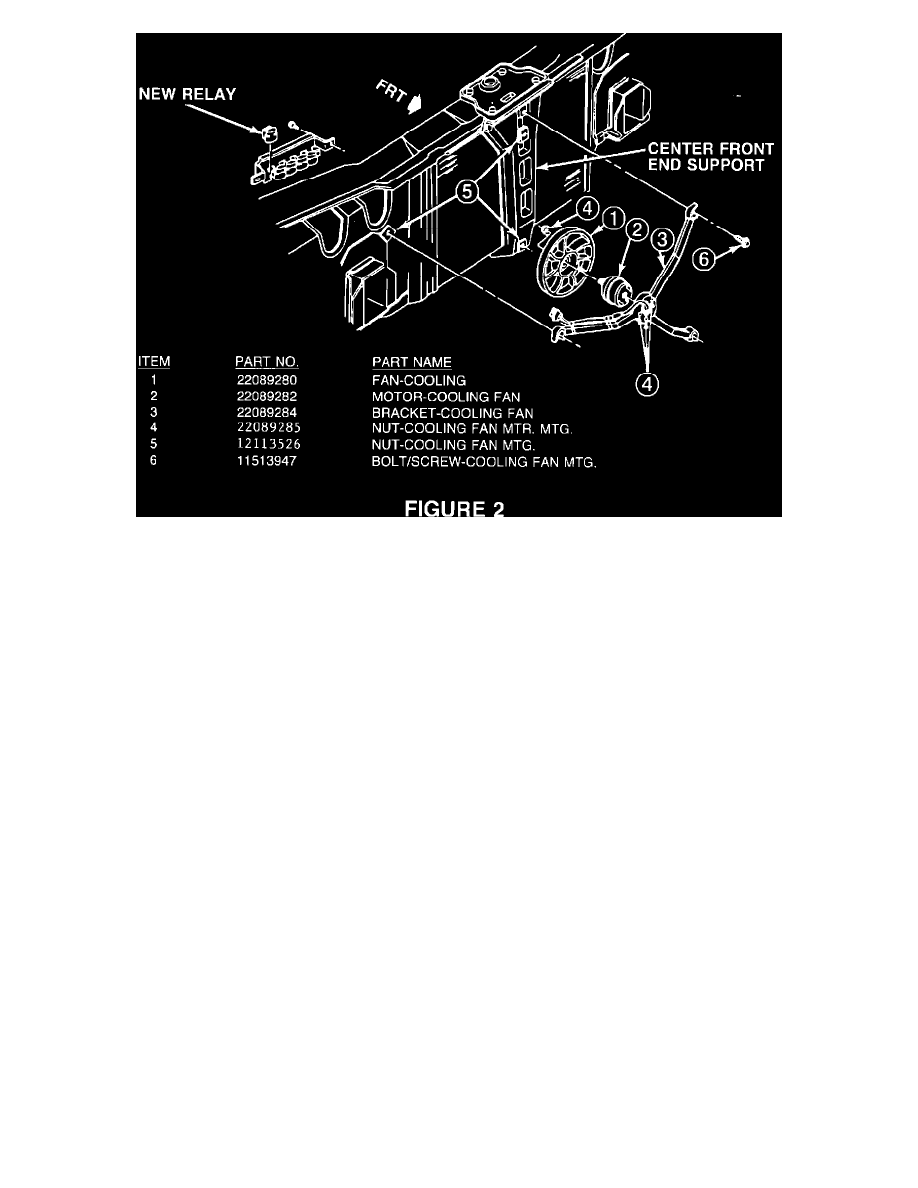
Assemble the cooling fan to the motor and fan and motor assembly to the bracket, as shown in Figure 2.
11.
Install the cooling fan assembly, as shown in Figure 2.
12.
Route the motor harness along the RH outboard leg of the bracket and secure in place with two adjustable plastic retainers. Cut off excess ends of
retainer.
13.
Attach the jumper wiring harness to the fan motor harness and route jumper harness through the front end panel.
14.
Install the remaining plastic push-in retainer to the RH side air baffle and condenser.
15.
Install the new relay in the relay mounting bracket on the RH side of front end panel.
16.
Splice the red # 2F wire from cavity A of the new relay connector to the red # 2A wire in cavity A of the existing cooling fan relay connector.
Cover the splice with the heat shrink tubing that is taped to the wire.
17.
Splice the dark green # 533 wire from cavity D of the new relay connector to the black with pink stripe # 533 wire of cavity E of the existing
cooling fan relay connector and cover the splice with heat shrink tubing.
Important:
Use the approved splicing materials and instructions as shown in the appropriate Service Manual.
18.
To ground the new relay and fan motor, install the black wire ring terminal of the wiring harness to the relay mounting bracket by replacing one of
the mounting screws with screw, P/N 11509135.
19.
Install the grille.
20.
Replace the existing ECM Memory Calibrator (MEM-CAL) with the new appropriate Calibrator, using the procedures specified in the Service
Manual.
21.
Connect the negative battery cable.
22.
Check for proper operation of the new pusher type cooling fan.